• Mossberg Owners is in the process of upgrading the software. Please bear with us while we transition to the new look and new upgraded software.

My SA-20 Changes and Fixes

Darth

.22LR
Hello all, I'm new here.

I was in the market for a semi-auto 20ga shotgun and, as I was searching, ran across very few reviews of the SA-20 ... well good ones that had any meat to them. I did find one that was very good. The fellow actually went into good detail. So I thought I would join here and give my 2 cents worth.

I bought mine about 2 weeks ago (2nd generation model) and figured I would have to do a TON of work on it as far a clean up and such. As I began to "figure out" how this thing worked, I began to realize that this thing is finished pretty nice. I recently bought a barrel for my 20ga 500CR and I was disappointed with it ... as far as the finish. There were "sharp edges" all over this thing. Not so with the SA-20 ... I was amazed at the things I didn't have to clean up. Most of the edges were smooth.

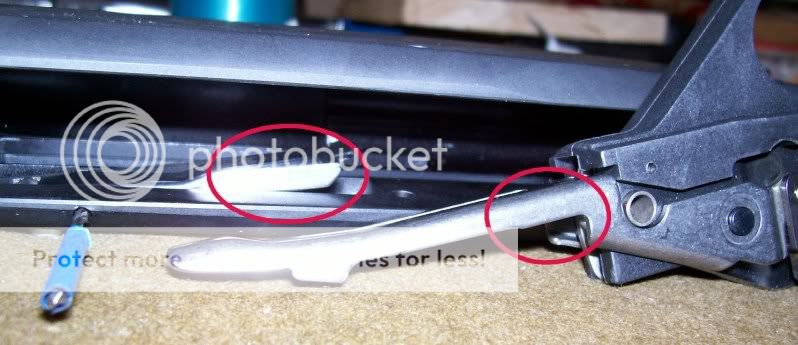
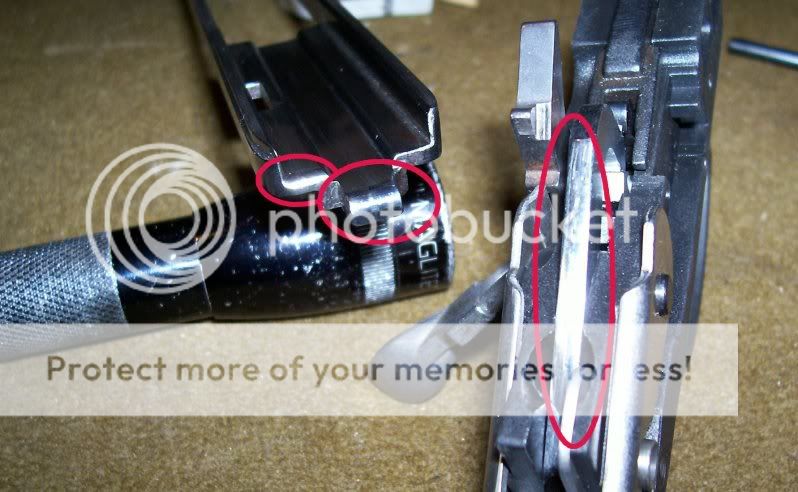
Some of the first things I did was "figure out" how to dis-assemble it, how it actually functioned and what I might do to make it better.

One of the first things I did was try to remove the magazine tube. It appears in the parts diagram that the tube is threaded into the receiver. I tried heating it and got about a 1/3 turn on it (with a strap wrench) but I saw no "gap" in the receiver area that would indicate it was "coming out" ... so I quit. Perhaps this thing is pressed in ?? I didn't want to damage it because I'm not sure about parts availability.

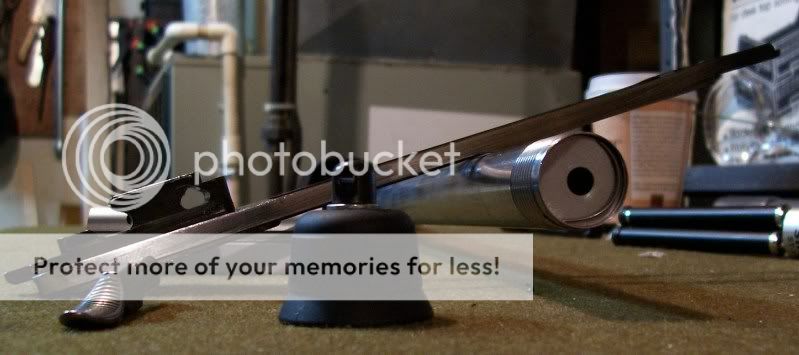
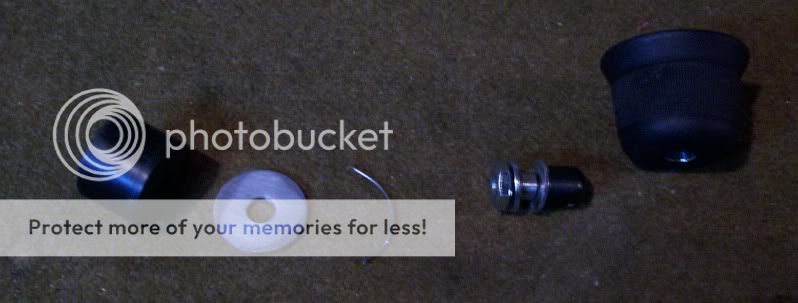
Anyway I pursued another way to access the magazine tube, because I wanted to clean and polish it. What I did was carefully file the ridge off of the other (cap) end and pull the "guts" out. Now my challenge was to find a way to retain the "guts" ... which I did.

I also added a "500 style" swivel attachment to the tube cap and one in the stock.

Overall I'm very impressed with the "fit and finish" on this piece. I haven't shot it yet, but I will soon.

Darth
 
My Magazine tube “Fix”
This is how I built a retention system after I filed off the original ridge.

If you look close, you can see the retaining wire on top of the steel washer in the magazine tube. The wire is .029 music wire with a small "hook" on each end. I drilled .035 diameter holes into the tube (opposite sides) and the wire "legs" go into the holes. I added the washer, which is about .005 smaller than the bore, so that the plastic cup wouldn't distort. When you screw the cap on, it pushes the whole arrangement about 3/32" deeper into the magazine due to the nut on my sling swivel. So ... I probably ended up with the plastic cup about 1/4" deeper than stock. I can still get five 2 3/4" shells into the mag with no problems and ... room to spare.

Just so ya know, the wire retainer DOES NOT hold the spring pressure when the cap is installed. Because of my sling swivel nut on the cap pushing in on the steel washer ... the cap takes the "load" of the spring when shells are inserted. The retaining wire only allows the cap to be removed and prevents the "guts" from coming out.

Darth

Magazine1.jpg


Magazine2.jpg
 
Slide release modification

I have read that the slide release buttons on these things were hard to push, my slide release button was no exception. After examining "how this thing works", I discovered that the piece in the red circle on the left simply "stops" the elevator from raising, thus locking the bolt open by stopping the "cycle". When you push the "slide release button" it moves the piece back into the cavity in the stock, and allows the elevation cycle to complete ... closing the bolt.

What I did to smooth it out was carefully "draw file" the "hump" on the elevator (right circle) until it was smooth and then sanded with 600 and then 1500 and then a light polish.

I also removed the entire button mechanism and polished the area in the left red circle. I also installed a lighter spring as well. The spring I installed was 6 coils (instead of the stock 5) and used a spring of .022 diameter wire instead of the stock .024 wire.

The drill bit is there just to hold the stuff in place while I test things. When I'm finished, I'll re-insert the tension pin.

A little bit of moly paste ... and the thing works real smooth.

I haven't test fired this yet with the lighter spring, but I see no reason why it wouldn't work ... and even if you don't replace the spring, the "cleanup job" and some moly will make it notably smoother.

Darth

Slide_Release2.jpg
 
Darth, it sounds like Mossberg could use you at the factory. Keep up the good work and let us know how it shoots.
 
cbshooter said:
Darth, it sounds like Mossberg could use you at the factory. Keep up the good work and let us know how it shoots.
Thanks ... but I would just drive them nuts I think ... and the guns would cost 3 times as much. :D

I think it's silly about the magazine tube, one other guy I was talking to tried to get his out, and he couldn't either ... and he's a retired gunsmith !! He ended up doing a different version of what I did.

Darth
 
Welcome to the Dark Side...I mean the Mossberg Owners Forum Darth !!

...and NO, I'm not your father !! ;)
 
Another thing you can do is polish the areas in the red circles.

On the far left is the ramp that sets the "elevator" as the action bar travels backwards, I polished the area (ramp) behind it as well.

In the middle is the ramp that cocks the hammer, this is an important one because after the gun is fired, this is the first (and hardest) thing for the action to move ... again, I polished the area (ramp) behind it as well.

The right circle is the hammer itself. The ramp in the middle circle pushes on this to re-cock the hammer. Mine was very ragged and irregular. I removed my hammer from the trigger group to do the work. I carefully stoned it (maintaining the original radius) and then sanded and then polished it.

I have some more "sanding and polishing" to do ... but this thing cycles WAY smoother than it did originally ... and with less effort. It just "feels" way better ...

Darth

Polish1.jpg
 
Well, last night I installed a lighter spring under the "slide release button" as well. The whole thing is much easier to operate now ... and it's easier to remove "unfired shells".

So, just to re-cap the whole thing ... I have replaced BOTH springs in the slide release mechanism.

I also noticed that the gun was putting "good sized" scratches on my shells as I would cycle them through the action, I found a sharp edge on the elevator and also one in the receiver. I smoothed out these areas and the "scratched shells" ceased.

Now I just have to make time to shoot this dang thing ...

Darth
 
Well done Darth...very informative with great pictures...

+1 reputation point for a fine post...thanks for sharing !!
 
Well I finally shot this thing. After all the polishing I did on this thing, I was confident that it would cycle 7/8 oz low brass shells … well it didn’t, and I was so confident that I didn’t take any 1 oz loads with me … silly me. It almost cycled two of them.

So I am wondering if they used different “action springs” or “hammer springs” in these things along the way. Why would some people have no issues cycling 7/8 oz loads and others would.

If anyone is interested in this “mystery” … my action spring dimensions are as follows:

Free length = 10 ½” long
Number of coils = 21
Wire diameter = .062”

One fellow reported that his only has 19 coils instead of 21 … interesting.

I ordered a different action spring from another “Turkish” made semi-auto to compare to. If it’s the same dimensions, except for the wire diameter, I’ll give it a try. I’m hoping that it will be about .002 smaller in wire diameter.

Some semi-auto’s (from what I read) come with two springs, one for light loads and one for magnum/standard loads.

Darth
 
I received the new spring today and it fits over the magazine tube as expected. It is shorter by 1.75". I measured the "cocking effort" and the results are as follows:

Effort with original spring = 17 lbs
Effort with new spring = 15.5 lbs

That is a total of 1.5 lbs reduction, that might be enough to let this thing cycle any 7/8 oz loads.

The wire diameter is the same at .062" and has only 18 coils instead of the original 21 coils.

I also fabricated a spacer to make the spring and even 9" long and installed it on the receiver end of the magazine tube.

Now I just have to shoot it and check everything out after shooting.

Darth
 
Well, I shot this thing today and it “kinda” cycled the 7/8 oz loads. Half of them worked OK and the other half “stove piped”. I still think I need to reduce the cocking effort a wee bit more … somehow.

I did take 1 oz loads with me this time … they work just fine. I shot the 1 oz loads with the new spring and the recoil was only slightly more.

I only shot about 20 rounds in total. about 14-15 of the 7/8 and 5-6 of the 1 oz.

Darth
 
Great post Sir. I'm a second owner of this fine firearm. Functions fine but of course the button pressure is high to feed in new shells. Took it apart and checked it over no burrs etc, polished as per your advise. I would like to know where you got your springs and do you have a part number or measurement of diameter and length. It would save some hunting time. Thanks
 
60cj6, sorry ... I don't have any measurements on the springs I used in the "buttons" area. I got them from my "spring box". All I did was pick a spring that was slightly less (about .002") in wire diameter, same length and equal or greater number of coils. I'm sure you could find some at the hardware store ... I get a lot of my springs there ... and I've been collecting for years.

Hope that helps ...

If you really "get stuck" ... let me know and I would be willing to take mine apart to measure them for ya ;)

Darth
 
Thanks. Don't worry about it. I'll find some over time still winter up here. Thanks for the quick reply by the way. I've been busy with my Lee Enfields. Jim, out.
 
Hey Ya'll,
On one of the other forums there is a fix that i think will help for the cycling. Use a brush with some 0000 steel wool on a brush with some oil in it. Spin it in a drill from the forcing cone back to the end of the barrel that goes into the receiver. Worked for me and I shoot all the cheap low brass shells now. Hope that helps. Tony
 
Back
Top