• Mossberg Owners is in the process of upgrading the software. Please bear with us while we transition to the new look and new upgraded software.

Good morning

Good morning Mossberg Owners.

I got halfway through my welding and ran out of argon, on a Sunday, and when I called Monday morning they said, “no more argon until Wednesday”!

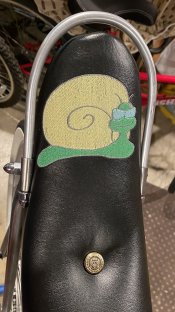
That won’t be fast enough so I’m just going to use the seat from another bicycle and put some new upholstery on it.

It’s been raining on and off now for weeks and the boat yard is a mess. I am just puttering around in the garage, hoping that the roof doesn’t leak.

We haven’t had any flooding in our neighborhood because we’re a hundred feet above the river and 300 feet above swamp level out in the valley. All the reservoirs are filling up and most are at 1/3 capacity or better with some over 2/3.

I hope you guys stay high and dry.
 
Good morning Mossberg Owners.

So far we’ve had over 4 times our local average January rainfall. Up north, along the coast and around Shasta they’ve had quite a bit more. 6X the paper says…!

Since I live on the SJ Valley’s margin, above the floodplain (and over 100 feet above the river) it never floods here. But I say that not haven’t looked at our local ponding basins in a couple days. I might go to do that this morning. It dried up to the point where I could actually take a bicycle out (if I didn’t like it very much.)

Those basins were all very empty at the end of fall. On the west side of town, 20 miles from here there will be some localized flooding. They’re a hundred feet lower in elevation, But the problem is their drainage system is much older.

The rain has stopped here, for a day or so, and it was actually gentle yesterday and last night. Some places in California are washing away into the ocean or washing away down the hillside.

I cleaned gutters and rearranged my tarps on the boat and the old cars. I have had no problems here, except a bunch of redwood needles all over my truck.

The bicycle build off contest ends Saturday at noon so I haven’t spent much time on the Internet lately.
8D2E1C03-1702-4E8D-921D-8A447E916ACB.jpeg

01A99275-6455-43AC-A492-04F7D48B2213.jpeg
 
A very good morning Mossberg Owners.

I woke up about three hours too early and now I can’t sleep. The rain here has let up to a drizzle now and then.

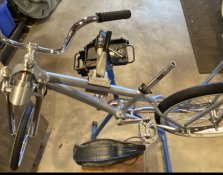
I finally got some Argon and finished welding on my bicycle seat. That’s only about 20 gauge steel.

1/2 a mm. ;) The holes are about 3 x 9 mm or 1/8x3/8 slots.

The use of a clamp (that I modified) and a 3/8” thick aluminum back up bar made this work a lot neater and easier. It’s a lot harder to make the steel just hang there in space, by surface tension, when it is liquid.

BUT, When using an acetylene torch you can just pull the torch back at the right instant To keep the gas flow from blowing thru your puddle. When using the TIG torch you are not supposed to pull the torch back, because you loose chilling post- flow Argon. (Argon cools the weld and the torch.)

AND You lose the argon coverage before the arc stops which means you get oxidation pits. Random arc scars and Ugliness.

Instead, you have to lift your foot off the pedal at the right instant. I find it slower/harder than just moving my wrist.

It’s like drag racing on a motorcycle, which is much easier than a car, because you only have to move your fingers instead of your legs.

But fortunately, this welder that I bought has an excellent pedal with a very smooth and precise motion. I’m getting better as I practice with it, but I have not had nearly enough practice to be good.

I can make strong solid welds, but they’re not very clean. After doing a dozen little welds I finally got fast at it, and made one that I thought looked almost professional.

One thing that would help is if I bought some modern clear glass cups with a built-in argon diffuser. Not so much because I need the diffusion, but it makes it easier to see what you doing.

The other thing is that I didn’t get every bit of paint off the backside, and once in a while I would get a flare of smoke that would obscure my vision. If I lose track of that arc for a micro-second on thin steel I will blow through or make a scar.

I only managed to ruin five tungstens in 15 welds. This is the most difficult thing, coming from gas welding, that I always want to move the torch in a little bit closer than I should. When you get it wrong it comes out horrible.

But when you get TIG welding right? It is just marvelous!
 
I can make strong solid welds, but they’re not very clean. After doing a dozen little welds I finally got fast at it, and made one that I thought looked almost professional.
Sometimes you got to get in and get out before the metal vaporizes from the heat. I'm impatient so I go in hot when I should probably take a bit longer to heat. A good rule-of-thumb is 1amp for every .001" thickness (ie: 1/8" set at 125A).
One thing that would help is if I bought some modern clear glass cups with a built-in argon diffuser. Not so much because I need the diffusion, but it makes it easier to see what you doing.
I use gas lenses on all my torches. They seem to lessen arc wander. I haven't found the need for the glass cups yet.
The other thing is that I didn’t get every bit of paint off the backside, and once in a while I would get a flare of smoke that would obscure my vision. If I lose track of that arc for a micro-second on thin steel I will blow through or make a scar.
Cleanliness is important with TIG but a lot of times with non-critical welds you can "sanitize" with the torch. ;) I've welded many an engine or transmission Al castings that required the saturated oil be "cooked out" with heat before a weld would take.
I only managed to ruin five tungstens in 15 welds. This is the most difficult thing, coming from gas welding, that I always want to move the torch in a little bit closer than I should.
O/A is a perfect skill to have for transitioning into TIG, particularly feeding the filler but also the heating of the material to be welded.

I like to get as close as I can to avoid arc wander but that makes it more likely I will "stir the puddle". :rolleyes: When that happens, it is time to remove the W from the torch, break off the glob end on the edge of the vise with a hammer, chuck it in the drill and run along the belt sander while spinning to produce a point again. I don't own a specialized grinder.

You need to match the W with the material you are welding, particularly the flavor. I use pure W (green) when welding Al but that limits the adjustment to 60Hz on AC. There are fancier flavors that will take a point and run at higher Hz. DC isn't so picky but you might have to experiment with different flavors (Ce, Th, etc.) to see what you like.

As far as W dia. you can go by a chart which is usually just under the thickness of metal you are welding and equal to the filler you are using. So 3/32" W for 1/8" Al (for example). A size too large will be harder to start. Too small and it will burn away and/or split at the ends. This requires "sets" of cups, collets and lenses for the different dia. Ws. I have 1/8", 3/32" and 1/16" sets. I don't have .040" because I don't weld tinfoil. ;) They make 5/32" but that is 400A machine territory.

A water-cooled torch (CK20) and Bernard 2gal cooler were an excellent investment as I do a lot of prolonged welding and the torch will get hot. I can attach a smaller air-cooled torch (#9) easy enough for the smaller stuff like sheet metal. It has a 1/16" gas lens on it.
 
Good morning Mossberg Owners.

@Bobster
Thank you for all the advice. I have not yet approached aluminum & done stainless only one time. Everything is mild steel or chromo and I’m doing it all with 3/32” 2% thorium electrodes. 3/32 or 1/16 fillers.

I tried running 1/16” and 1mm both, but not easy to do with the CK17f torch. I am going to purchase a micro torch, (basically just a straight pencil) for running 1 mm, because I’m going to try and weld some sub 1mm Chromo steel.

It’s air cooled which is going to mean limiting weld time. But I’m not doing production work. I’m doing custom work which means I can take as much time as I want.

Sorta. The bicycle contest I’m working on ends Saturday at noon, and I still have to do a little more welding and upholster the seat.
3C3F3392-0CD8-4C15-9E24-0F73C349A14B.jpeg
 
Good morning all of yous. Its a beautiful Saturday morning here. The high today should be mid 50s, and even warmer for the next couple ot days. Not much going on today. I should go to the grocery ,but might hold off till Monday. Don't have to deal with all of the folks that have to work mall week. I remember those days, sort of. I will most likely get to the dog park for a bit and let the dog burn some calories.

You all have a great weekend and be safe.
 
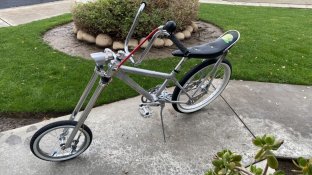
Good afternoon Mossberg Owners. I’m starting to come up out the fog of the past few days. I’ve been spending a lot of time in the shop finishing this bike for the contest.

6F9781F3-9E47-4897-B570-BB6299DD6337.jpeg
FD28F2C5-196A-4E77-BE3A-CCFE92486582.jpeg

34C5448E-4328-4A01-816F-4E46D2728B9D.jpeg

2C74F0A7-F439-4313-9698-8F7A4EB891A3.jpeg

2D31E5C7-6297-4158-A3F2-D63C7A51A53D.jpeg
 
caddman, that's cool. Don't care how it places in the build-off. You have a very unique build for sure.

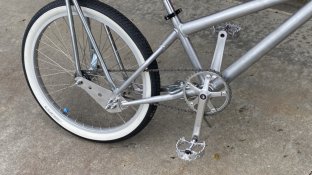
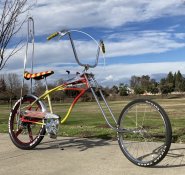
I especially like how you routed your sprocket chain. Usually folks either route them inside or outside of the frame. Not around it. I'd give bonus cool points for that alone.
 
Thank you John.

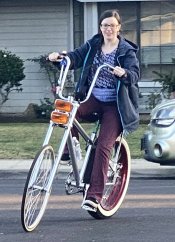
I had to spread the frame, reverse the rear sprocket and the front sprocket, plus I spaced the front in about a quarter of an inch from the spider until it just barely clears the frame.

Those clearances basically dictated the chain line, which more or less dictated how far the bike could drop. Another half an inch & the chain would’ve been rubbing on the stays.

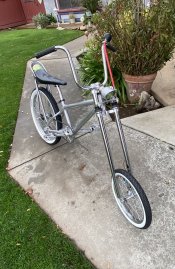
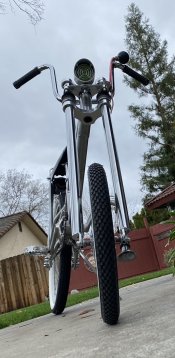
This is really not the style en vogue right now so I don’t expect to do very well in the contest, but I had a lot of fun building it. and I like the way that it came out.

The big thing is that it’s very solid structurally, in spite of having those huge drop outs in the back. It’s the way I triangulated the struts, tied the tops of the struts together rigidly, and reinforced the seat until it became a serious structural member.

If you ever rode a Stingray with a sloppy Seat and sissy bar, so it squeaks & creeks, you’ll understand why I went to these efforts.

I remember breaking sissy bars and my stingray seat when I was a paper boy. The stockers will really not stand up to an athletic teenager with the will to pedal hard.
 
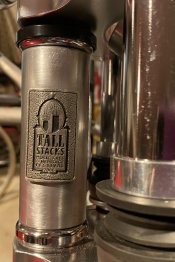
The head badge was a souvenir keychain from the Cincinnati river boat festivals.

My mom brought me that the the last time she ever went back to visit in Covington.94EB511A-211A-4F6B-8FE4-2A94C2C89692.jpeg
 
I am afraid to start adding up what I spent on this free bicycle. I got the frame for free and I got the front wheel free the stainless I have had forever but I spent over $50 just on stainless steel bolts & chrome acorn nuts.

I spent over $100 on the bottom bearing adapter, sealed bearing kit. and one crank arm.

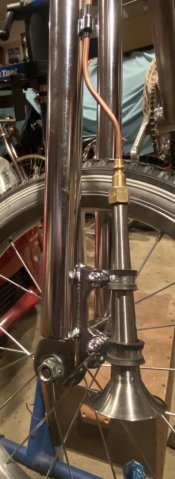
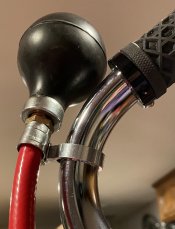
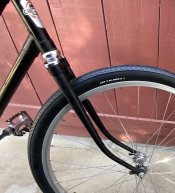
I bought the rear wheel assembly and tire ($35), and a new front tire(16), handlebars(20), grips(30), seat(40), kickstand(9), horn(7), forks(100), steel tubing(9), solar lamps(20), seat post (15), clamp (10), pedals (15), Custom embroidered upholstery (135).

$571

That doesn’t include gasoline for running around in the truck or electricity and welding gas. That easily put it up to $600+

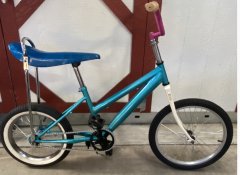
I spent almost $1100 to build up the Mongoose bike.
4FBD8235-8FF1-4A26-AA09-5533E1B0A16B.jpeg

I only spent $100 to build up Flyaway,
B2DC7689-870A-4E50-83D3-AD5DFEFA7CDC.jpegAnd about the same to build up the leftover bits bike.
BF66B1FC-62BD-4AFE-8956-ED57EF277394.jpeg
 
Good morning Mossberg Owners.

Well it looks like the rain has stopped, temps have risen, and it is getting a little windy. I think it will dry the street up enough to go bicycle riding today.

We are fortunate that our property is well up above the floodplain. I wouldn’t have bought anything that was in danger if the local flood control damn broke.

Lots of water is coming down into the lakes and I am anxious to go fishing again. But it’s too muddy for that, so now that the bicycle contest is over I’m going to go up in the hills with my buddy, do some knife throwing and target shooting, and maybe get the truck stuck in the mud.
 
What is the "style" now? Lowrider?
It’s divided, actually.

There were 3 categories. Muscle, skinny, & dirt. I had 2 in muscle, & one in skinny.

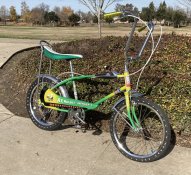
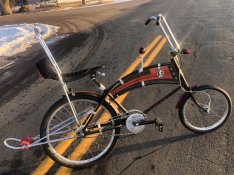
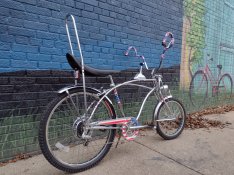
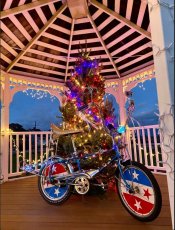
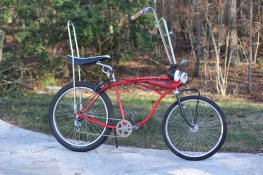
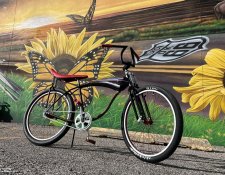
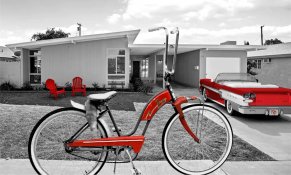
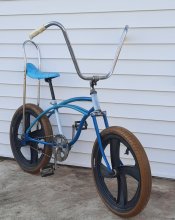
These were the top 6 muscle bikes in order. These all beat me.
E1EFDCA2-2D07-42FE-91DE-5DE3D32960A9.jpg19DF030D-998F-420C-A541-B94D0B849625.jpeg
A4AA9FF6-CCAC-4AF5-9177-6C5F21D8F922.jpeg
E7C36EE5-B24B-4143-9351-A45A24CBEE4F.jpeg2621B99B-A9E8-410E-BCAB-97F76B624A0A.jpegAE1E90AB-C051-4422-BFEC-18386034B230.jpeg

There were 19 in muscle bike. Mine finished in a tie for 7th with this:
BA93E625-564A-4408-A450-7B878B4F5D03.jpeg
There was a tie for 6th as well.
These all finished one vote above me.
D413E1E9-65E4-4885-88D8-60C8424A72CB.jpeg
F10A0527-7C88-4DAD-AF73-6A2AF32B3690.jpeg
E4AB1B07-D4E5-4A91-B727-C6D347F44924.jpeg
 
Back
Top