You are using an out of date browser. It may not display this or other websites correctly.
You should upgrade or use an alternative browser.
You should upgrade or use an alternative browser.
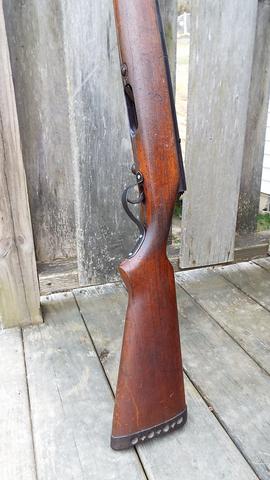
I have this old gun...
- Thread starter John A.
- Start date

They did teach me that. But it's easier for me to just get it shooting where it needs to without having to remember where each of the shotguns shoot. One of the bad things for having one too many to remember.
Plus, I missed out on a turkey shoot last November for a turkey or a ham because they only allowed bead sights.
So, having one gun where I don't have to try to remember where/how it shoots, isn't too bad. That is if I even like how it shoots when I finish it. But with an extra full choke +, I'm going to assume based on that alone it should do pretty well.
@John A. I dont think ya was following me on crook of,tree trick. They literally would torque/bend them old guns if,they didnt shoot were pointed. Last time I saw it done was actually at a turkey shoot, the guy wedged his long single,m boomer in his hitch on truck with a hat for padding and started bending till she hit dead center, for,real thats actually a thing. 
Yeah, I got what you were saying. Though I've never seen it done.
One thing that is to my detriment, I tend to over-do everything. I'd end up with a barrel that was so bent, it would shoot me in my own butt every time I pulled the trigger.
Or put more twists and turns in the barrel trying to tweak it just perfect than the Indianapolis 500 has. LOL
One thing that is to my detriment, I tend to over-do everything. I'd end up with a barrel that was so bent, it would shoot me in my own butt every time I pulled the trigger.
Or put more twists and turns in the barrel trying to tweak it just perfect than the Indianapolis 500 has. LOL
My Dad takes the muzzleloaders he builds and wraps them up in an old shirt, ties them down to a tire and proofs the rifles that way. I saw him burn up a nice flannel shirt when he touched off a flintlock one day. Watching him scramble to untie the rifle before the fire damaged the rifle was a sight to behold as I never saw him move that fast before or since.
Last time I did anything like that, I laid the gun across one of those 4x4 folding leg card tables, used a tie down strap around the gun and the table and put a cinder block on the table to keep it from doing a backflip. And ran a long piece of trot line string through the trigger and the other end tied to the trailer hitch on my truck.
The parts came this morning and I got them installed relatively easy. The extractor detent has a little notch that only goes a particular way. If you're looking at the side of the parts, the notch goes toward the inside of the bolt and the solid side is outwards toward you.
The mag spring and follower works right now. Bolt stop screw stops the bolt like it's supposed to.
The extractor pulls the shell out of the chamber now, but doesn't eject it. I think that is due in large part because the broken extractor on the other side is allowing the shell to twist some while you're pulling back on it and when it does slip out of the extractor, it tensions toward the inside of the receiver. I think that will fix itself when I'm able to get the right side extractor later on.
Will try to shoot it later this evening to see how it does. For the time being, I loaded up 10 shells all with titegroup and 1-1/8oz shot with the lightest published load I could find. 15.0 grains, Winchester primer, supposed to be 8,000 psi and 1090 fps. That's about 2500psi below saami max for the 12 ga.
I'm mainly starting out as low as I can just to proof check everything at first to see how it does before stepping up to "regular" low brass velocities. I'm pretty sure this load was meant for cowboy action shooting with those old guns anyway and in fairness is pretty anemic, but the gun needs to earn my trust.
I loaded up five shells with #6 shot (one is the test load that I won't be holding and just to see if the gun frag's, and depending on how it does, I'll shoot the other 4 into a paper target to see how it patterns. And I have five other shells loaded up with scrap shot that I have salvaged ranging from #7 to 9 shot just to see how it does.
Less powder, more lead...shoots far, kills dead. Just hopefully not on both ends")
Going to try to get some pictures and/or video later this evening. I think it'll be fine.
The mag spring and follower works right now. Bolt stop screw stops the bolt like it's supposed to.
The extractor pulls the shell out of the chamber now, but doesn't eject it. I think that is due in large part because the broken extractor on the other side is allowing the shell to twist some while you're pulling back on it and when it does slip out of the extractor, it tensions toward the inside of the receiver. I think that will fix itself when I'm able to get the right side extractor later on.
Will try to shoot it later this evening to see how it does. For the time being, I loaded up 10 shells all with titegroup and 1-1/8oz shot with the lightest published load I could find. 15.0 grains, Winchester primer, supposed to be 8,000 psi and 1090 fps. That's about 2500psi below saami max for the 12 ga.
I'm mainly starting out as low as I can just to proof check everything at first to see how it does before stepping up to "regular" low brass velocities. I'm pretty sure this load was meant for cowboy action shooting with those old guns anyway and in fairness is pretty anemic, but the gun needs to earn my trust.
I loaded up five shells with #6 shot (one is the test load that I won't be holding and just to see if the gun frag's, and depending on how it does, I'll shoot the other 4 into a paper target to see how it patterns. And I have five other shells loaded up with scrap shot that I have salvaged ranging from #7 to 9 shot just to see how it does.
Less powder, more lead...shoots far, kills dead. Just hopefully not on both ends
Going to try to get some pictures and/or video later this evening. I think it'll be fine.
Congratulations on getting this far, John. This motivates me to work on my old beater 16ga one-shot Springfield.
Part of the attraction to me has always been the Chinese puzzle aspect of gun construction.
One thing I do when taking one apart, particularly an unfamiliar one where the springs can fly into nether regions of my garage, is work on a towel, with a big towel over my head like a tent. Anything that slips loose won't get away.
I wasn't worried about the metal construction of the gun giving way, but the wooden stock fragging and busting into toothpicks since it was split completely in two from the front all the way back to behind the trigger guard.
But it shot really well. And patterned really good too.
I was unable to feed it from the magazine because where it's missing the other extractor, it's not ejection the empty hull, but rather pulling it out of the chamber and then just leaving it laying in the ejection port, which blocks the shell from the magazine from feeding, so right now it's basically a single shot until I get the other extractor.
The safety also moves too easy and I'm going to figure out some way to put some tension on it. I could remove it entirely so it'll never be "on safe" but I don't really want to do that either. I'll see if I can come up with something. Later models have a piece of spring steel that rubs up against the stock so I might switch it over for one of the newer ones.
With the front bead adjusted all the way out, it was shooting a little low, but I can file some of the threads off and lower it. I just didn't want to do that until I shot it because I may not have needed to, but it did. It shot just a hair to the right, but still had plenty of pellets in the bullseye too.
Anyway, I'll try to process the pictures and video and will update it later this evening.
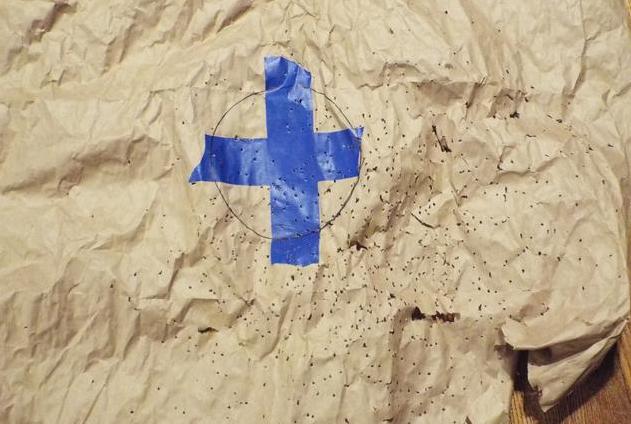
Edit to add the targets
1-1/8 oz #6 shot (4 shots at target)
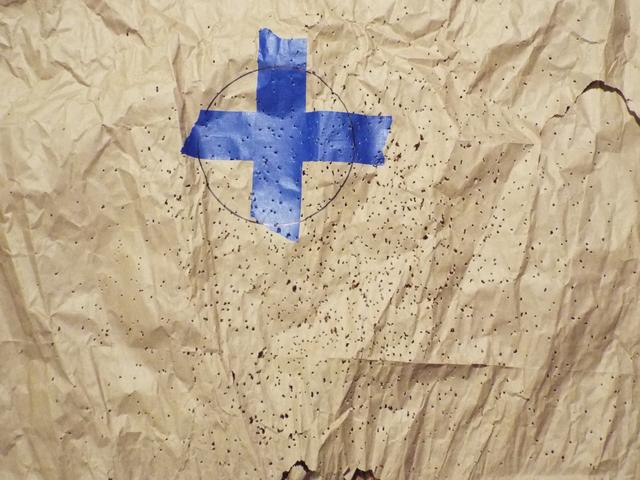
1-1/8 oz #7-9 shot mix (5 shots)
I removed some of the threads on the front bead, which lowered it and now the front bead is sitting on top of the barrel and that will raise the pattern higher than it is on paper. Still may not be perfectly dead centered, but I think will still be plenty of pellets where they need to be.
I also bent the metal on the safety, which tensioned it more between the stock and the receiver. While I was shooting it, the recoil of the gun would move the safety on and wouldn't let me pull the trigger and I'd have to stop and move it. It was intermittent, but I think putting a little bend in it will cause it to rub enough to where I'll have to physically move it myself now. If not, I'll crank on it some more later.
Nice. John you're gonna have a darned nice gun.
Thanks guys, yes, it's gonna be a keeper. My youngest son and I are going to attempt to make a metal trigger guard for it today. I have some thin SS sheet metal in my shop that I used on another project years ago and he wants to try his hand at making a guard for it, so it's going to be his introduction to metal fabricating. I could buy one for $13, but he insists that he wants to make it his self, so that's the route we're going to go.
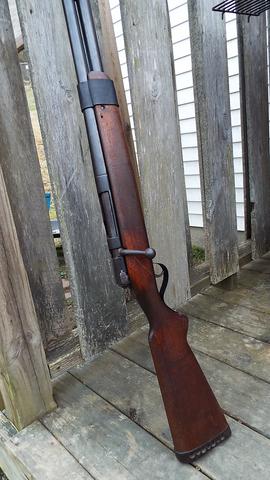
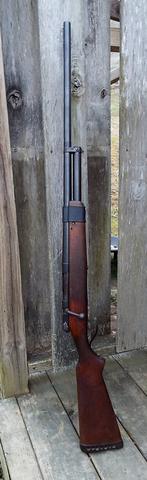
In doing some research, looks like most people are saying that it was a high standard model 10 shotgun. However, the HS model 10 shotgun was a bullpup style shotgun.
https://en.wikipedia.org/wiki/High_Standard_Model_10
But when I really got to really looking into it, it appears to be a relabeled H&R model 120.
Who knew?
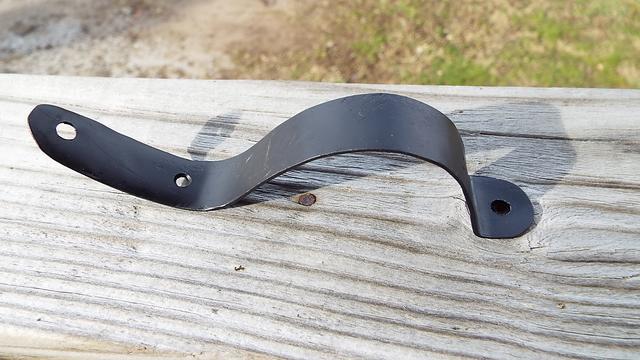
Well, it just turns out that my son took to metal working like it was his 2nd nature.
I couldn't find the piece of sheet steel, so, we used a sawn in half piece of aluminum tubing that I didn't use on another project.
He pounded it flat on a piece of steel, then I helped sawing it to the width using a dremel since the metal was too soft to try to hacksaw through.
Then he and I shaped it with the bends that we wanted using a hammer and what we could find laying around to get the shape we wanted. We ended up using a 6 lb steel hammer handle to get the bend in the trigger guard that we wanted.
Then once it was to shape, he drilled the holes, sanded it and some paint.
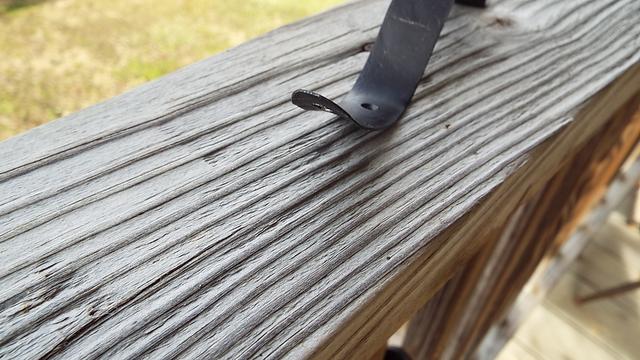
Oh, and he also rolled the edge to match the stock grip so it wasn't sharp and followed the contour of the stock to make it more comfortable.
In all, yeah I could've bought one, but I wouldn't take $100 for this one.
I couldn't find the piece of sheet steel, so, we used a sawn in half piece of aluminum tubing that I didn't use on another project.
He pounded it flat on a piece of steel, then I helped sawing it to the width using a dremel since the metal was too soft to try to hacksaw through.
Then he and I shaped it with the bends that we wanted using a hammer and what we could find laying around to get the shape we wanted. We ended up using a 6 lb steel hammer handle to get the bend in the trigger guard that we wanted.
Then once it was to shape, he drilled the holes, sanded it and some paint.
Oh, and he also rolled the edge to match the stock grip so it wasn't sharp and followed the contour of the stock to make it more comfortable.
In all, yeah I could've bought one, but I wouldn't take $100 for this one.