• Mossberg Owners is in the process of upgrading the software. Please bear with us while we transition to the new look and new upgraded software.

First attempt at wood buttstock and forend

JT10

.270 WIN
Not sure if this is the right place to start this thread...

I've been working on this since January of 2012 and it is almost complete.

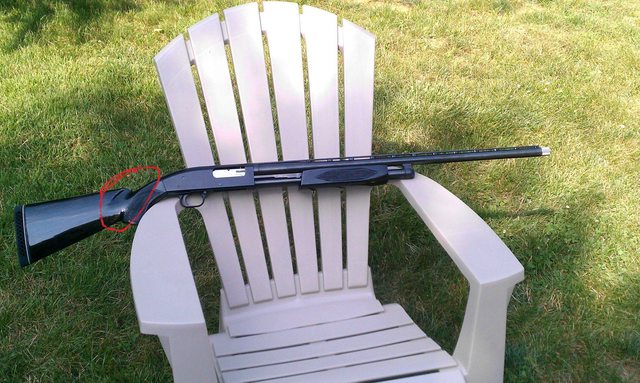
You all know this model. Maverick 88 field model.

31010big.gif


I had no idea how difficult it would be and I had no idea how many tools I would need to buy in order to replicate the synthetic stock and forend in a decent hard wood. I had to buy a band saw, belt/disk sander, hand planer, checkering tools, long drill bits. That is all not including the supplies I needed to do the finishing.

I had no delusions that I would be able to produce a top-grade replication. I just knew I wanted to try and see how it turned out. I also knew I wanted to try this ebonizing process to stain it very dark.

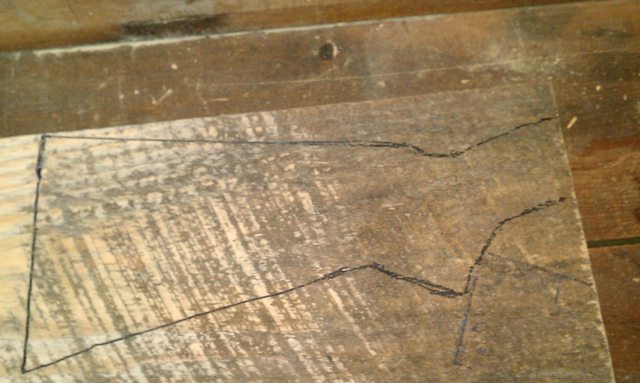
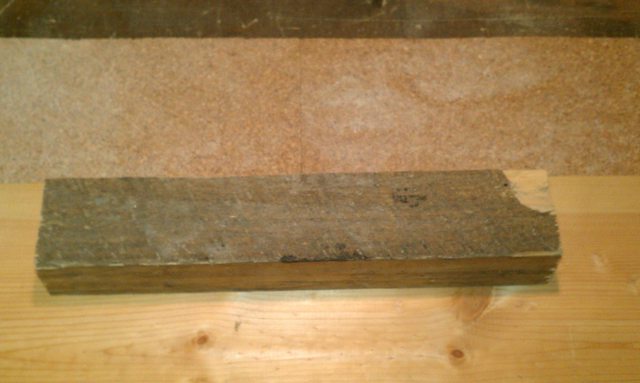
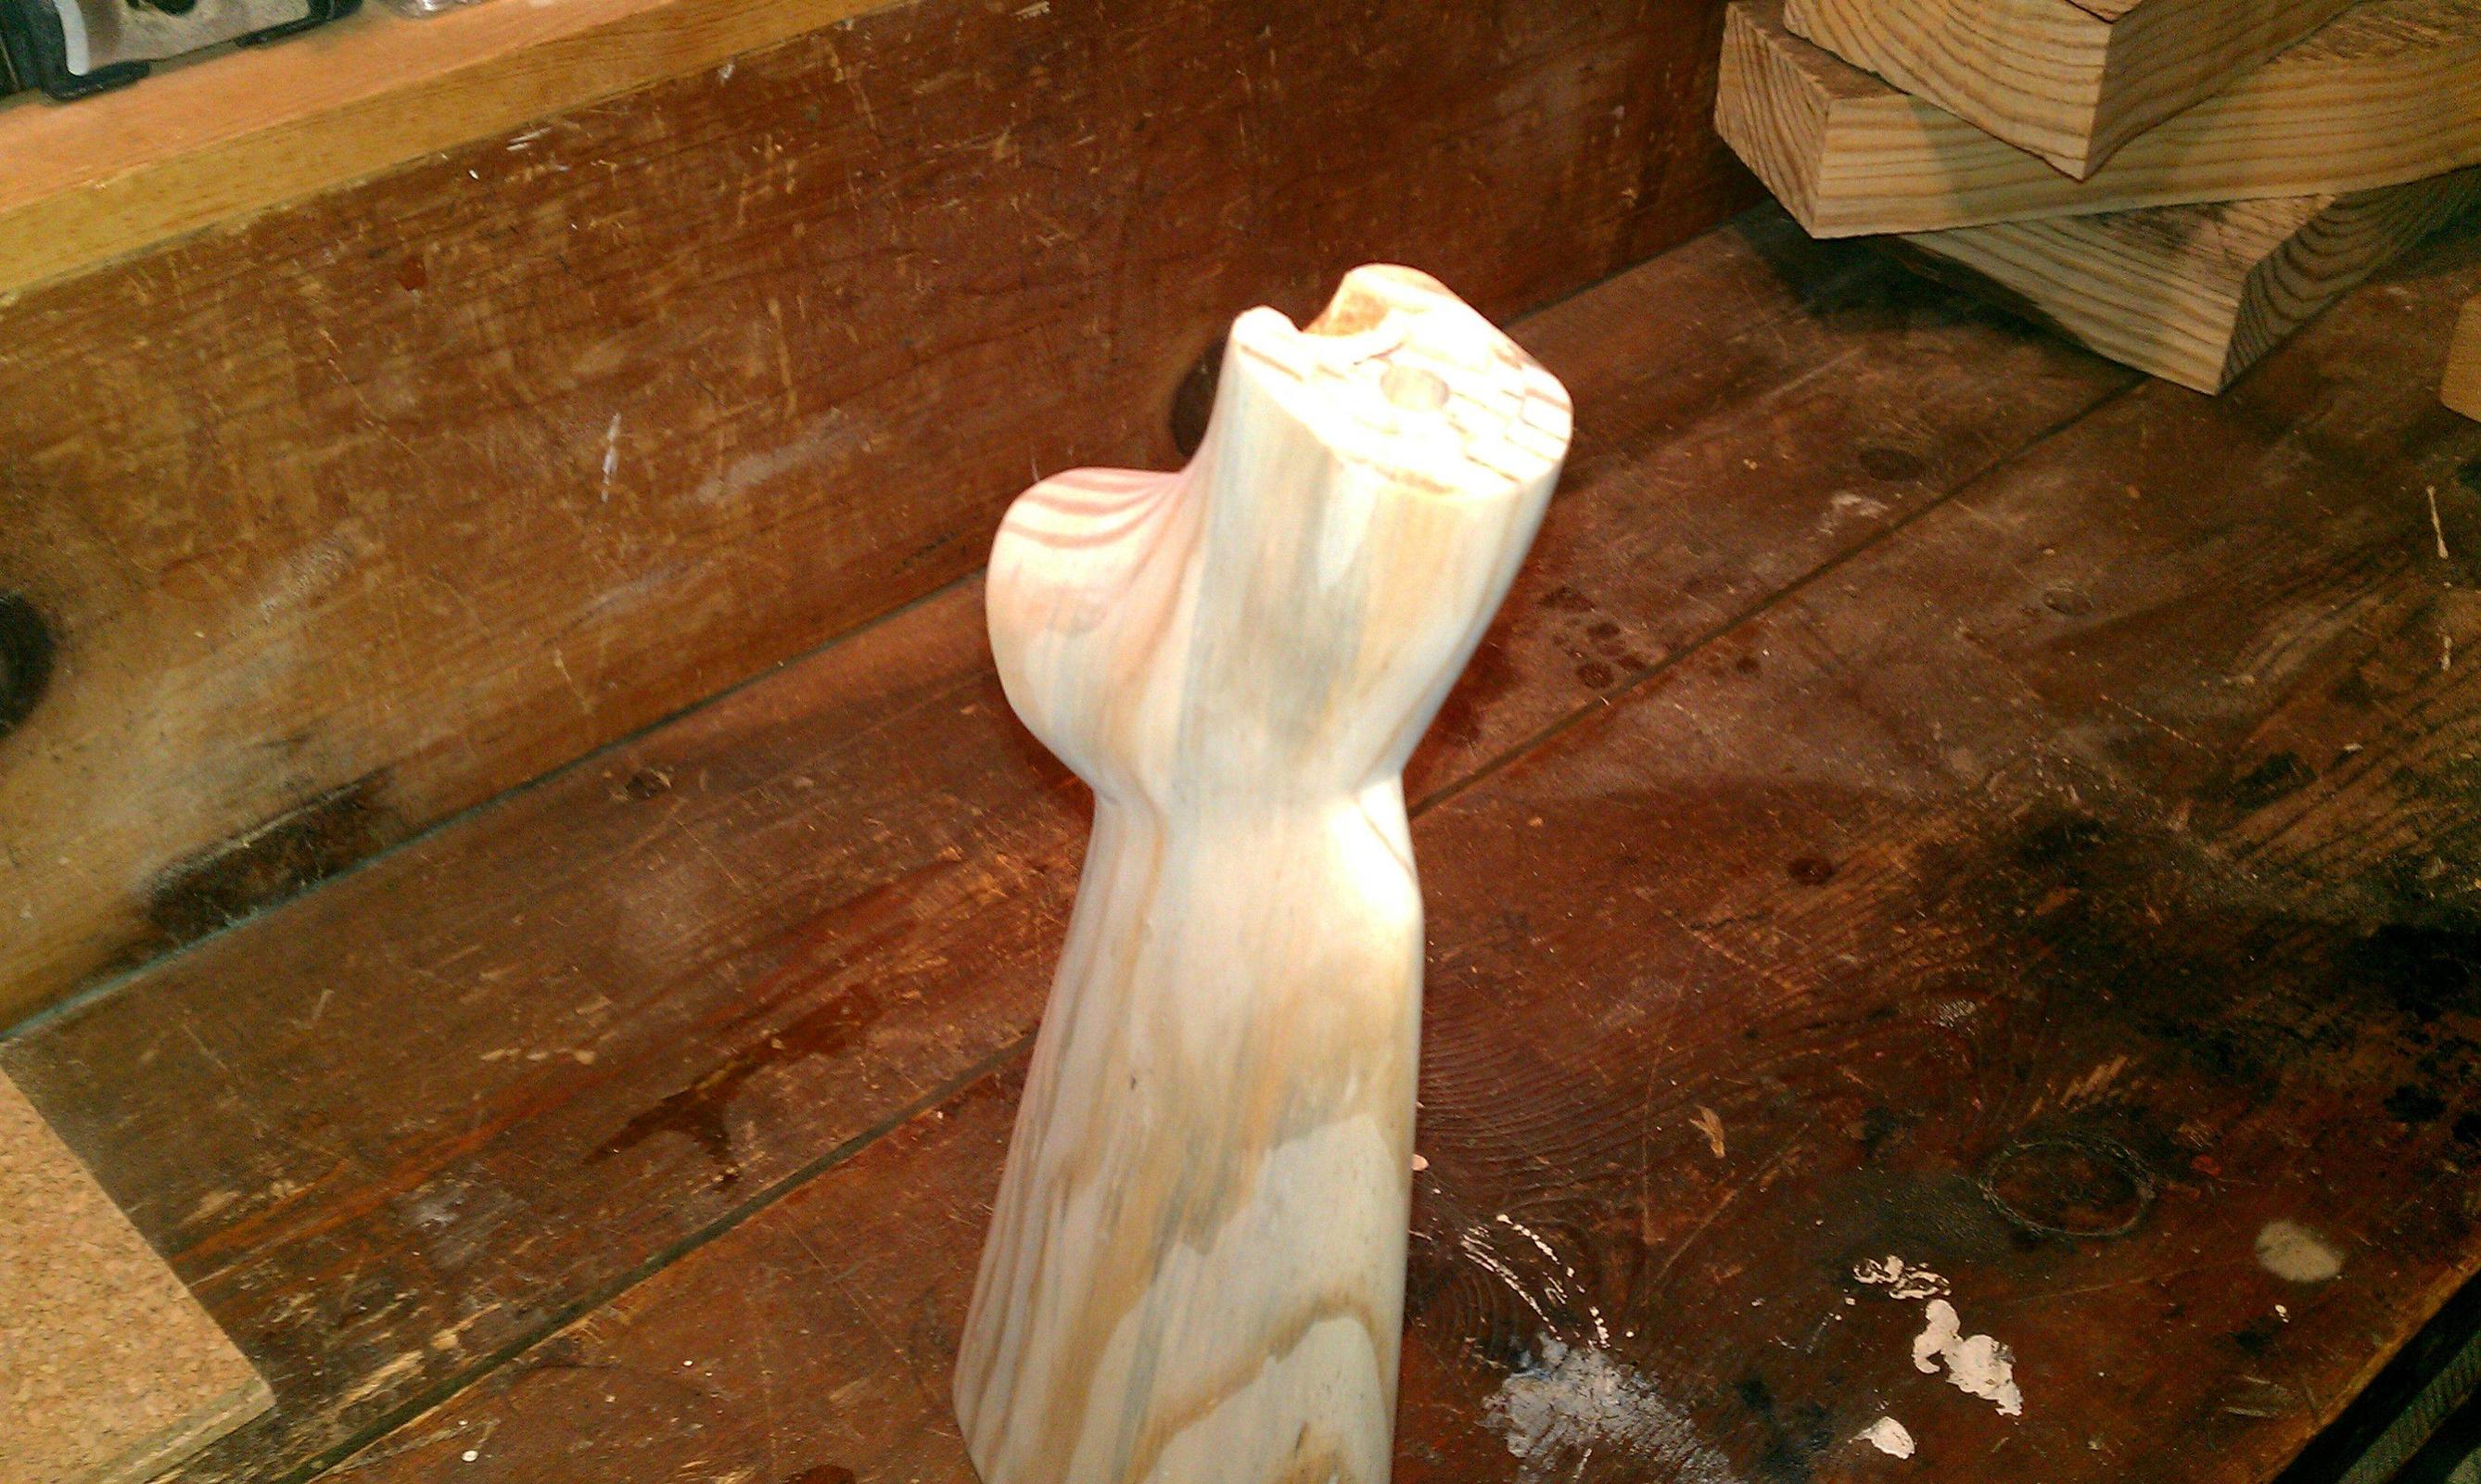
I started with a block of aged Ash. 8/4 x 10" x 20" and cut out the rough pieces to begin the process.

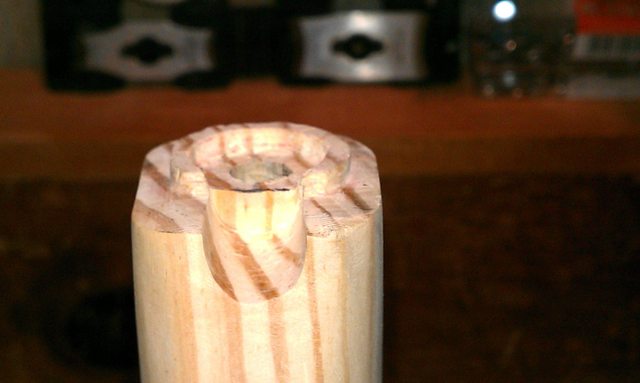
Drilling the holes for the mounting bolt and magazine tube took a very long time.

wQPx3l.jpg


tDPGBl.jpg


j25wol.jpg


Ql1oxl.jpg


2TGonl.jpg


Mk7yal.jpg


KKYfu.jpg


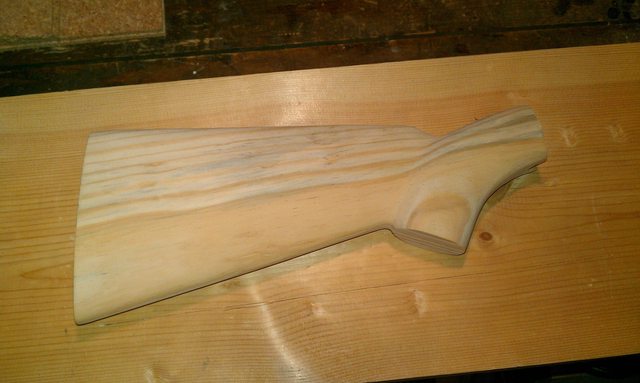
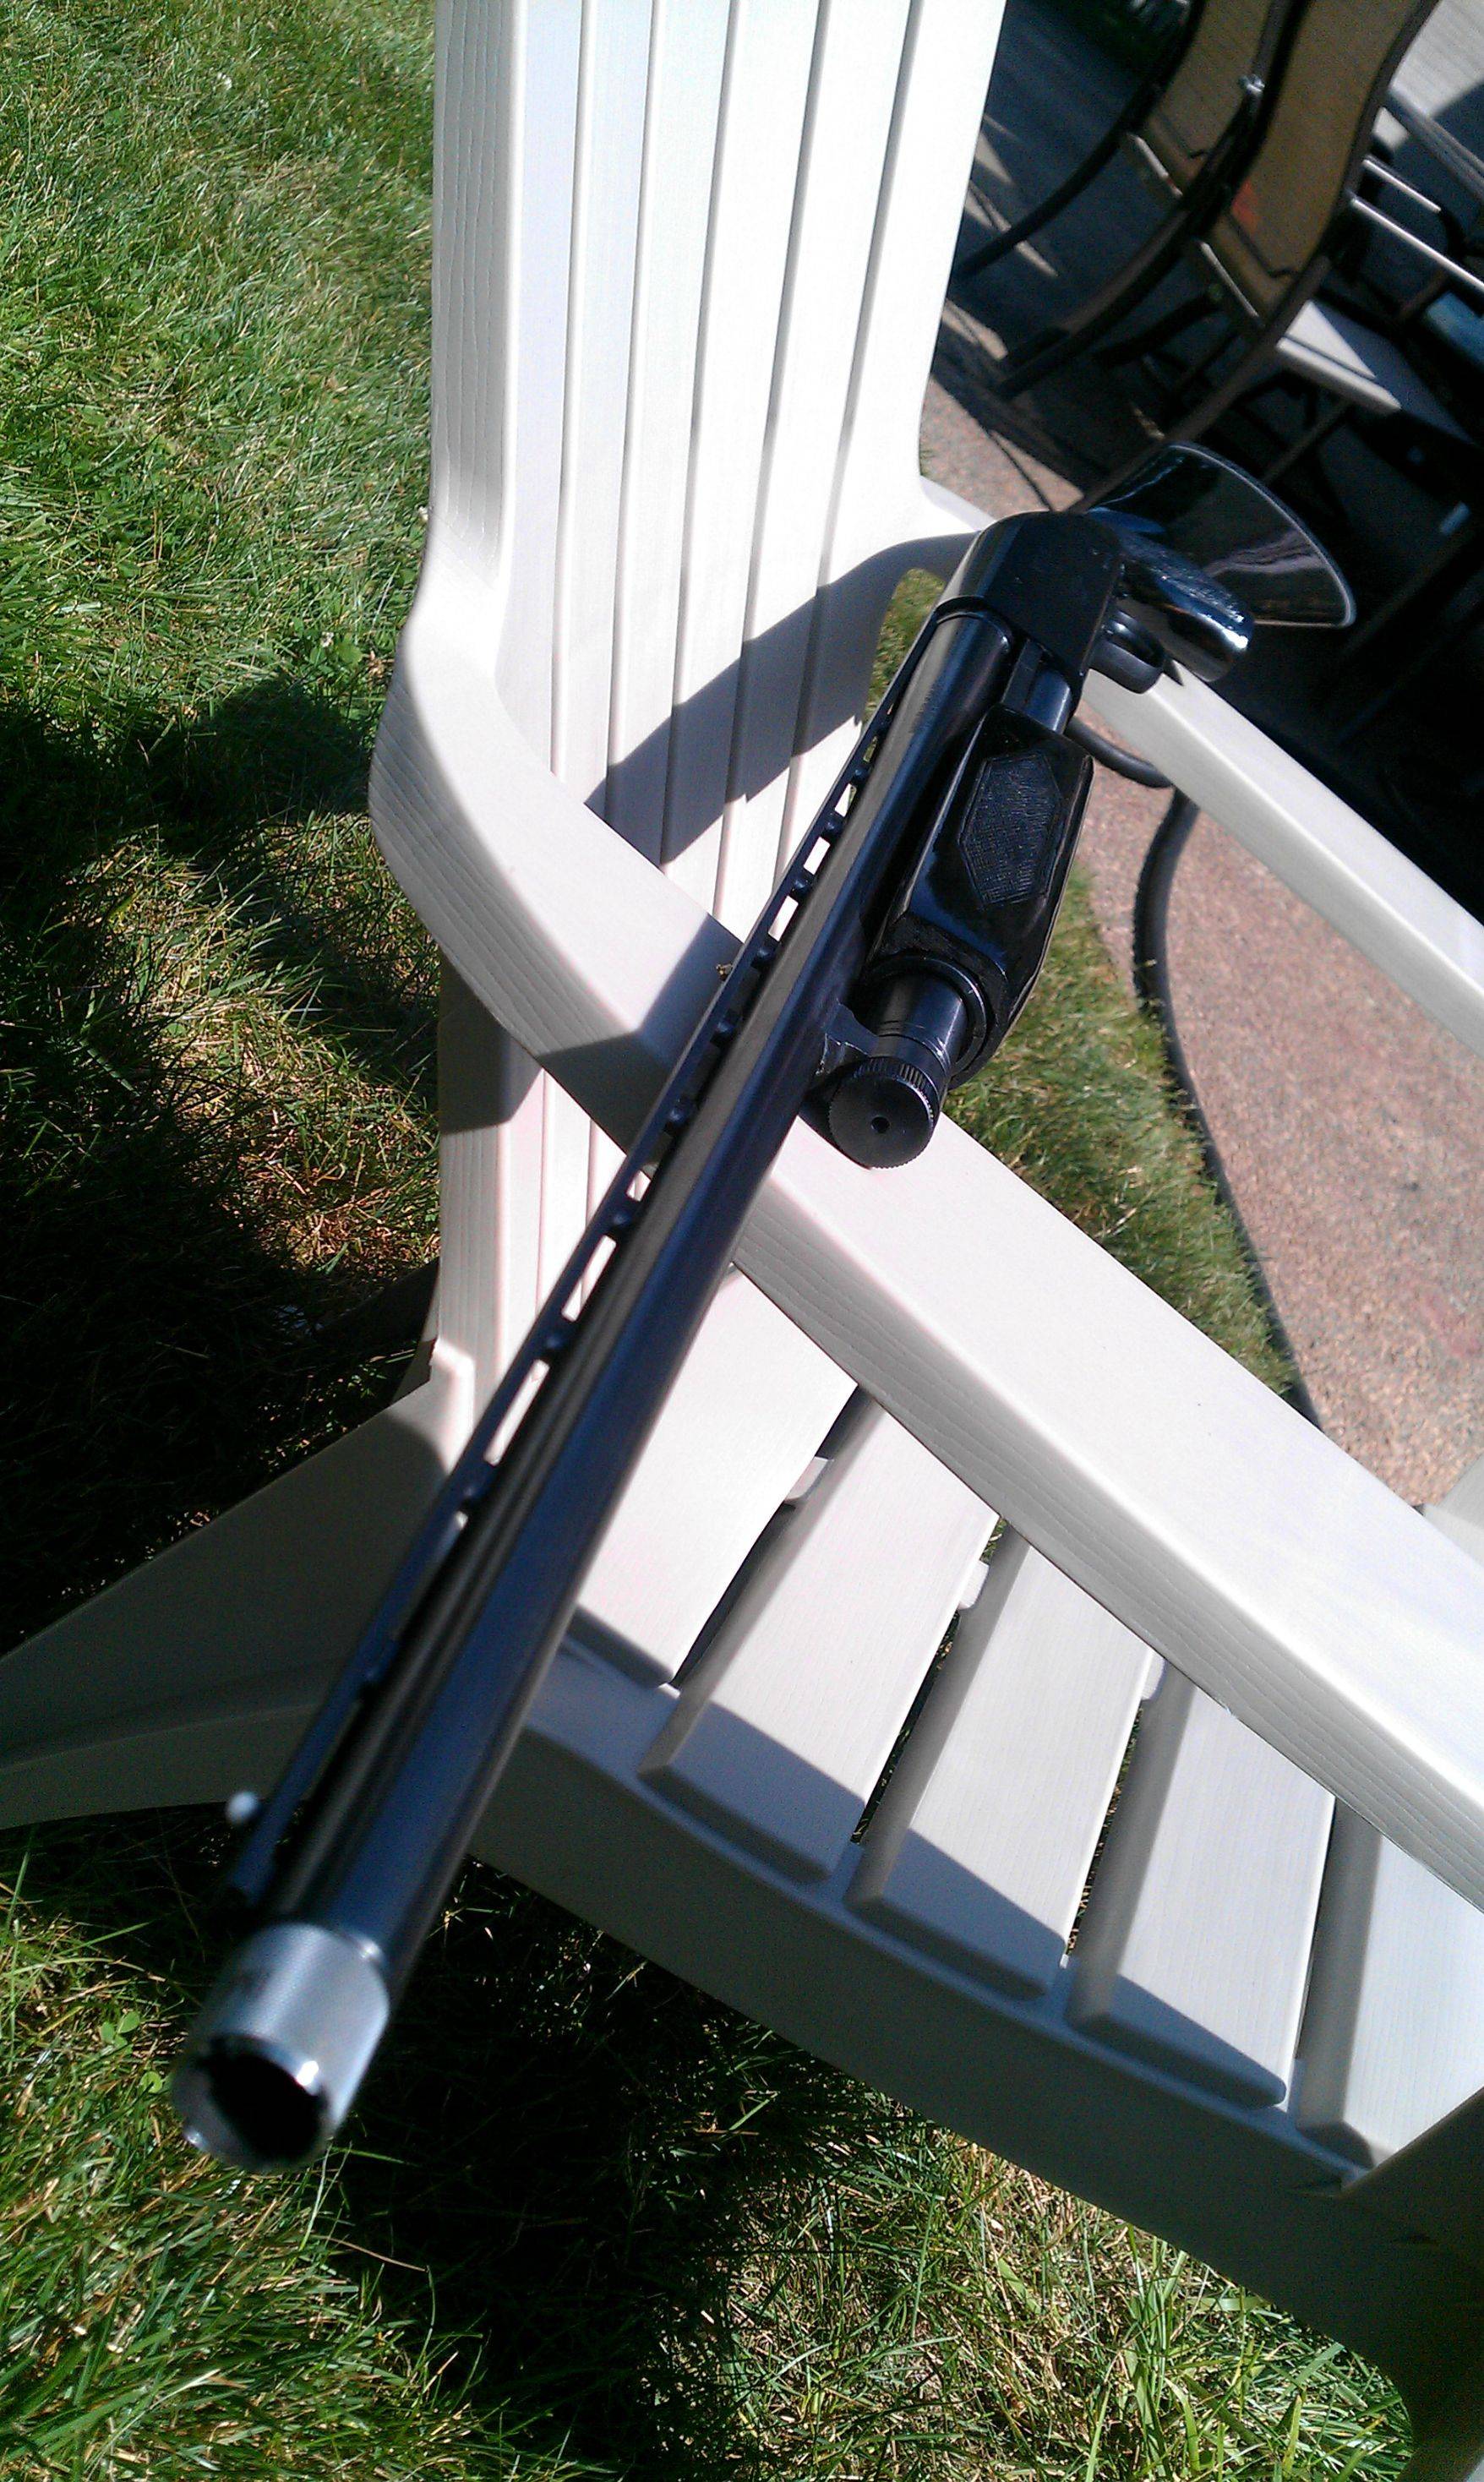
So after six months..and I have no idea how many hours....

I have this!

yKtYL.jpg


gjcsu.jpg


xxF2l.jpg


nluOt.jpg


YP6dm.jpg


mlGXn.jpg


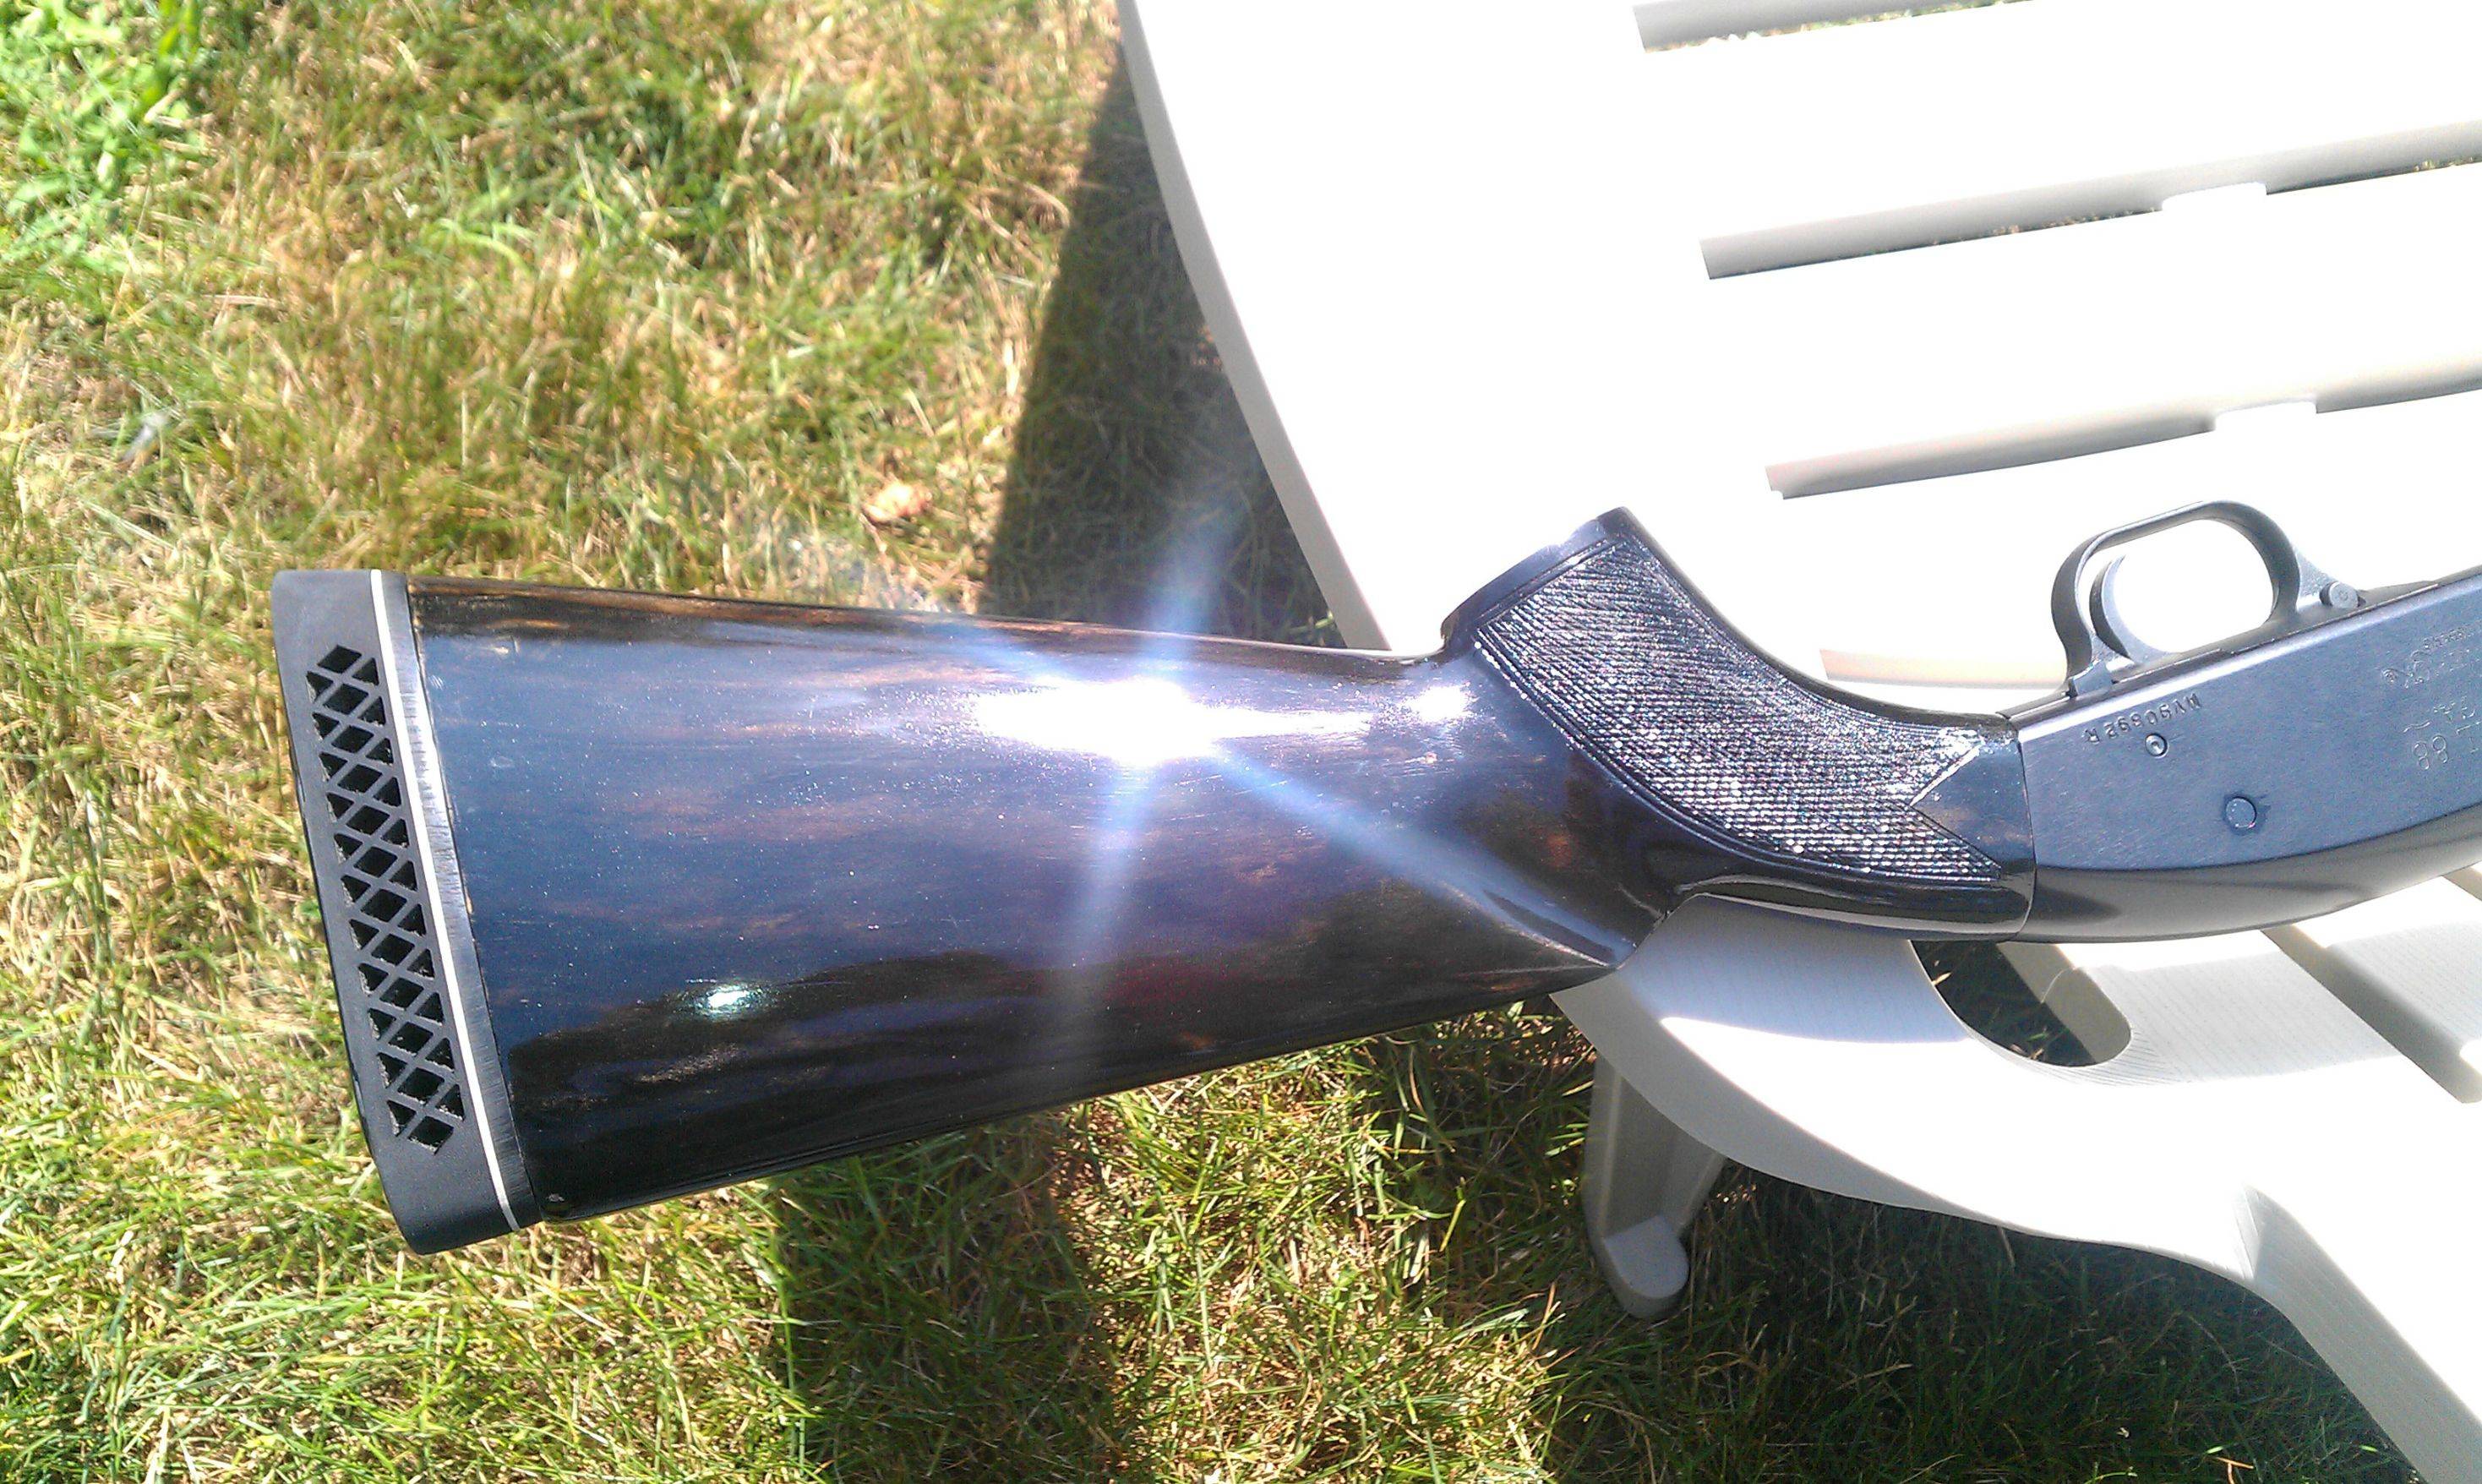
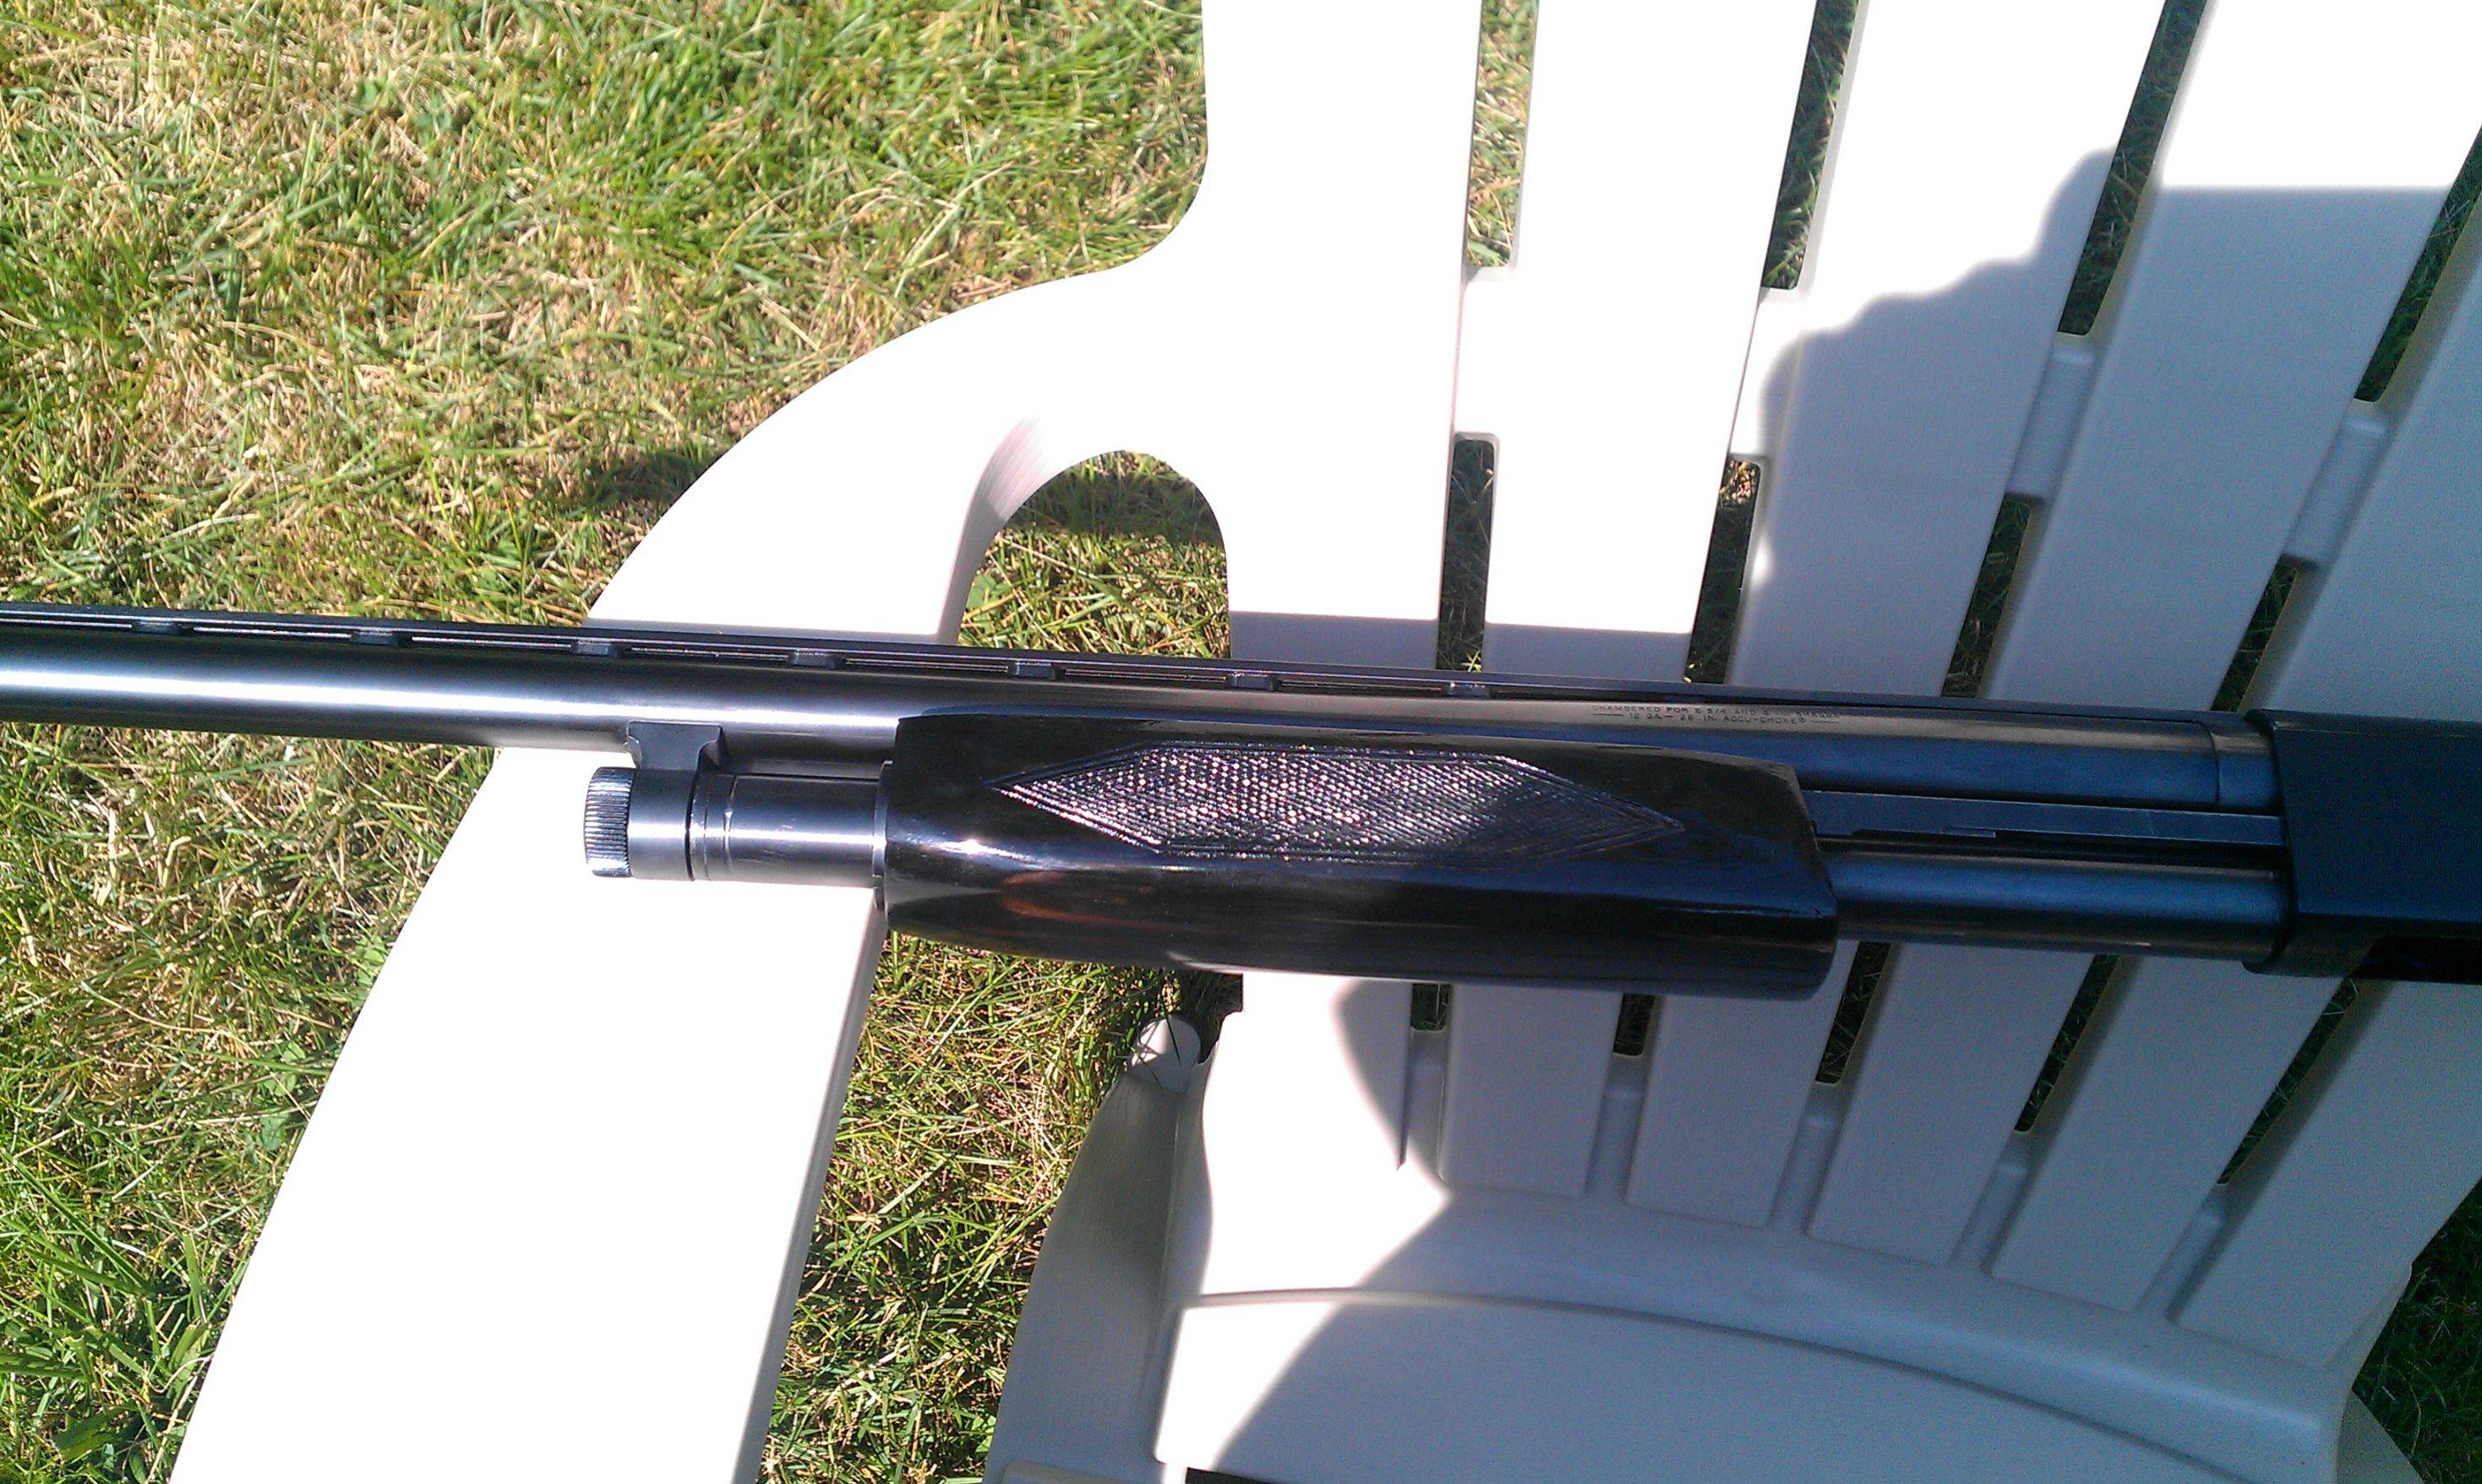
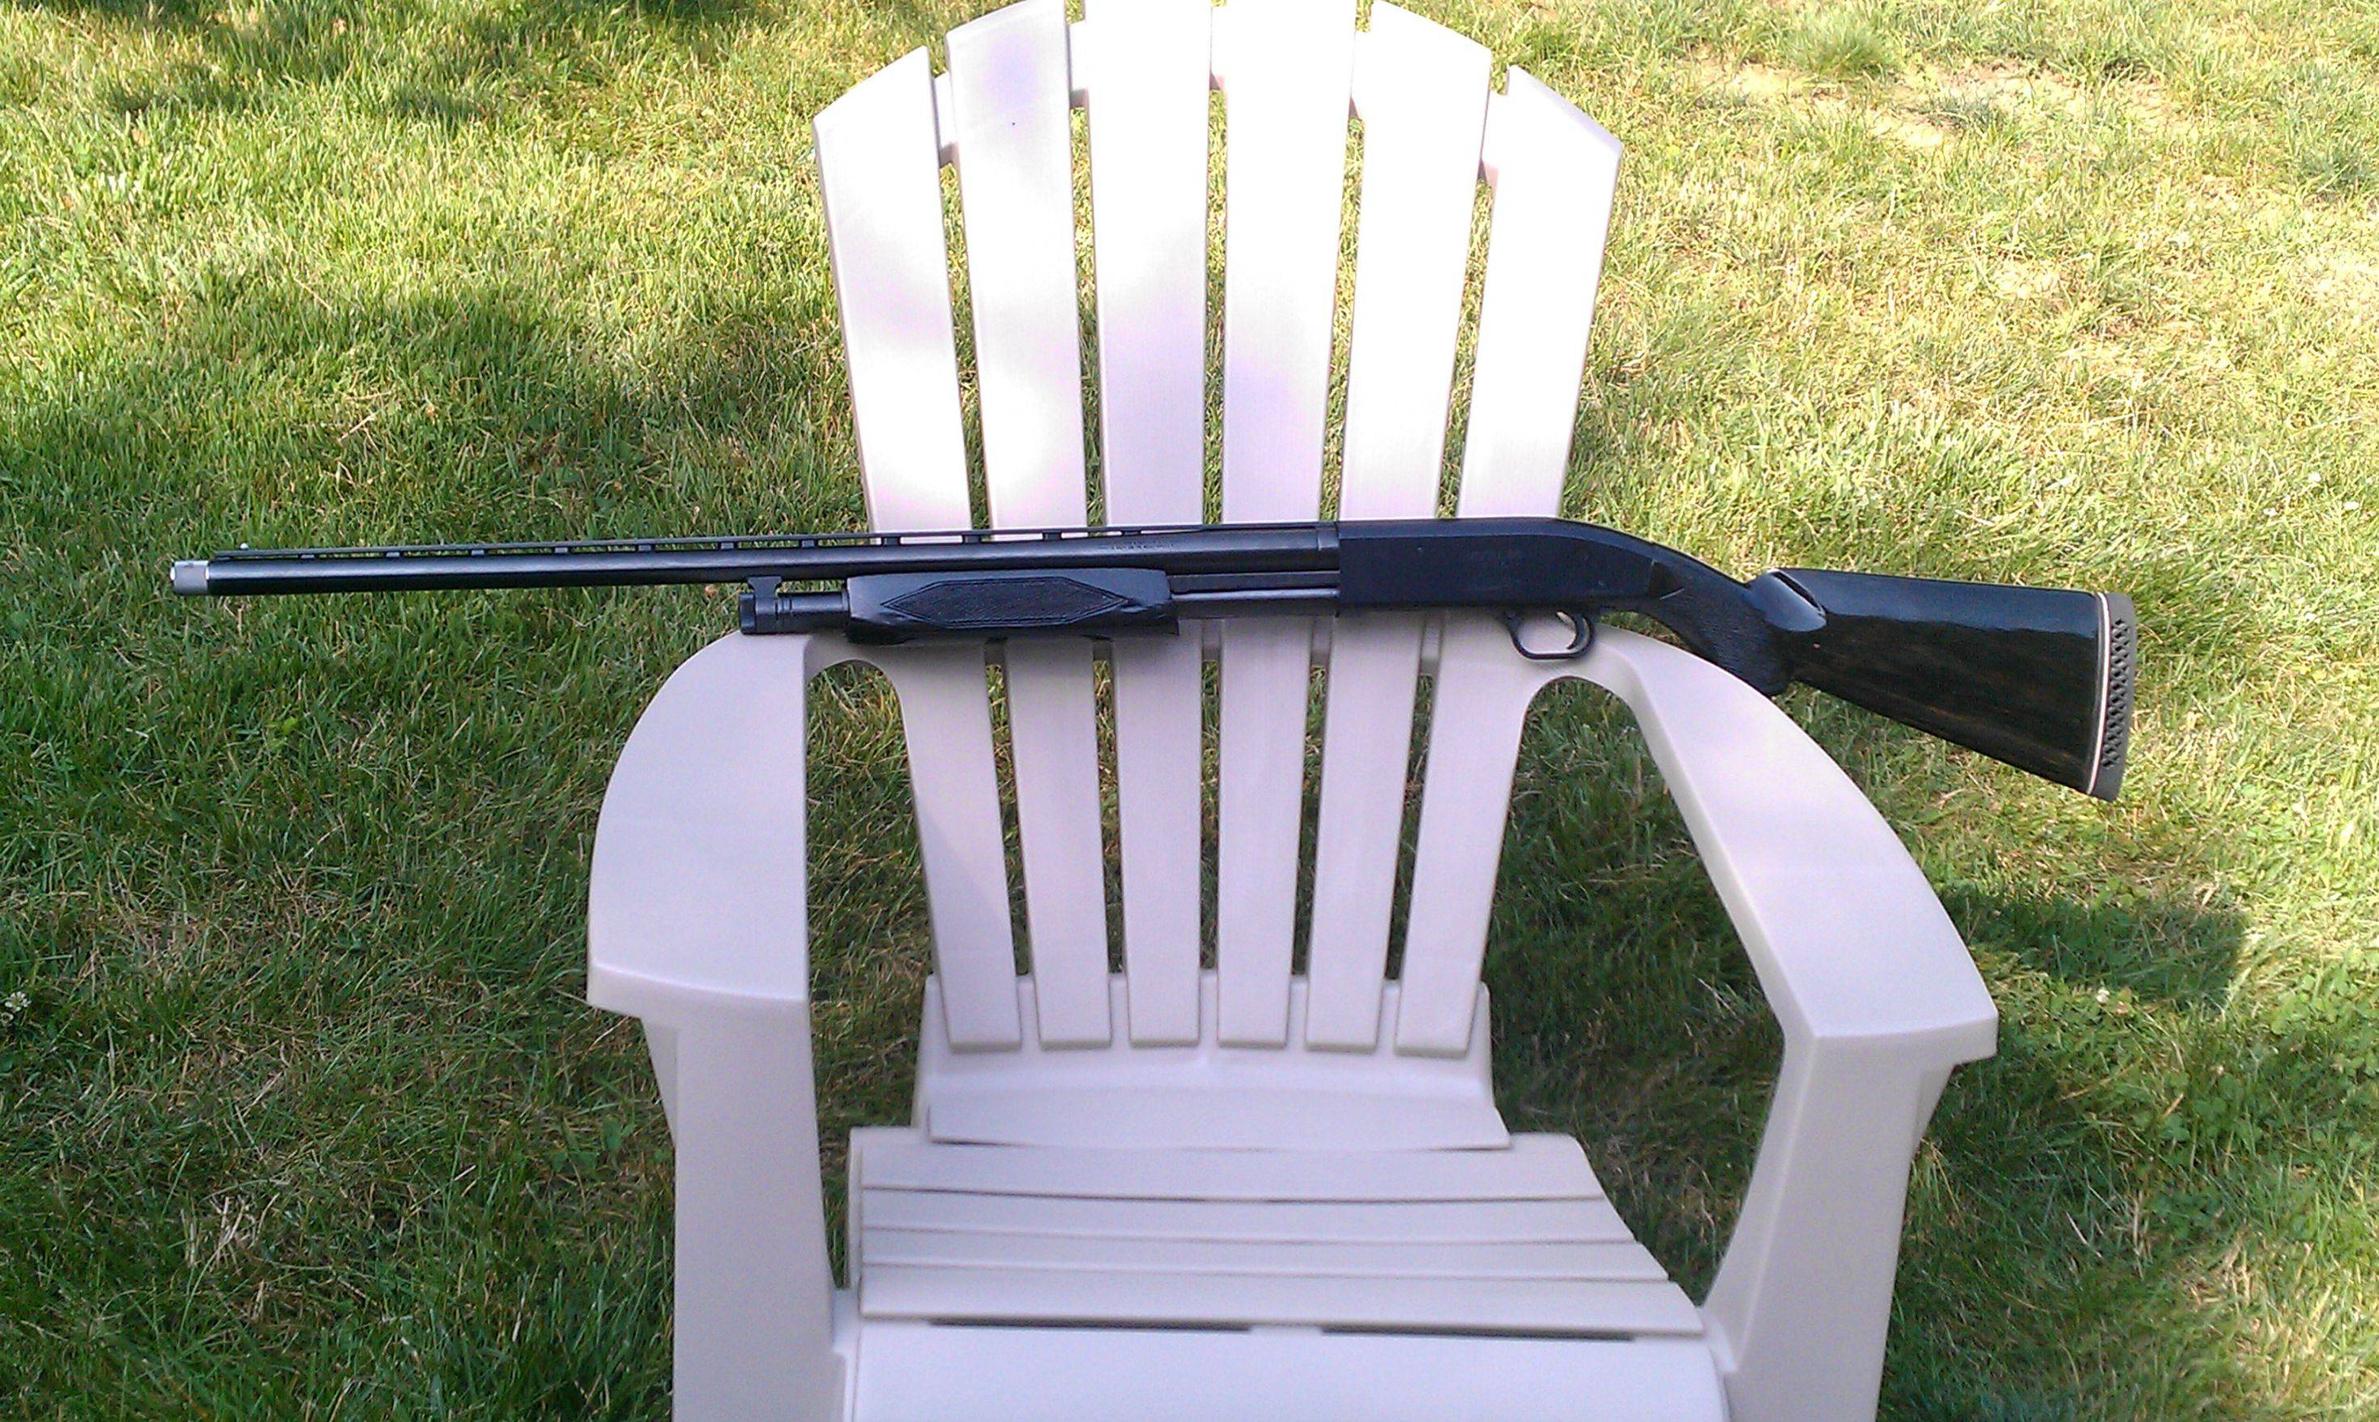
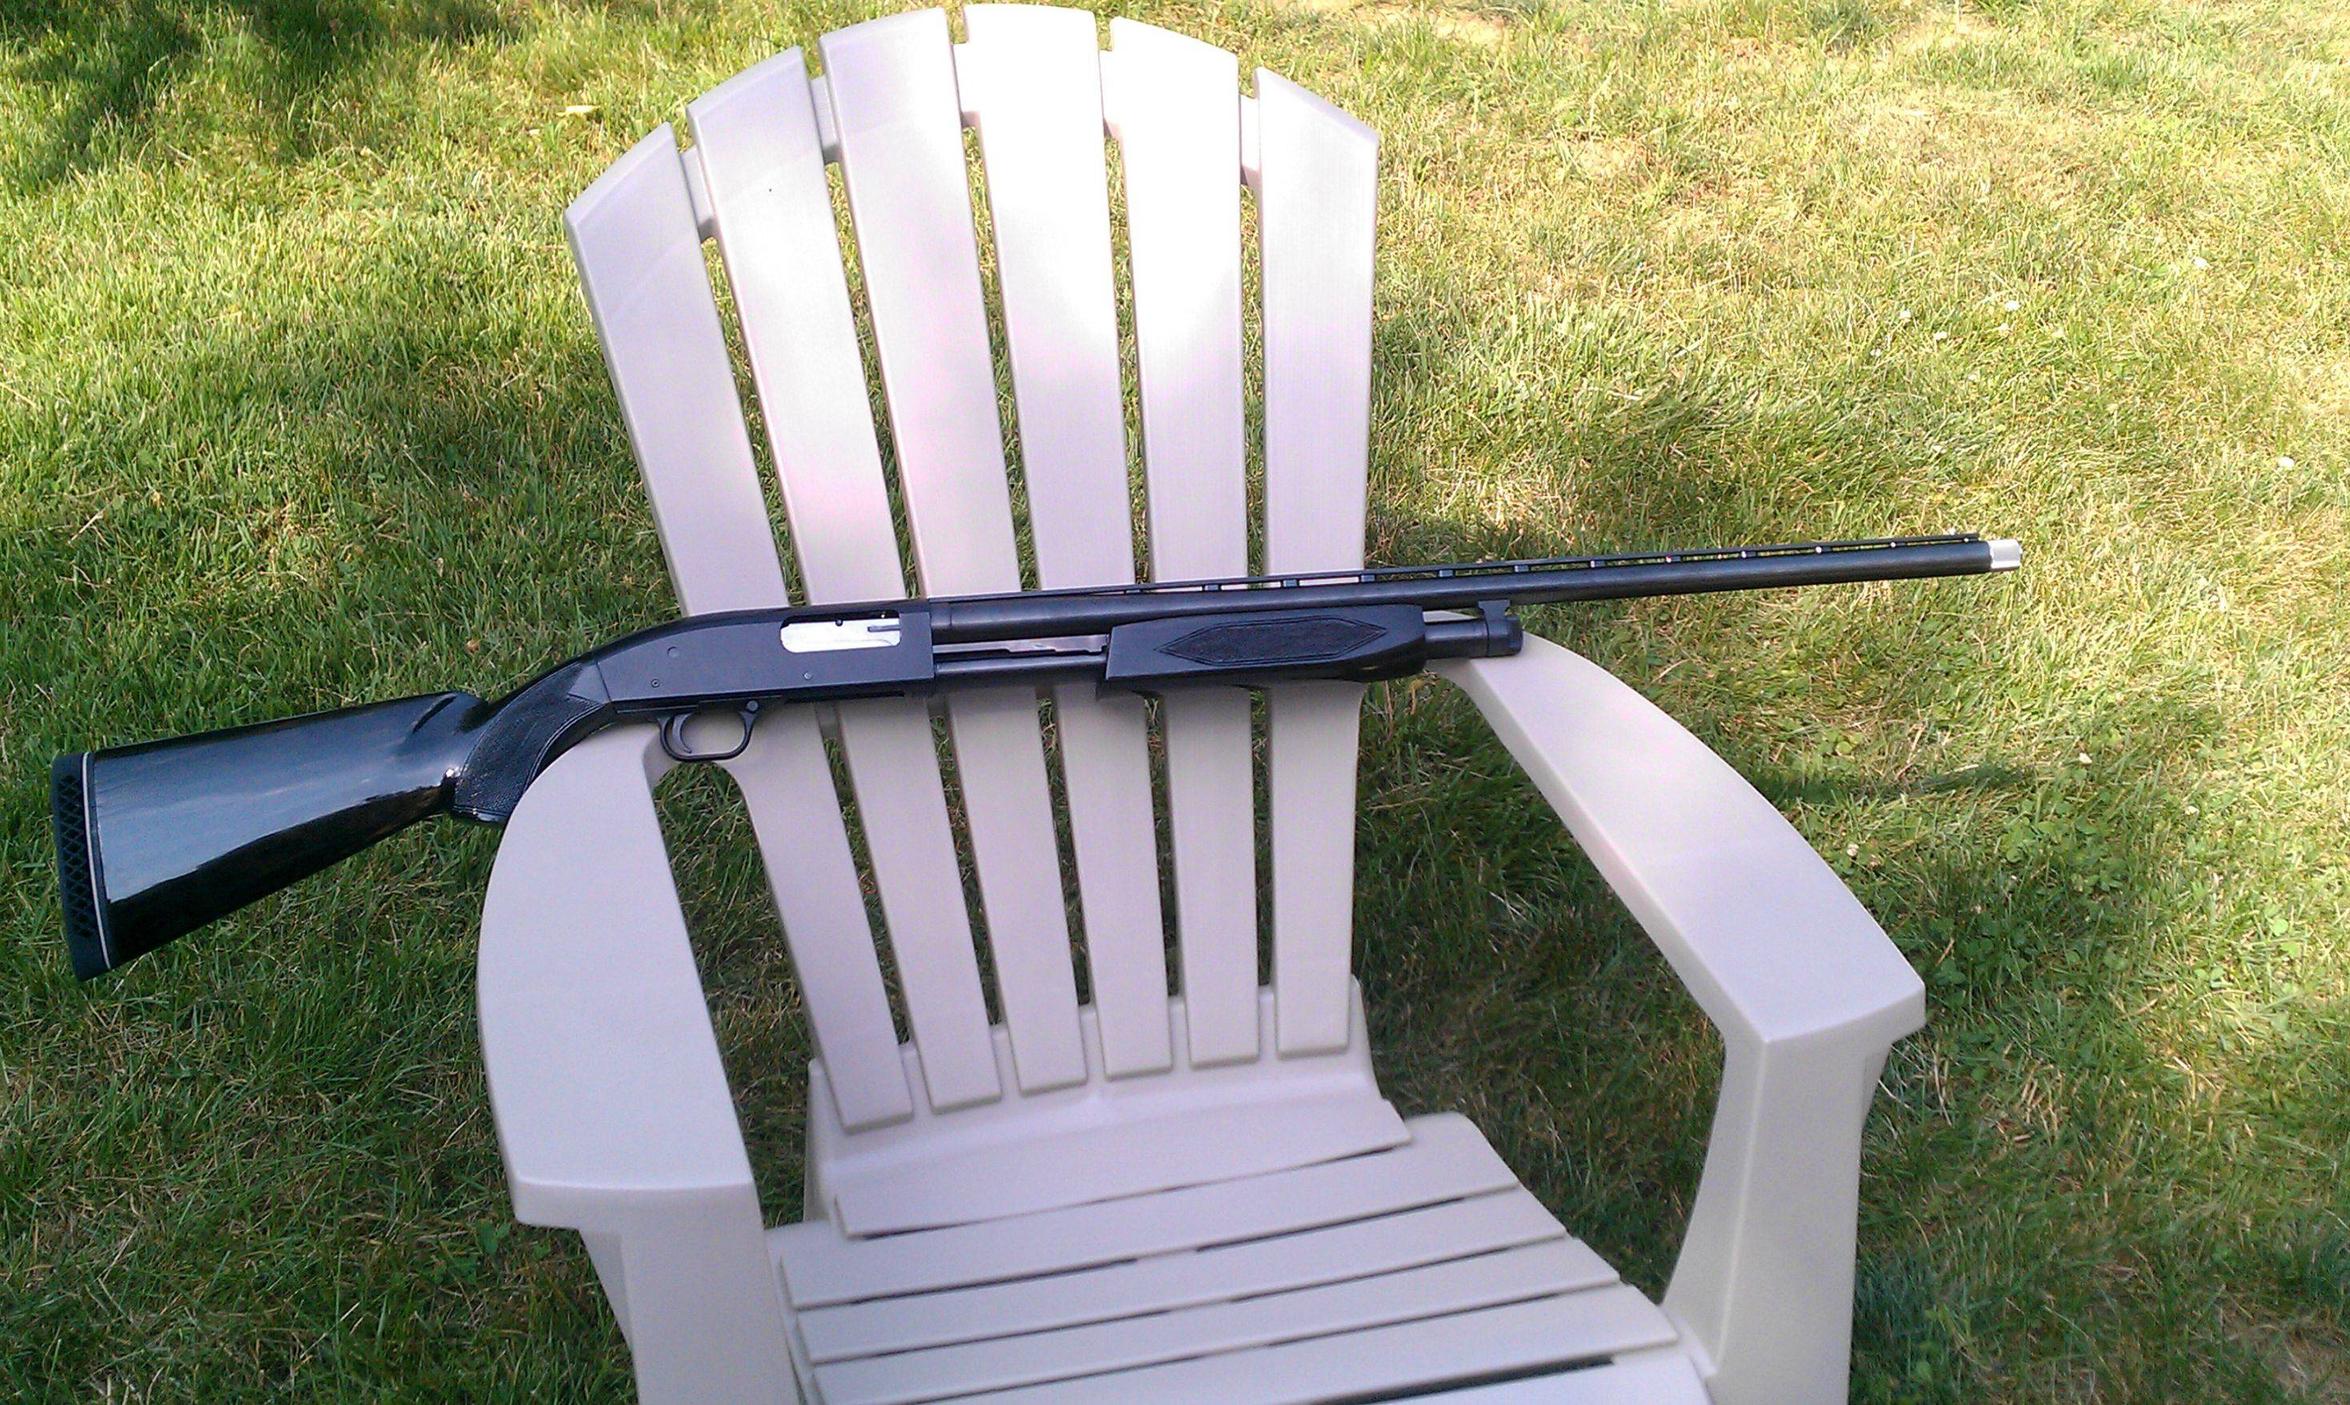
I also added a Pachmayr recoil pad and Carlson Extended Choke tube for trap shooting.

A difficult task and great learning experience.
 
This is the right area.

Holy cow...that looks sweet. Great job man. Great job!

How's it feel to do such a thing? I'll tell ya......GREAT!!!

Got any more pix of the process? I'd love to see more....
 
Also....what kind of band saw and checkering tools did you get? I just recently got a Grizzly bandsaw...and my newest purchase...a 18" Delta drillpress!
 
ripjack13 said:
Also....what kind of band saw and checkering tools did you get? I just recently got a Grizzly bandsaw...and my newest purchase...a 18" Delta drillpress!

Basic Ryobi bench-top model band saw model BS903. It stands about 36" tall and got good reviews from Home Depot.

The sander I got from Harbor Freight. 36" belt, 6" disc combo. I used it to shave the final length off of the butt-end. I needed to take an additional 1/4" off from where I cut with the band saw. I also used this sander to shape the recoil pad. I actually made a replica of the Miles Gilbert recoil pad shaping tool out of oak. It worked to perfection.

I also purchased a really heavy set of wood files. Could not have done it without this set.

I purchased the Dem Bart checkering kit (20 lpi) and added a wide border tool to the set. I must say the checkering was very difficult. Ash is a very strange wood. It is considered very hard but the grain is very coarse and this caused all manner of difficulty for me on a first-time effort.

Oh, and the finish is a complete Birchwood Casey Combo.
After the staining process, I used Birchwood Casey sealer/filler.
Then Tru Oil. About 20 coats.
Then 4f pumice.
The last step will be the rottenstone buffing.

I'll also add that the videos at MidwayUSA.com were extremely helpful with many of the steps in this overall process.
 
Holy Smokes thats awesome!!! Nice work man, very nicely done!!!
 
That is a fantastic job.

I also like how you took off extra material for a transitional grip area.

Very nice indeed.

Definately worth + rep points for that !!!!
 
Thanks JohnA.

Can you explain what you mean by a transitional grip area? Not sure what that refers to.
 
JT10 said:
Thanks JohnA.

Can you explain what you mean by a transitional grip area? Not sure what that refers to.


eJfatl.jpg


The area in the red circle....
 
I looked at that saw too. My wife actually bought me a Sears model. It wouldn't cut a straight line for anything. And I tried to adjust it using every trick in the book. So I returned it, and got a Grizzly 14" bandsaw. It's one of the best investments I have made so far.

My sander is nothing special. Flea market special. But get some good sandpaper. not the HF stuff. It'll fly off the disc.

Wood files...Great investment! I have a ton of them. When they Break (the cheapies) you can make knife blades out of them. The good ones tend to keep their edge longer as long as you don't pile stuff on them in the drawer..(and put some paper towel tubes over them as covers)

I have the 20 tpi Dem-Bart master set as well. I think they cut better than the Gunline set. I'm still practicing my checkering skills. Did you use sticky paper to make a pattern on the stock? ( i think it's called mylar) or just free hand the shape with a pen/pencil?

True oil....how is that to work with? Is it a hard finish when cured? How long between coats did you have to wait?

Thanx for letting me pick your brain....
+1 to ya too...
 
ripjack13 said:
JT10 said:
Can you explain what you mean by a transitional grip area? Not sure what that refers to.


eJfatl.jpg


The area in the red circle....


^ This

I especially like how you made that.
 
ripjack13 said:
I looked at that saw too. My wife actually bought me a Sears model. It wouldn't cut a straight line for anything. And I tried to adjust it using every trick in the book. So I returned it, and got a Grizzly 14" bandsaw. It's one of the best investments I have made so far.

My sander is nothing special. Flea market special. But get some good sandpaper. not the HF stuff. It'll fly off the disc.

Wood files...Great investment! I have a ton of them. When they Break (the cheapies) you can make knife blades out of them. The good ones tend to keep their edge longer as long as you don't pile stuff on them in the drawer..(and put some paper towel tubes over them as covers)

I have the 20 tpi Dem-Bart master set as well. I think they cut better than the Gunline set. I'm still practicing my checkering skills. Did you use sticky paper to make a pattern on the stock? ( i think it's called mylar) or just free hand the shape with a pen/pencil?

True oil....how is that to work with? Is it a hard finish when cured? How long between coats did you have to wait?

Thanx for letting me pick your brain....
+1 to ya too...

For the checkering pattern, the inner-most pattern lines, I used a thin plastic ruler to draw the pattern and also as a guide line for the first actual cut. I ran the cutter along the edge of the ruler to get these lines started. I also used the gauge that came with the checkering kit to determine the angle of the lines.

The Tru-oil is actually really easy to use. The first few coats can go on fairly thick as the wood absorbed a lot of oil. Later, you must use very very thin coats with your fingers or you will get run lines and drips. I waited about a day between coats and sanded with various grades of sandpaper depending on how much dripping I needed to deal with from the previous coat. Anywhere from 400 to 1000 grit. I also used steel wool but found that to be annoying because it created steel wool dust that was a pain in the ass to clean off before I could start the next coat. I waited about a week before I used the 4f pumice. Not sure when I'll do the rottenstone or I may even use the 4f again and apply more coats of oil.

Thank you all for the kind feedback. Feel free to ask additional questions. I know I went crazy before I started to get as much info as I could.

I appreciate your interest in this!!
 
raven01750 said:
Great work JT. I'll bet your as proud as a puppy with his first poop over that one! :lol:

Paul


Raven01750,

I know its still, "just a Maverick" but yes, I am proud of it. I know there are areas where I could have done better. So - all the better for the next one that I make from some real Walnut for the classic look. But I needed to see what I could do. And now I have some (very little - I know) experience.

Where I'm from, shotguns and trapshooting are not so common. But for now, and my first firearm (and I'm no youngster) I much prefer to handle this now, much more than the synthetic stuff.
Thanks!
 
There's no such thing as "just a Maverick" around here.

If you like it, we love it. Shoot it proudly and often...
 
Back
Top