• Mossberg Owners is in the process of upgrading the software. Please bear with us while we transition to the new look and new upgraded software.

My DIY Smoker project

diyguy

.270 WIN
My last homemade smoker lasted 15 years. It was a converted chest freezer I tipped on its side and it worked great for hot smoking but eventually rusted through because of the heat and moisture and salt inherent to the smoking process.
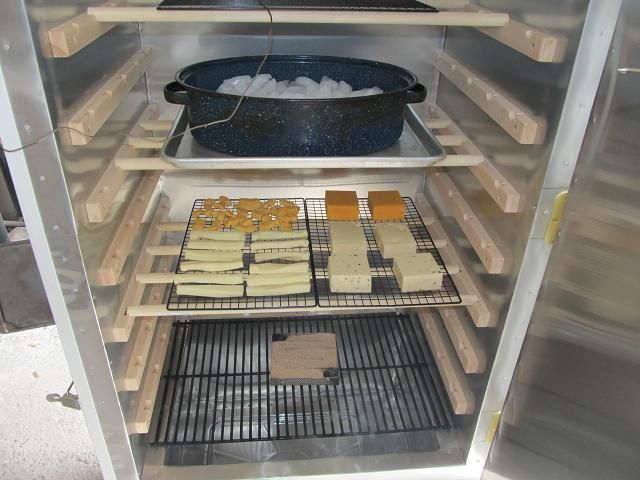
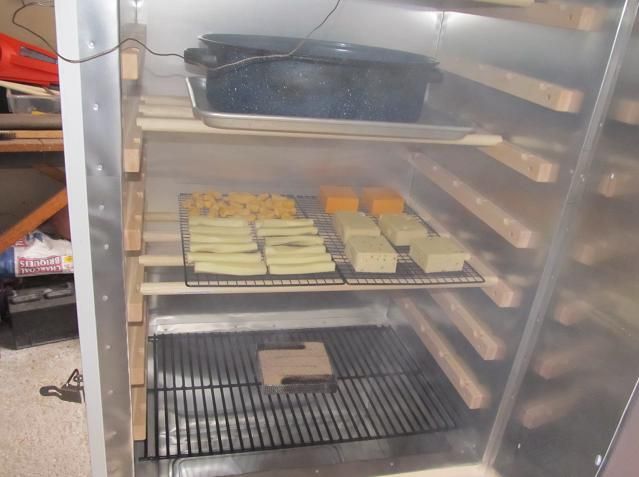
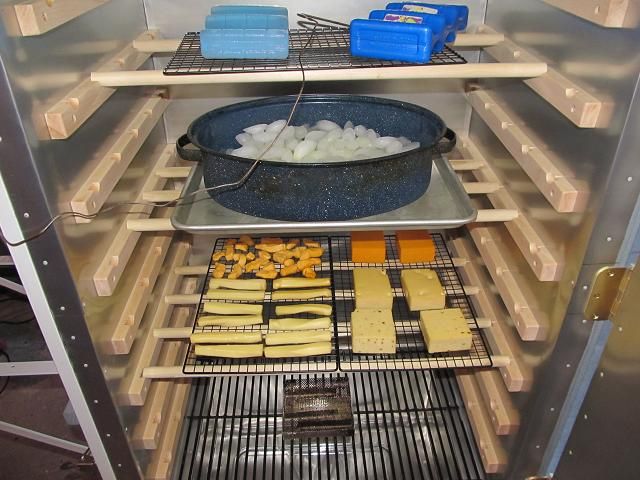
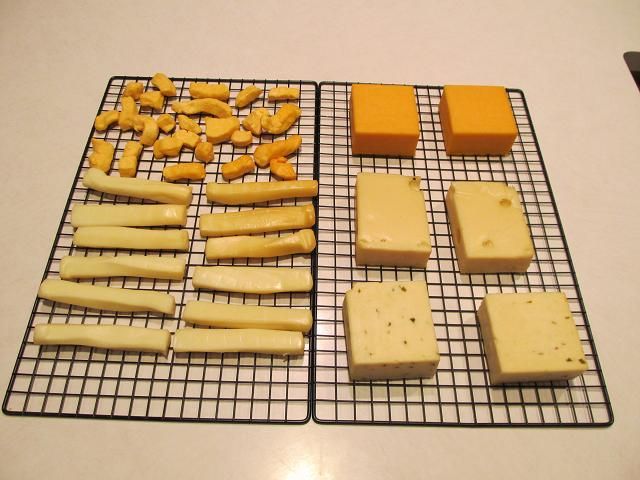
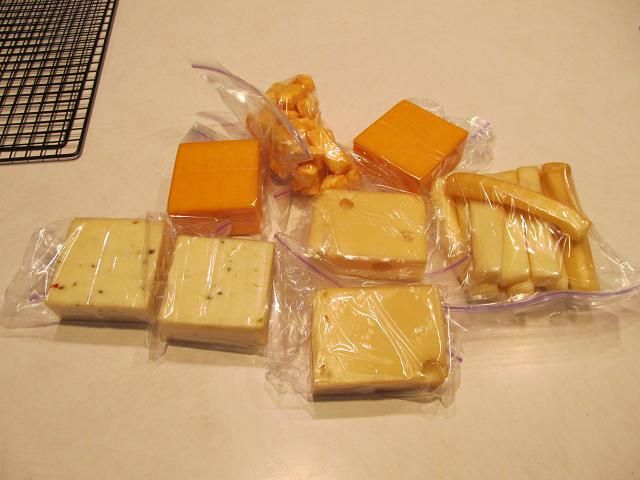
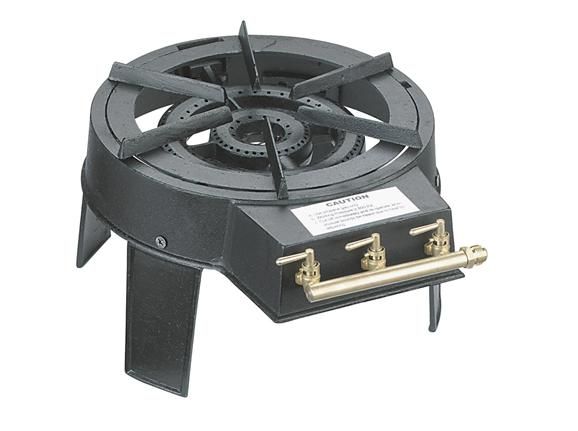
Being that I like to build things, I began building a new smoker from scratch. I searched online for big electric smokers to get a feel for what’s available and to find something to pattern mine after (never been ashamed to steal a good idea) Most of the smokers were too small for what I want but none of the big commercial units allowed for cold smoking. Part of the reason I want a new smoker is so I can smoke things like cheese, nuts, lox and other things that are cold smoked. Also the big commercial units cost around $4,150. I think the price is fair considering what you get but I would rather make my own.
This is an example of what out there and the size of the smoker I want to make
http://www.cookshack.com/store/Smokers_3/SmartSmoker-Model-SM160
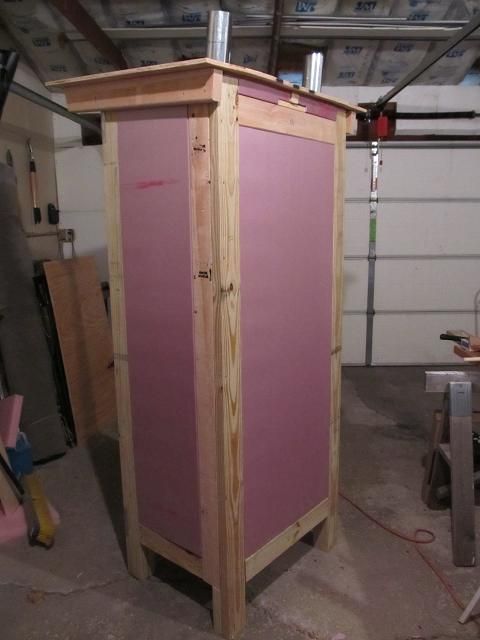
I like it but it cant be used to cold smoke and it has too few racks. My smoker will sit outside year round so it has to be weatherproof. Since most of the meat smoking I do is in the winter in temps below freezing, I will insulate the smoker with 1 ½ thick foam board. I will use treated lumber for the legs since its going to sit outside year round. I will make it for hot smoking but will build a cold smoking adapter. I want ten racks and the extra height for smoking hot sticks and bacon sides. The inside smoking area I’m shooting for is 25” wide, 20” deep and 48” tall and will be lined with aliminum. Its going to have dual exhaust, and T-111 exterior siding and will be about 7 feet tall. The inner walls are going to be ½ inch thick plywood.
THe plan is to build the smoker from wood and line it with metal.
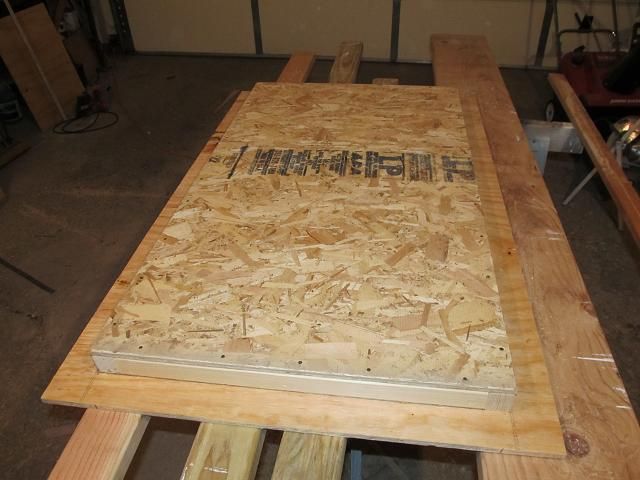
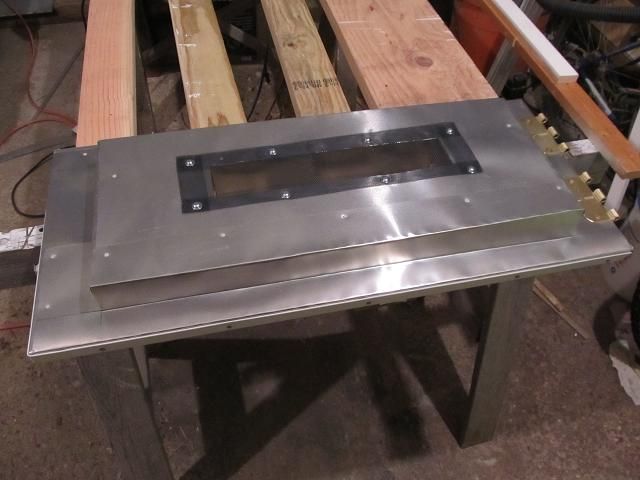
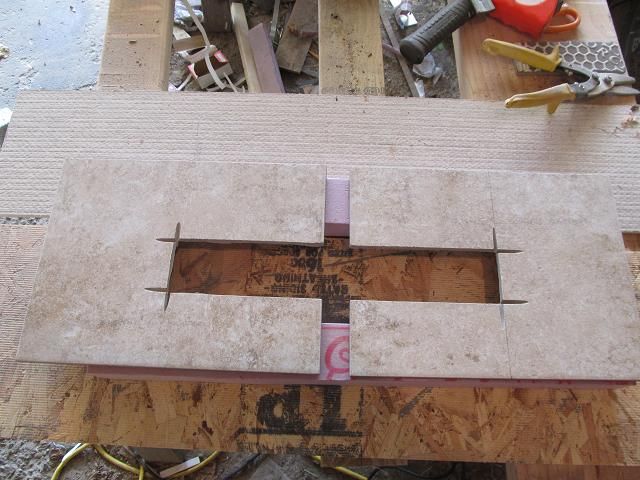
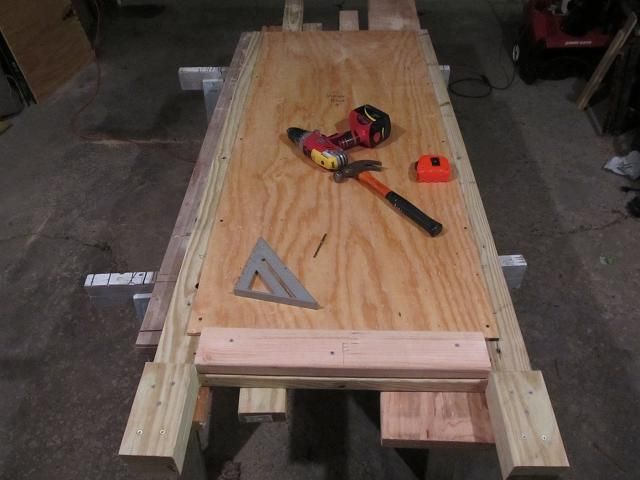
The back wall
smoker_1.jpg

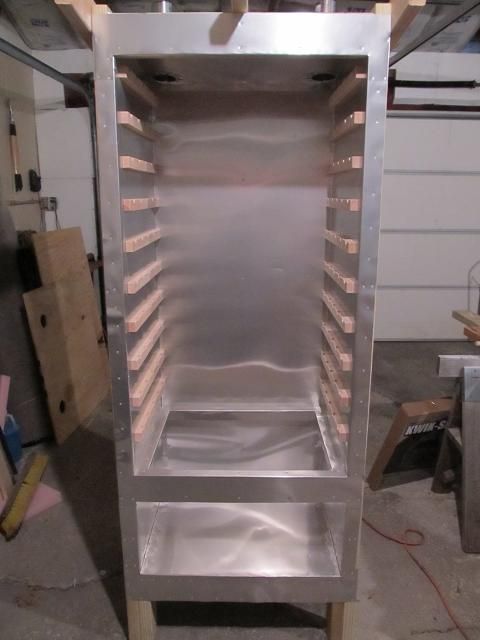
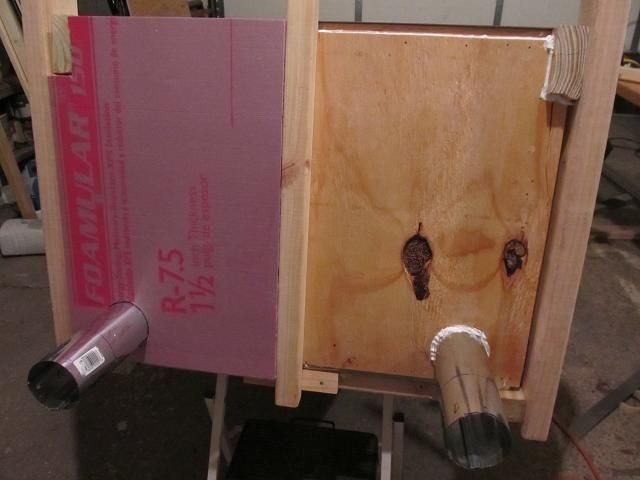
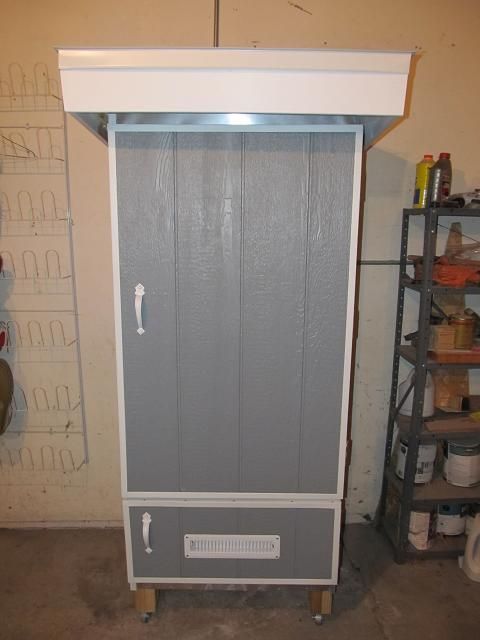
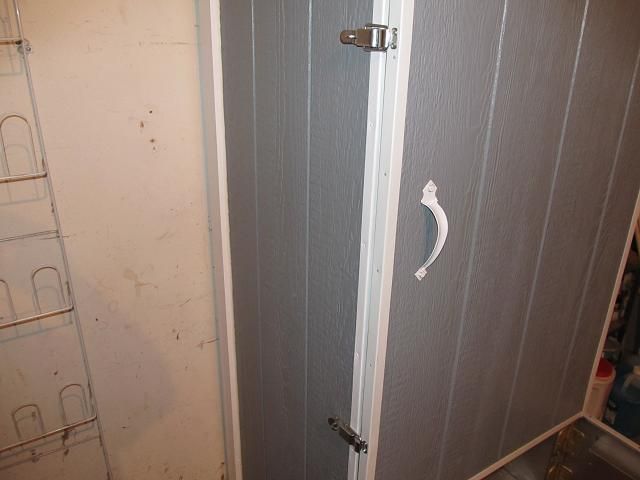
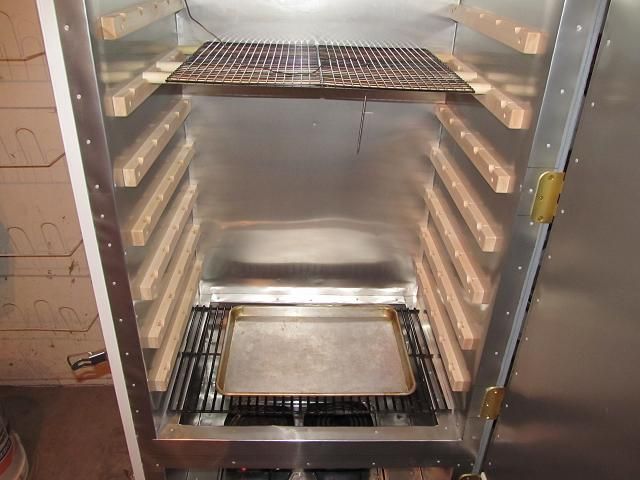
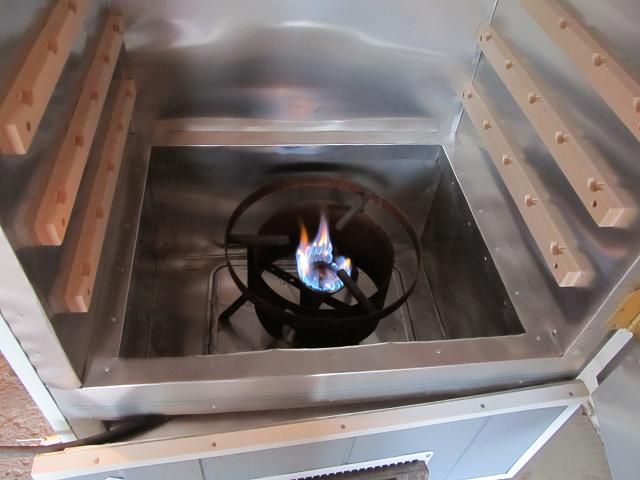
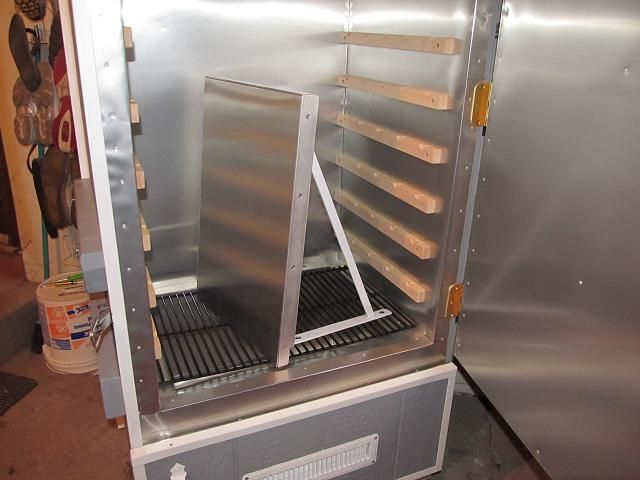
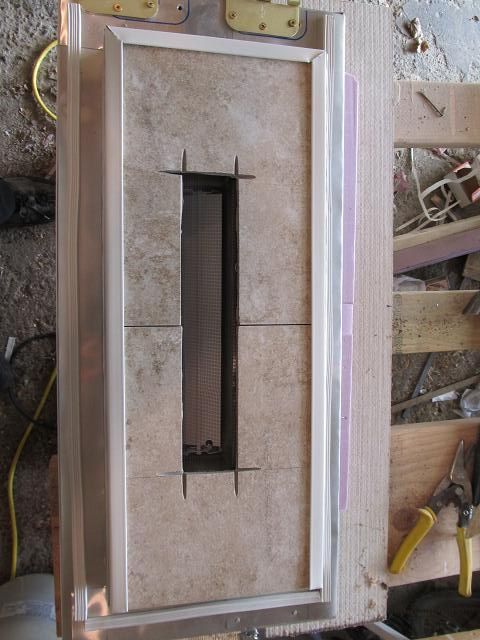
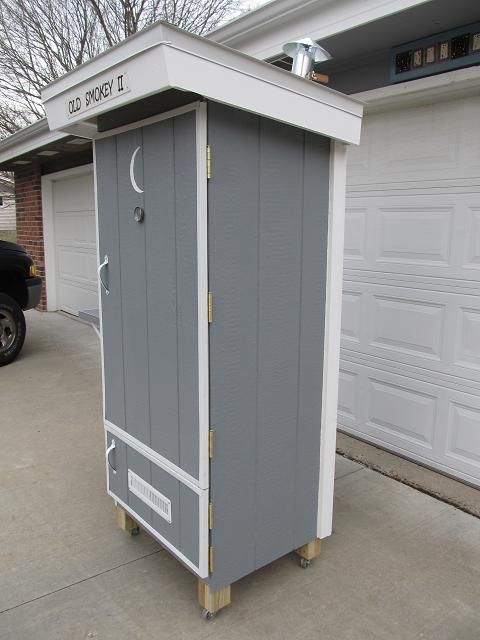
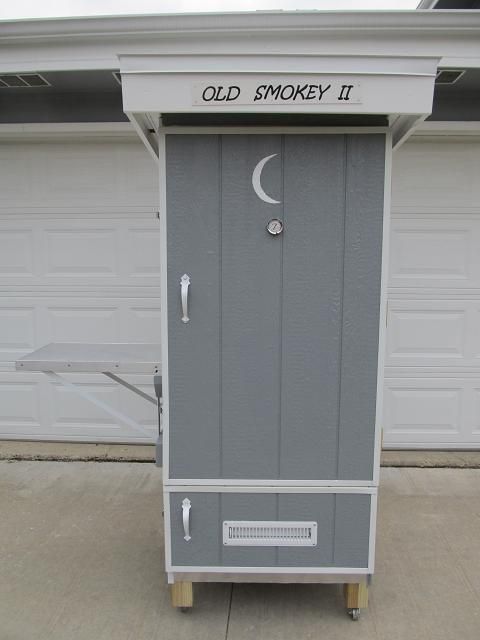
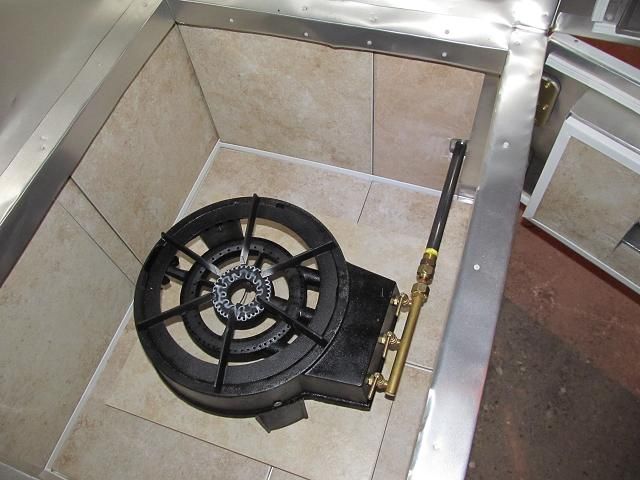
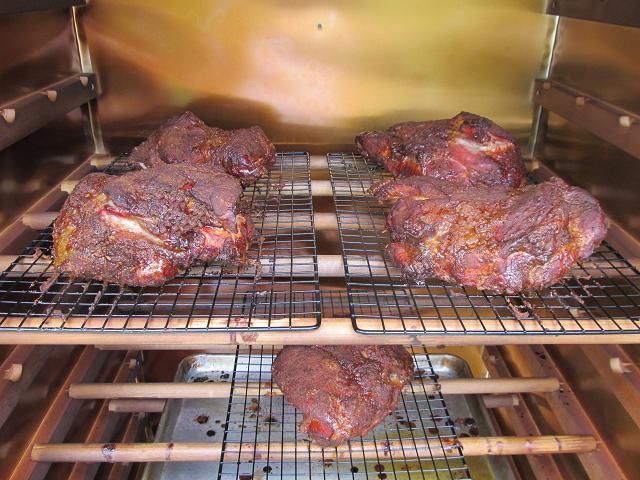
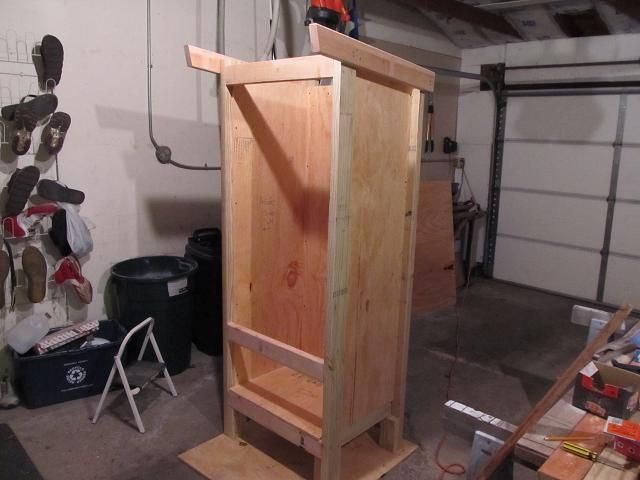
Fast forward to the completion of the structure. The upper opening is the smoking chamber. The lower is where the electric heating elements and pan filled with wood will go. each compartment will have its own door so I can add wood and adjust the heat without opening the upper area and letting all the heat out. The recessed areas are 1 ½ inches deep and will be filled with pink foam board (R-7.5).

smoker_2.jpg


smoker_3.jpg

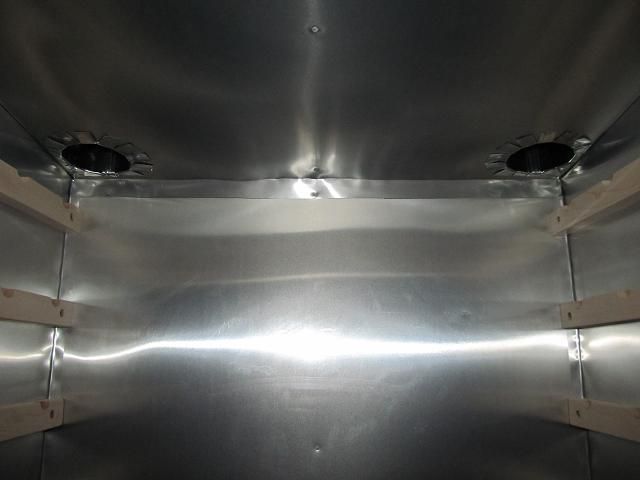
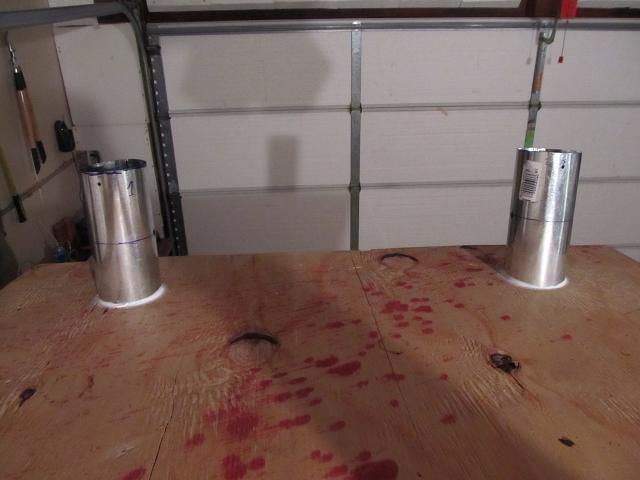
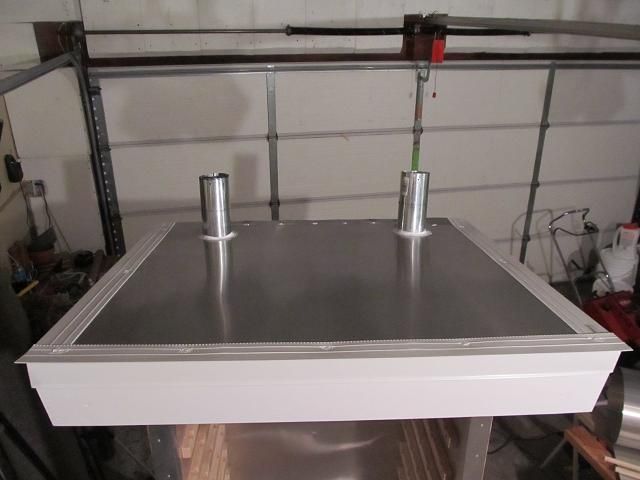
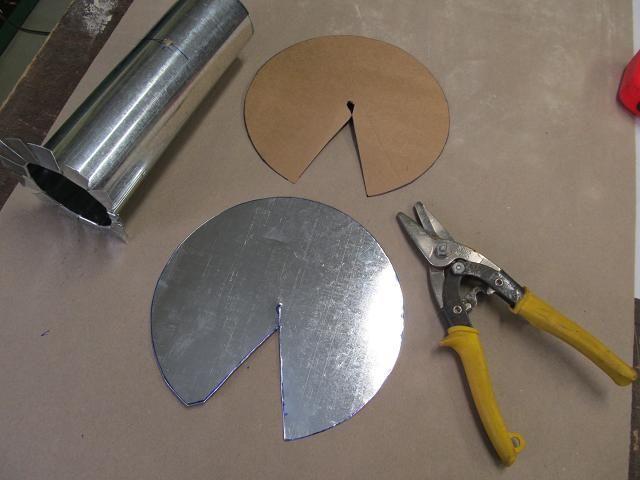
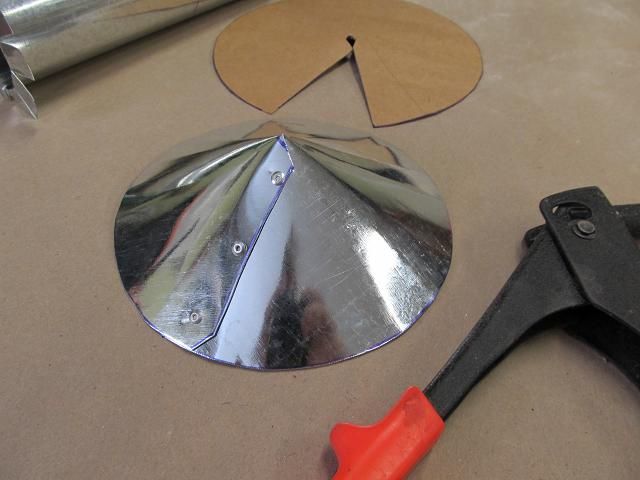
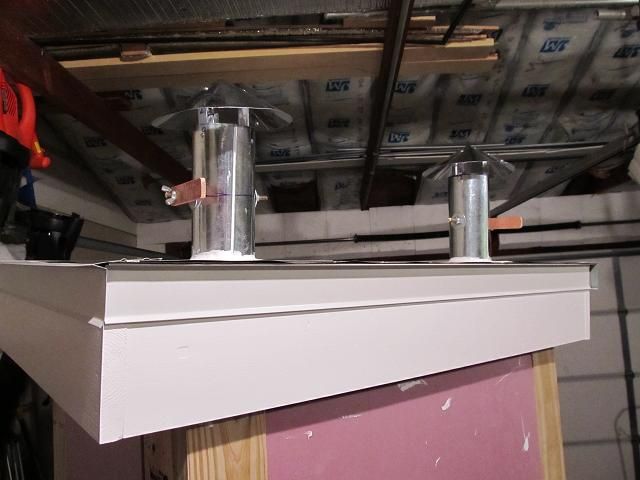
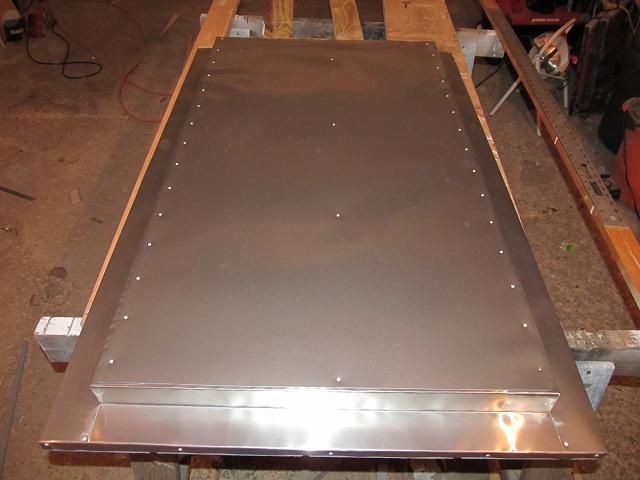
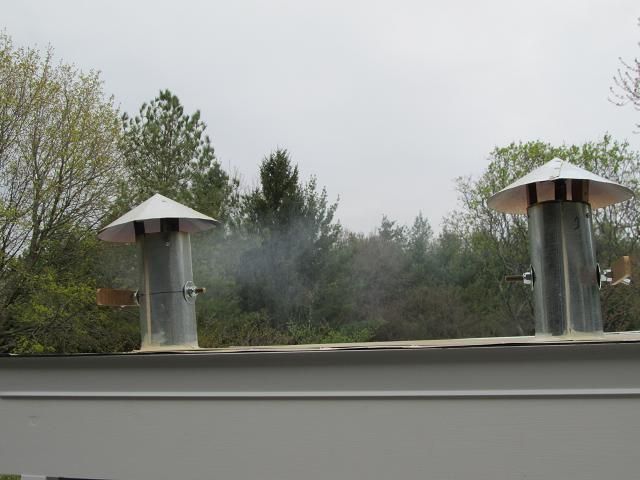
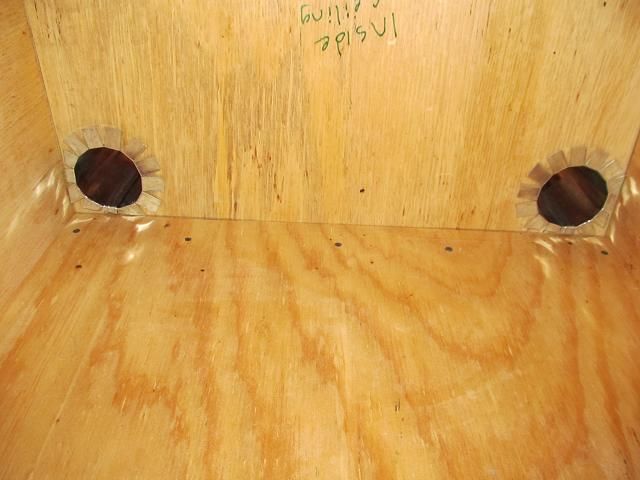
Here is the inner ceiling. I’m using 3 inch galvanized for the smoke stacks. I cut and bent tabs all the way around to attach it to the wood and to have a good seal.
smoker_4.jpg

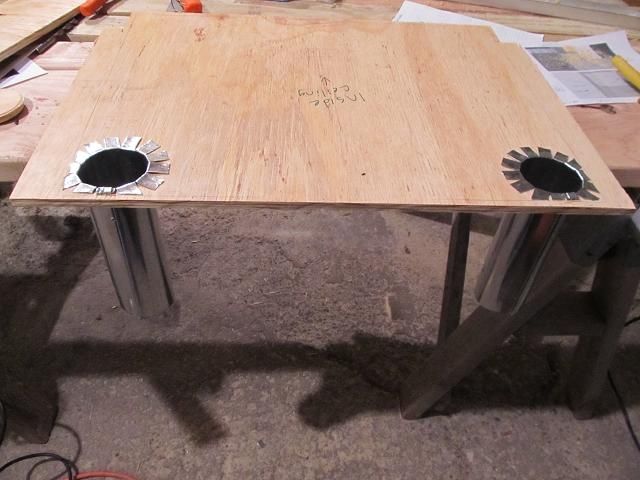
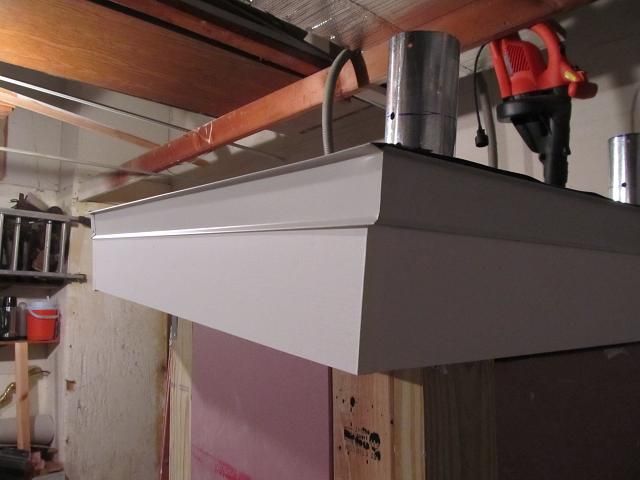
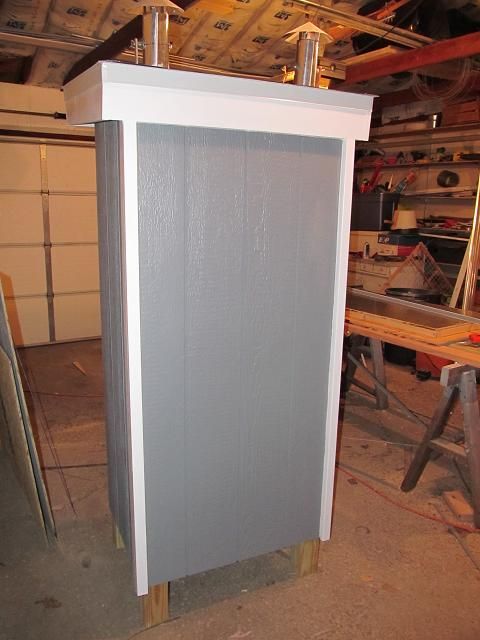
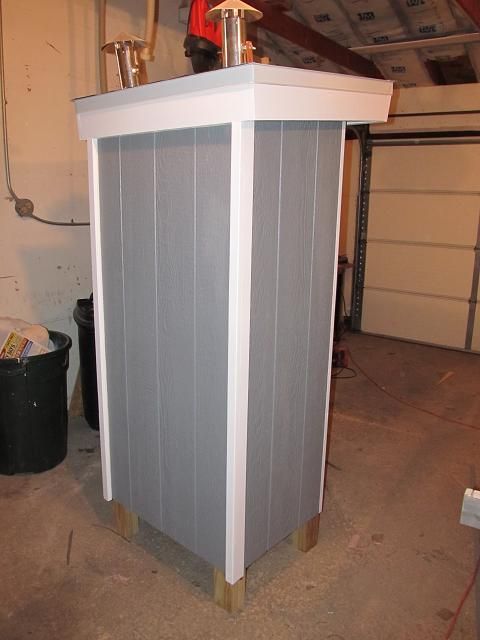
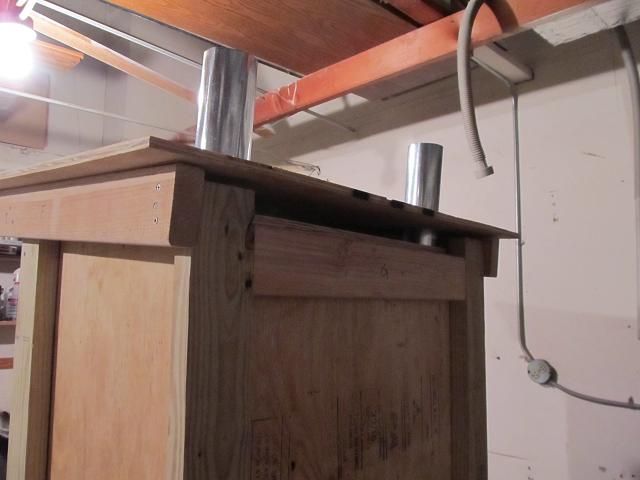
Testing to see if it fits.
smoker_5.jpg

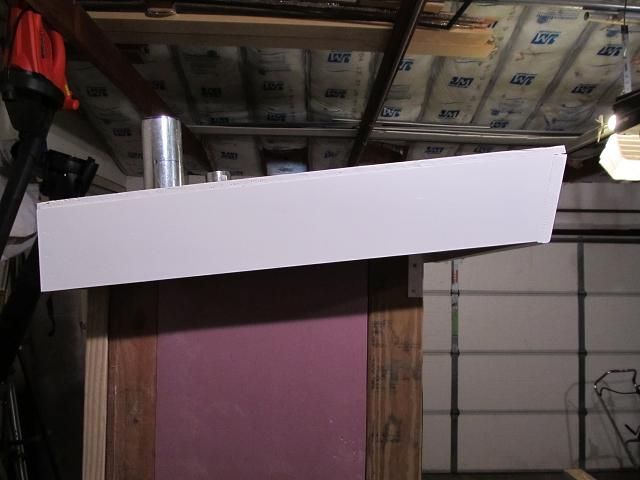
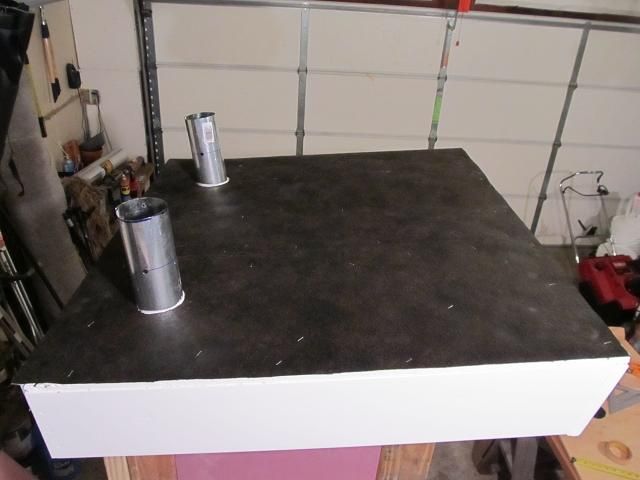
The space between the inner ceiling and the outer roof will be filled with insulation board. This was to test the fit to make sure I had the smoke stack holes in the right place.
smoker_6.jpg

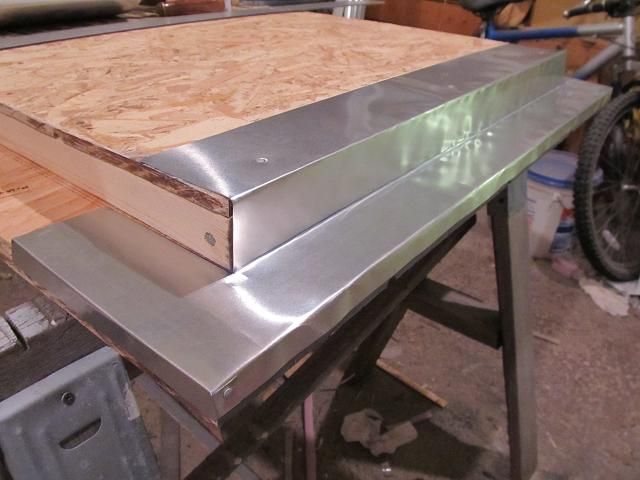
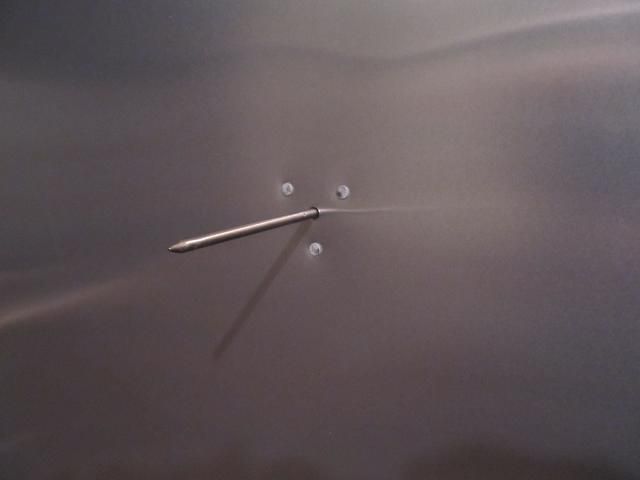
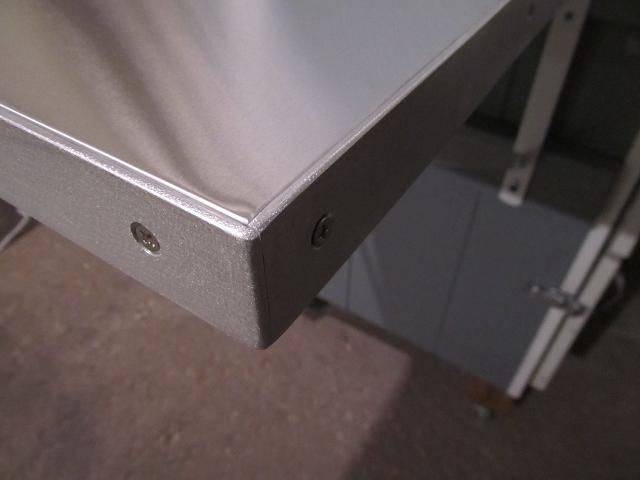
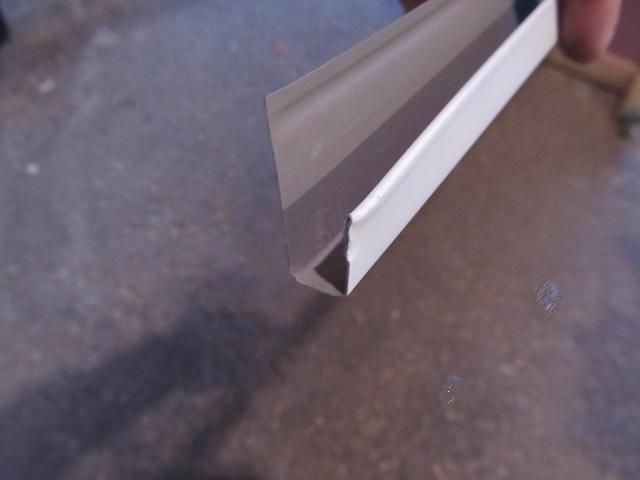
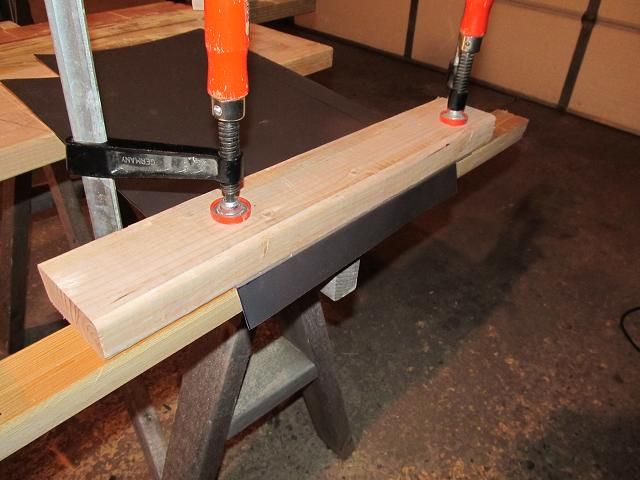
I don’t have a sheet metal break for making the bends in the aluminum lining so I improvised.
smoker_8.jpg

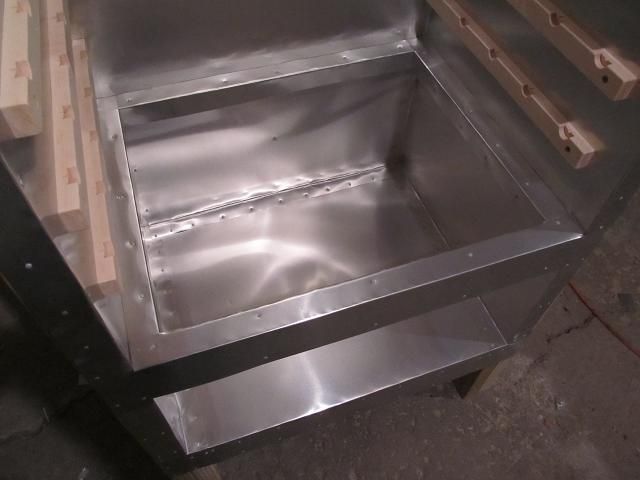
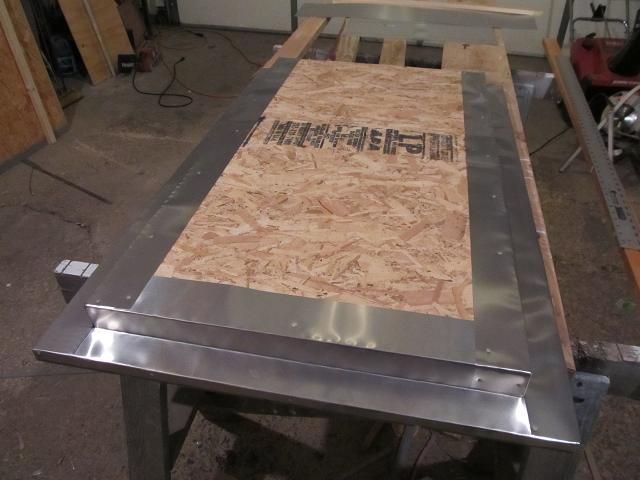
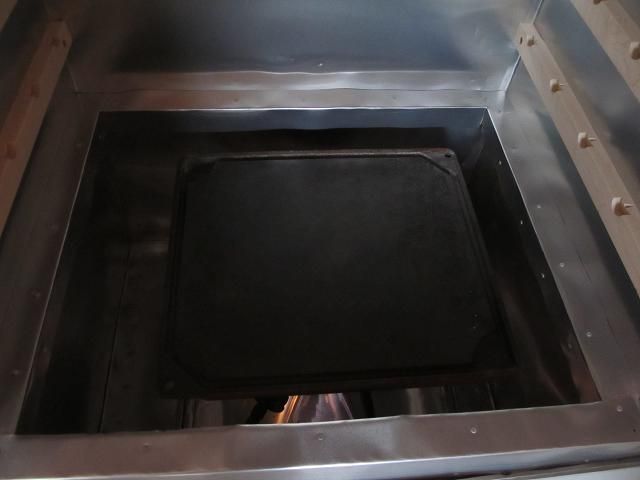
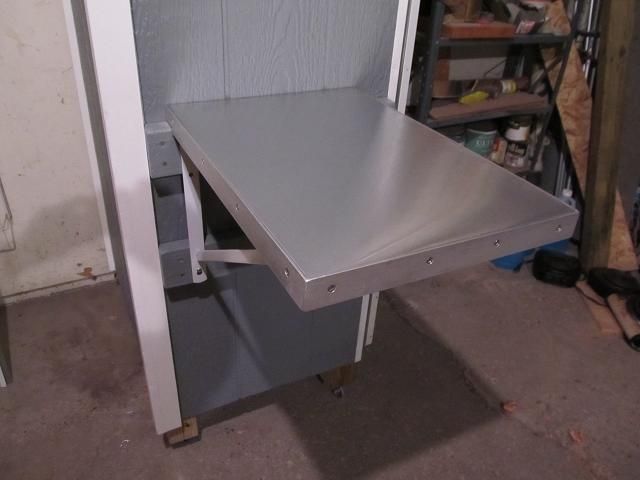
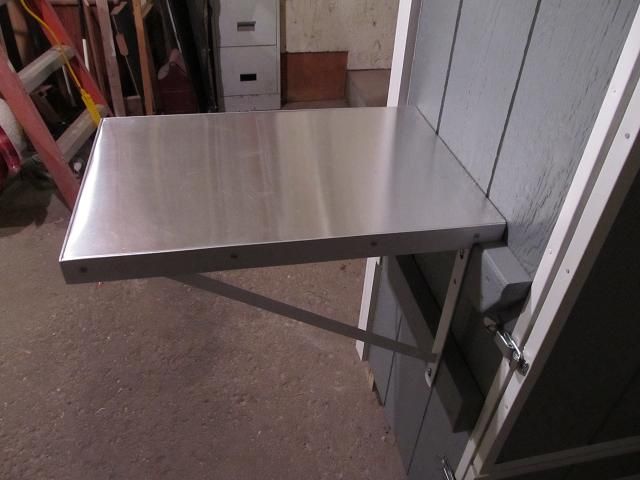
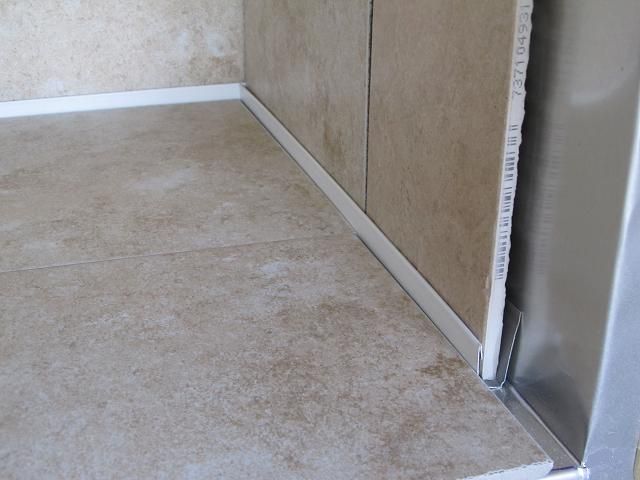
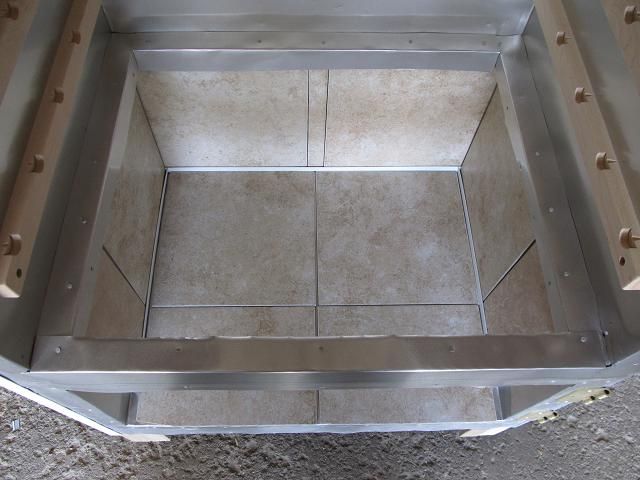
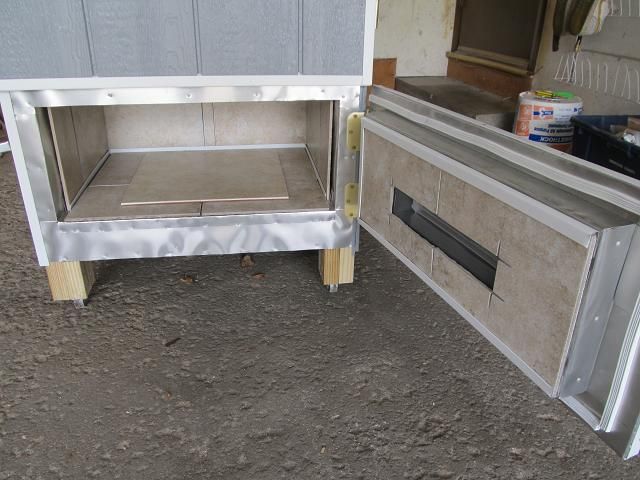
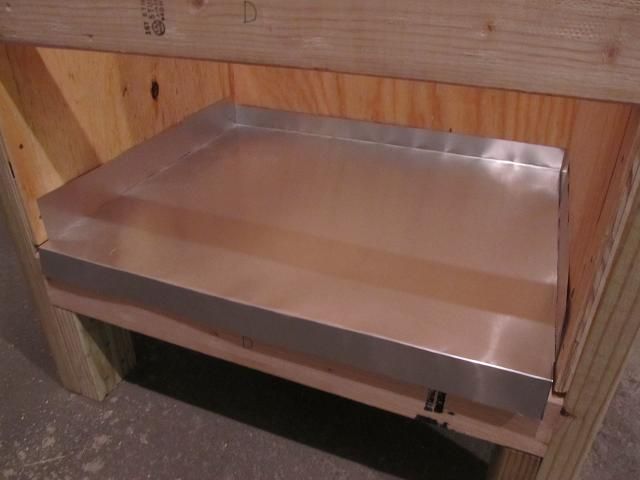
The floor piece being tested for proper fit. My plan is to wrap all the exposed wood with aluminum. I will use aluminum nails to hold the aluminum lining in place to avoid rust.
smoker_7.jpg

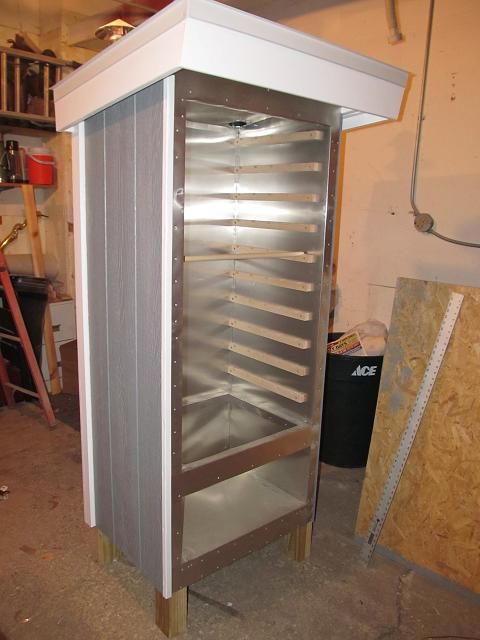
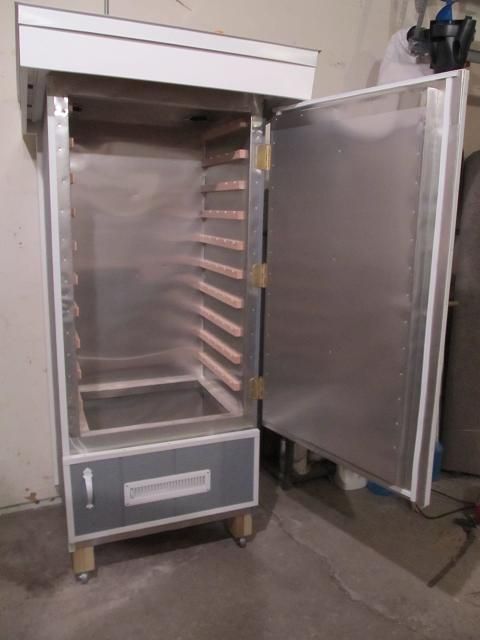
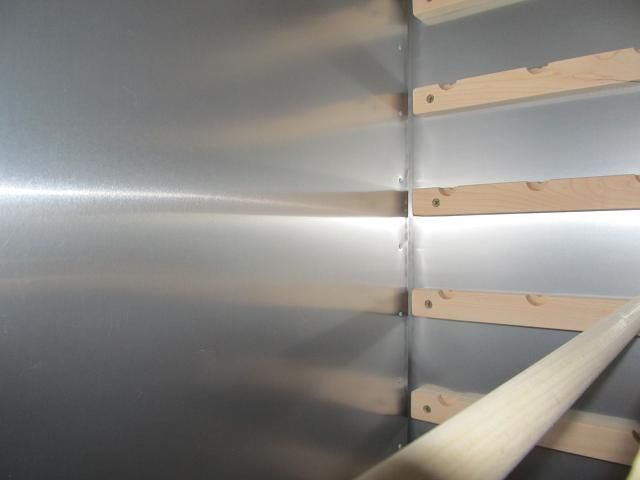
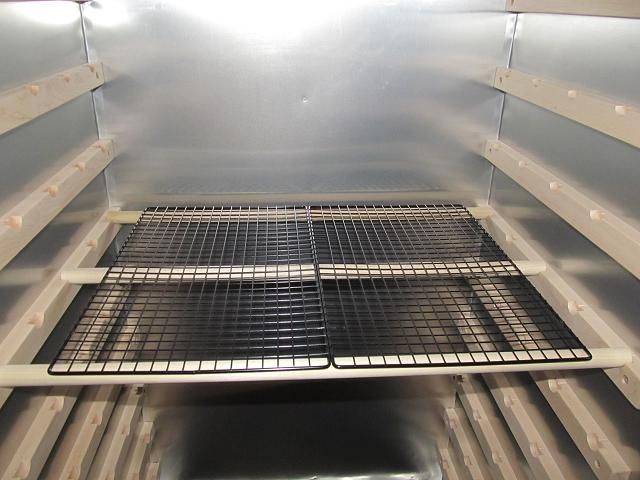
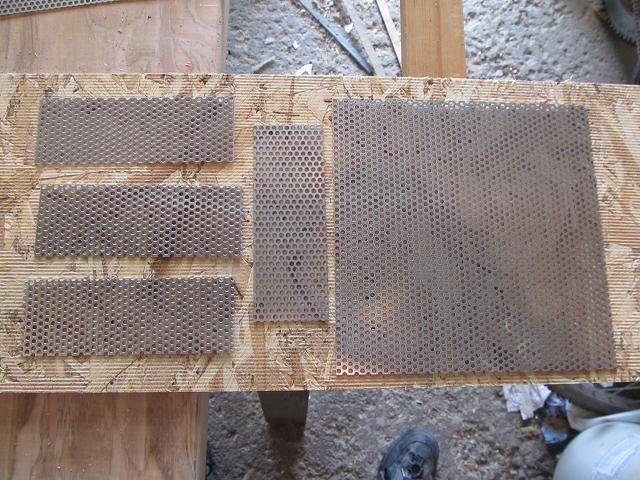
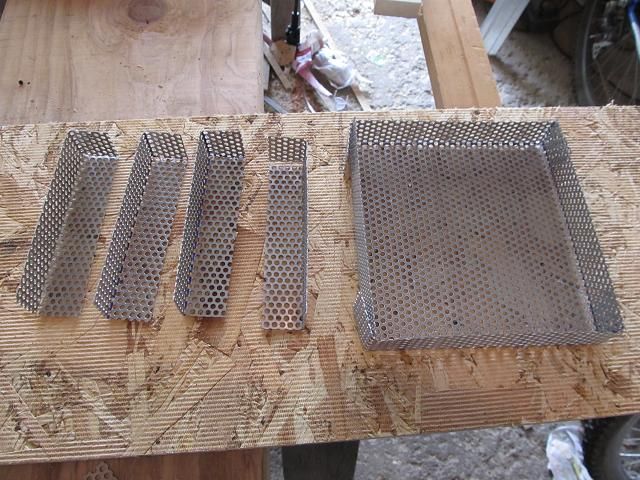
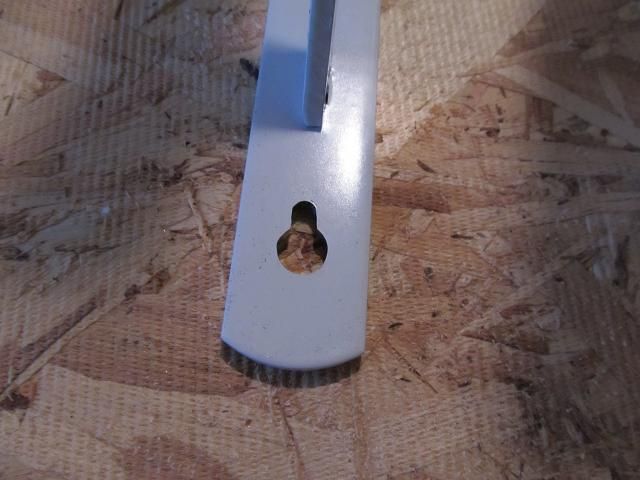
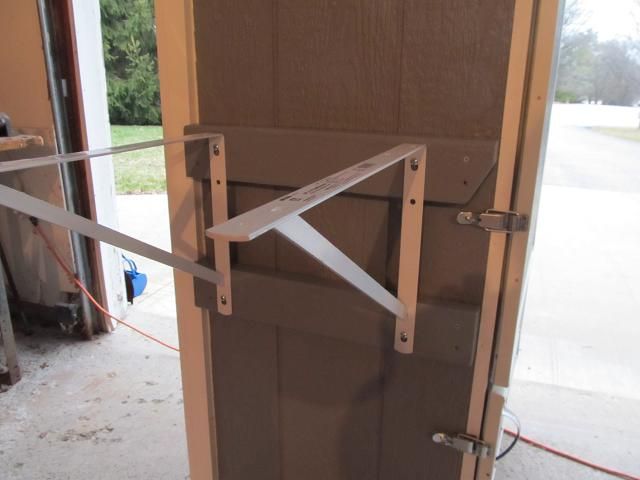
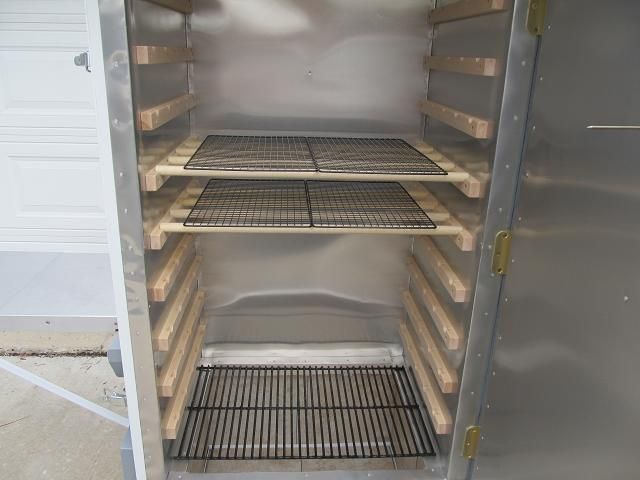
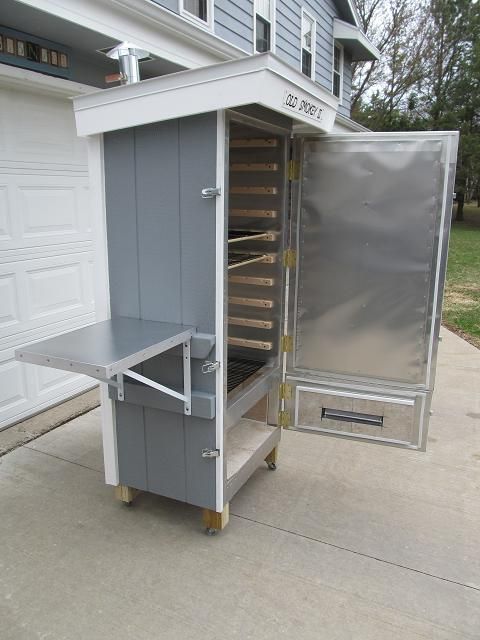
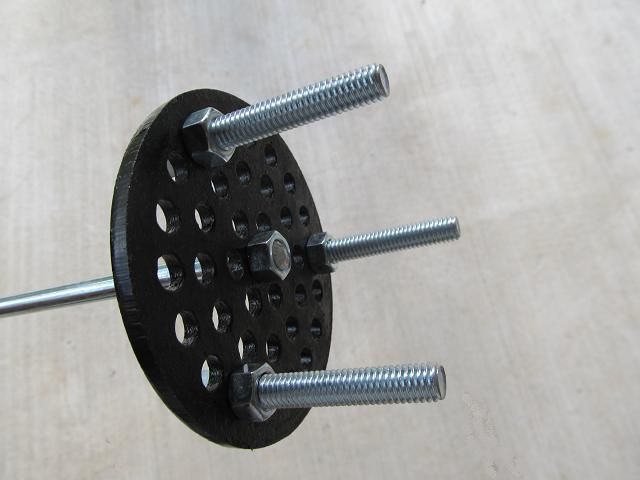
The racks for smoking will be supported by 3/4 inch poplar dowels. They will be supported by the hard maple strips on each side. I drilled a 7/8 inch hole about halfway through the maple and then split each one on my table saw. Each strip will be able to support 5 dowels.
smoker_9.jpg

smoker_91.jpg

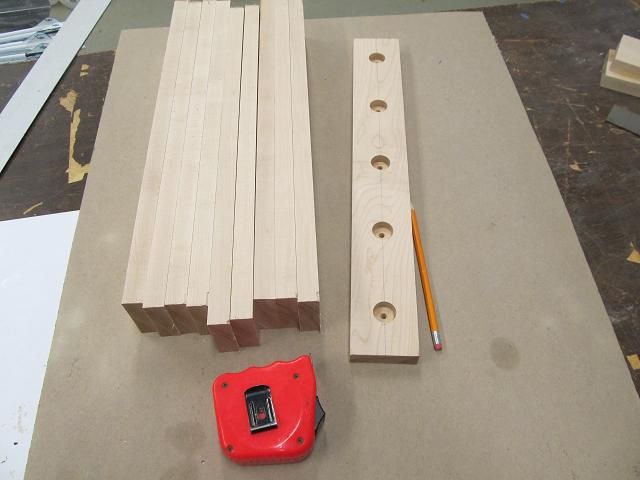
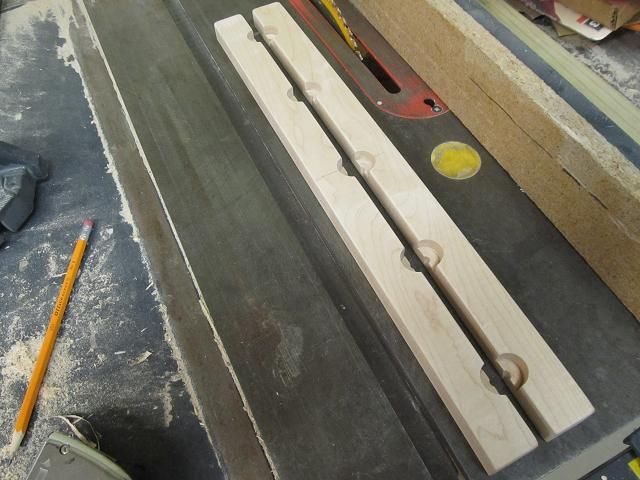
Once I finish lining the entire inside with aluminum, I will attach the maple rack supports.
 
I got the entire inside wrapped in aluminum and the maple rack supports installed. It was a bigger pain in the butt than I thought it would be.
smoker_92.jpg


smoker_97.jpg


smoker_94.jpg

smoker_96.jpg


With the interior done I focused on the outside. First the insulation. R 7.5 Pink foam board 1 1/2 thick.
smoker_991.jpg

I caulked around the smoke stacks before insulating. I don’t want any leaks.
smoker_98.jpg

Then the roof went on and more caulk.
smoker_99.jpg


Next was the fascia and some paint.

smoker_992.jpg

Then some tar paper.
smoker_993.jpg

Then the metal roof and drip edge and some white silicone caulk over the aluminum nail heads to prevent any leaks.

Normally drip edge goes on before the tar paper and is covered by asphalt shingles that cover the nails holding the drip edge. The thin metal is not as robust as shingles so I used the drip edge to hold the thin roof metal down and to cover all the nails holding it in place. I put a large bead of silicone under each piece of drip edge before nailing it in place.

smoker_994.jpg

smoker_995.jpg
 
Since I don’t want rain and snow getting into the smoke stacks and since I cant find any caps for 3 inch ducting I made some from galvanized sheet.
smoker_996.jpg

The rolled it and riveted the joint.
smoker_997.jpg

Since I also can't find inline butterfly dampers for 3 inch ducting, I made my own from brass threaded rod and stainless hardware (no rust). It was pretty much a huge pain in the butt but it worked out ok.
smoker_998.jpg

smoker_999.jpg

smoker_9991.jpg

smoker_9992.jpg

smoker_9993.jpg

I started cutting the pieces of siding and painting the exterior corner trim. I hope to get that installed tomorrow so I can make the doors.

Got the siding on and the corner trim.
smoker_9994.jpg

smoker_9995.jpg

smoker_9996.jpg
 
Time to build a door. The face of the door will be two layers. 1. is half inch plywood and 2. is the same T-111 siding I've been using. It will also be insulated framed with 1 1/2 x 1 1/2 lumber.
smoker_9997.jpg

Then another layer pf plywood to support the metal lining.
smoker_9998.jpg

I start the aluminum at the bottom and overlap all the joints like shingles on a roof so no moisture can get to the wood.
smoker_9999.jpg

Then the sides.
smoker_99991.jpg

Then the face. (all metal is held in place with aluminum nails)
smoker_99992.jpg

The top piece is the same as the bottom except it laps over all the other pieces.
With the top door completed, I began the bottom door. This is where I will load wood chips and adjust the heat without opening the big door and losing all the heat I built up. In order to have proper venting and air flow to the smoke stacks, I need a fresh air intake. I need to prevent unwanted intruders from entering the smoker (mice, wasps, etc) so I folded over the edges of metal window screen material and screwed to the inside face of the door and I added a set of hinges.
smoker_99993.jpg

The front of the door as a floor register vent that I can open and close to adjust the air flow. The white metal around the outside edge of the door is aluminum angle use for suspended ceilings. It was just the right size and color and material for this job. It covers the cut edge of the siding and the edge of the aluminum I wrapped the door with.
smoker_99994.jpg

Both doors get a weather-strip seal all around.
smoker_99996.jpg

To make moving the smoker easier, I added steel casters. I don’t want rubber casters that will take a flat spot after sitting plus the hard rubber caster will eventually rot from exposure to the outside.
smoker_99995.jpg

Then it was time to hang the doors.
smoker_99997.jpg

smoker_99999.jpg

Just for grins (and because I would not be able to see myself) I set the timer on the camera and placed it inside the smoker to see how the door fits and looks from the inside. All seems well.
smoker_99998.jpg
 
I added over-center catches to draw the door tight against the seal. The upper door gets two and the lower door gets one.
smoker_999991.jpg

smoker_999992.jpg

Then drilled a hole for a heat probe. I will have one in the door and another digital remote version.
smoker_999993.jpg

smoker_999994.jpg

Then I fired it up using two electric hot plates rated for 1000 watts each. I put a rack in to support the probe.
smoker_999995.jpg

smoker_999996.jpg

The temp in my garage was 55F. It took over an hour to heat the inside to over 200F.
smoker_999997.jpg

Then I took the legs off my propane turkey cooker and placed it inside to see how propane would fair.
smoker_999998.jpg

And placed a heavy cast iron griddle used on Scout outings over the flame to act as a dissipater.
smoker_999999.jpg

In two minutes I was over 230F and I kept having to turn the burner down till it was just a faint flicker of a flame. This is no longer an electric smoker project. It is now a propane smoker project. This burner is rated at 45,000 BTU. I will shop for a lower rated burner and make accommodations for the hose to leave the smoker.

After learning of a product called the “A-maze-n-smoker “ I have also scrapped the idea of an external smoke box and flexible dryer vent hose to deliver smoke for cold smoking things like cheese. After reading about the product, I made a few of my own. It’s a perforated metal box that is 6 x 6 inches with a maze if metal strips that is filled with sawdust and let to smolder in the smoke house without generating heat. It’s a freaking awesome thing.
Here are the parts I cut out before assembly. I used aluminum.
smoker_9999991.jpg

Then after cutting and bending.
smoker_9999992.jpg

Then riveted together.
smoker_9999993.jpg

The rivets act as legs to space it away from whatever it sits on so air can flow under it.
smoker_9999994.jpg

Then I filled it with sawdust and lit each end through the hole I cut. The store bought version claims it will smoke for 8 hours if lit on only one end. I lit mine on both ends just to see how it would work. It produced a lot of smoke. I lit it at 5:30 pm.
smoker_9999995.jpg

Here it is at 6:30
smoker_9999996.jpg

7:30
smoker_9999997.jpg

8:30
smoker_9999998.jpg

When it was burned out, I knocked it upside down and rinsed it with water.
smoker_9999999.jpg

I’m really impressed by this thing. He sells it for $32. I will make a few more for myself. If you’re in the market for a very cool cold smoking, smoke generator, I would highly recommend checking his product out at.
http://www.amazenproducts.com/SearchResults.asp?Cat=12
 
Im adding a side table to the smoker because when I carry racks of things to smoke, out to smoker, I need my hands free to open the door. The table will make it easier. I want the table removable without tools so I can store it inside the smoker when I’m not using it. Because I’m working on the outside of the smoker and it’s a nice day, I bought several varieties of local made cheese to cold smoke (it was 55 degrees this afternoon)
But first I needed some sawdust. I cut down a sugar maple 2 years ago so I passed a piece of it through my table saw until I had enough sawdust to smoke the cheese.
smoker_99999991.jpg

Then filled the smoke pan.
smoker_99999992.jpg

I took a big pan of ice out to the smoker about an hour before I wanted to use it. Since this is essentially a big, insulated cooler, the ice dropped the temp inside from 55 to 44. Then I cut the cheese. I’m smoking Cheddar, Swiss, Pepper Jack, String cheese and Cheese curds.
smoker_99999993.jpg


Then into the smoker with the sawdust pan.
smoker_99999994.jpg


While working on the side table I peeked at the one hour mark. I can't believe how much smoke that little pan makes. That thing rocks!
smoker_99999995.jpg

As I said, I want to remove the table without tools so I used a Dremmel tool to key-hole-slot the tops of all 4 holes.
smoker_99999996.jpg

Then screwed in large screws but left them sticking out a little more than the thickness of the bracket.
smoker_99999997.jpg

But enough about the table, its two hours later and the cheese is done. I emptied the sawdust pan to keep from choking and let the smoke clear.
smoker_99999998.jpg

The almost finished product.
smoker_99999999.jpg

I bagged it all separately and then placed all the bags in another gallon sized bag and put it in the fridge where it will sit for two weeks and we will enjoy it around Easter time. Why? Everything I have read about smoking cheese says that if you try to eat the cheese right out of the smoker, it will taste like licking the bottom of an ash tray (I can only imagine what that would taste like) so the cheese has to mellow and absorb the smoke before it can be enjoyed……………………………… But being impatient, I sampled one of the cheese curds. Yup, ash tray, all the way. It was awful. If I had not read up on the subject, I would have thrown the whole lot in the trash, thinking I had done something wrong. It pays to study.
smoker_999999991.jpg
 
Back to working on the side table. I want a table that is easy to clean and removable without tools. I made a wooden frame that sits on the two shelf brackets and then covered it with plywood. Then I wraped it in aluminum. This is a heavier gauge than I used inside the smoker so it was a bit harder to bend.
smoker_999999992.jpg

The sheetmetal edge was a bit too sharp for my tastes so I put an edge of aluminum strip that is an 1/8 x 1 1/2. I held it in place with stainless steel screws since it will be exposed to salt and the elements.
smoker_999999995.jpg

smoker_999999993.jpg

smoker_999999994.jpg

When not in use, it fits nicely in the smoker.
smoker_999999996.jpg


I was able to find a propane burner that I think will work well for this project. It has 3 separate burner rings with adjustable settings. I found it at Northern tool for $40. I hope to have it in a few days.
smoker_9999999995.jpg

When I was going to use electric heat, I was content with the aluminum over wood smoke/heat chamber. Now that I will have open flame, (and the potential for flare ups) I have decided to line the lower chamber with ceramic tile. The biggest consideration is the temperature extremes. This smoker could be -10F one day and with me using it, 225F the next day. Because of this, I can’t line the chamber with ceramic using conventional methods. I have to allow for a large amount of thermal expansion. To account for this, I will loosely hold the tiles in place with a roofing product that is used for soffit and fascia. The Home Depot carries it under the name of “J” channel. Its made of aluminum. I will screw it to the side walls of the smoker.
smoker_999999997.jpg

I used 12 inch by 12 inch tiles (.57 cents each). The tiles on the floor will not be in “j” channel and will be allowed to float.
smoker_999999999.jpg

Completed. This might be overkill but I think its cheap insurance against burning this thing to the ground.
smoker_999999998.jpg

I was going to use 16 inch tile so I bought a sample (.77 cents each) but ended up using the 12 inch. I will place the large 16 inch directly under the burner.
smoker_9999999991.jpg

Lining the door with ceramic proved to be a bigger challenge due to the air vent. I used an abrasive cut-off blade in my 7 inch circular saw to cut the openings.
smoker_9999999992.jpg

They will also be held in place with “J” channel.
smoker_9999999993.jpg

The ceramic lined bottom chamber.
smoker_9999999994.jpg

Once the burner arrives and I figure out where to run the propane line, I will have to cut a hole in a tile and the side of the smoker for the line to exit the smoker.
While I’m waiting, I painted a sign. My Son named my first smoker “Old Smokey” and insisted I paint a crescent moon on the door. I can think of no reason to break with tradition so this smoke will be dubbed “Old Smokey II” and also bear the crescent moon. While taking pictures, a neighbor stopped over to ask how I got a permit to put an outhouse on my property? After a bit of explaining, he understood.
Here is what “Old Smokey II” looks like so far.
smoker_9999999999.jpg

smoker_9999999998.jpg

smoker_9999999997.jpg

smoker_9999999996.jpg

Now I'm just waiting on the UPS delivery man and the burner.
 
The propane burner arrived. It’s a heavy and durable piece of equipment. The only mod I made was cutting 2 inches off of the legs to lower it. Then I went and got some iron pipe and fitting so I don’t have to have any rubber regulator line inside the heat of the smoker.
smoker_99999999991.jpg

Then a notch in a tile and a hole drilled through the side wall.
smoker_99999999992.jpg

I’ve got gas.
smoker_99999999993.jpg

I lit the smallest burner ring and let it burn to see how hot I could get it at its max setting. I brought the inside temp to 270F which is way hotter that anything I will be needing but I wanted to test out the door seal gasket and see if the whole thing would take the heat. Each burner is adjustable so I will be able to tweak the heat as I like and have extra to spare for when it below zero outside.
Time to put some meat in this thing.
But first some cold smoked cheese, olives and salt.
smoker_99999999994.jpg


Then I fired up the smoker with some big ole hickory chunks.
ribs_chicks1.jpg

ribs_chicks2.jpg

ribs_chicks3.jpg

ribs_chicks4.jpg

ribs_chicks5.jpg

ribs_chicks6.jpg

Living the high life.
 
Man cannot live on smoked meats alone. He needs some breakfast sausage too.

So I ordered a 60 pound case of boneless pork picnic shoulders. (What the hell happened to meat prices?? What I used to buy at .88 cents a pound was $1.60 a pound anyway, I took 30 pounds of venison out of the freezer so I could make a 60 pound batch of breakfast sausage. Then I cut up a few of the pork shoulders into small pieces for grinding.
bkfastsaus1.jpg

Then ground them together.
bkfastsaus2.jpg

Our family likes the Hi Mountain brand of breakfast sausage seasoning so I got a few boxes. I mixed it with a quart of cold water and 4 tablesthingys of crushed red pepper flakes for some heat.
bkfastsaus3.jpg

Then I grind it again through a smaller plate.
bkfastsaus4.jpg

Then I convert the grinder into a stuffer and bulk pack it.
bkfastsaus5.jpg

In order to continue pork-a-palooza, I saved 15 pounds of butts for the smoker tomorrow. It will spend the day in the new smoker.
bkfastsaus6.jpg
[/QUOTE]
Since the trees have already budded out and I know some of the apple trees at the back of ourproperty need trimming, I killed two birds with one stone.
pork1.jpg

There is a soon-to-be Bacon palooza pictorial coming at some point and I plan to use apple wood so it will be ready when the time comes. This is more than enough for today.
pork2.jpg

Then all the butts get a rub down
pork3.jpg

pork4.jpg

Then into the new smoker for the day.
pork5.jpg

pork6.jpg
 
The half way point
pork7.jpg


After 8 hours in the smoker, the pork butts were ready for pulling.

pork8.jpg

Pulling pork is a perpetual pain in the posterior and something I wanted to speed up so I went to Ace hardware and bought a cast iron floor drain (like you probably have in your basement floor) a few 3/8 bolts and nuts and a 12 inch long bolt to make the perfect pork puller.

pork9.jpg

pork91.jpg

I invited the folks from Youtube over to have some pork and to video the perfect pork puller in action. The pork is only minutes out of the smoker and very hot. You will notice the steam. The Youtube folks were nice and all but they sure can eat. Click below to watch the video.

I only pulled two of the butts, the other 3 will be vacuum sealed and frozen for another day. Then I added just a splash of BBQ sauce to the two I pulled and mixed it tp.
pork92.jpg

Add some beans, potato salad, a bun and a Rootbeer and call it day.
pork93.jpg
 
Go big or go home

Picked up 35 pounds of meat at Sam's club

A 12 pound beef brisket
12 pounds of pork Boston Butt
And 11 pounds of fresh chicken.
I will smoke this mess of grub with a mixture of Hickory and apple wood.
The chicken will be finished first, then the pork and then brisket. The brisket may spend up to 12 hours in the smoker.
I love smoking days.

smokedmeats1_zps7ebbe500.jpg


The Brisket rub is made and rubbed on the meat 12 hours prior to smoking.
½ cup paprika
½ cup brown sugar
3 tblsp chili powder
3 tblsp onion powder
3 tblsp garlic powder
3 tblsp seasoned salt
1 tblsp cayenne pepper powder
3 tblsp black pepper
2 tblsp oregano
Use rubber gloves and rub the spices into the meat and let it sit in the fridge over night.
smokedmeat2_zps8ceb9460.jpg


Then it was time to rub mustard on my Butt (s) and a secret blend of herbs and spices.
smkedmeats3_zps85120edc.jpg

Then I split the chickens and gave them a rub down of not so secret spices.
smokedmeats4_zps8872ad36.jpg

Then it was into the preheated smoker with the lot of it. The two pans in the bottom are filled with water and beer.
smokedmeats5_zps32552811.jpg

I’ll use hickory chunks to start out with and switch to apple later in the day.
smokedmeats6_zpsa0451cff.jpg

The smoke is great smelling in the morning.
smokedmeats7_zps0711514a.jpg

Now its time to wait. Occasionally spraying the pork and beef with the mop sauce. I have a temp probe in the thickest part of the brisket and another probe checking internal air temps in the smoker.
smokedmeats8_zps8655ef84.jpg
 
The chickens are the first ones done. They look nicely smoked. Time to prepare the rest of the supper menu.
smokedmeats92_zps596352c5.jpg


Then the pork is complete. The combination of the smoke, and the mop sauce on the spice rub gives a dark look. Beneath that bark is juicy smoked pork goodness.
smokedmeats93_zps90132549.jpg


The pork is pulled.
smokedmeat93_zps34d4e753.jpg


Dinner is served
smokedmeats94_zpse1dc9dcf.jpg


12 hours after it began the brisket has reached 188 degrees F. This was a really thick and fatty brisket (all the better) and the amount of juice it let loose when I cut into it was amazing. The groove around the cutting board didn’t hold it all. We captured this flavor in a quart jar to be used when the meat is reheated.
I cut it into meal sized chunks that (once cooled) can be vacuum sealed and frozen. The brisket can be reheated right in the sealer bags and sliced once warmed. I will divide the juice and freeze it as well to serve with the meat. This might be my best one yet. Its been a long day and I smell like a piece of smoked meat. I need a shower.
smokedmeats95_zps48c85066.jpg

smokedmeats96_zpsccf3b7a1.jpg

smokedmeats97_zps428ded97.jpg
 
drool5-1.gif
Very Nice Project! You make everything look so easy... I'd have cut hell out of myself on the aluminum or the smoke stack vents, cut a finger half off cutting the plywood, or stapled myself to the project during assembly. When done, I would have to post it with a junkyard in the background rather than a very cool tipi!!
Biker-1.gif


smokedmeats7_zps0711514a.jpg
 
That Tipi was a fun DIY project that involved the whole family from cutting down the poles to sewing the inner and outer fabrics. I think my wife has more nights sleeping in it than I do. It makes a nice looking night light in the back yard.

tipilight3.jpg
 
Back
Top