I also put a rough copy of this over at remingtonowners forum but wanted to put a copy here too since it sees more traffic and may help someone else.
This short tutorial covers how to do one of the most simple, yet very often requested jobs for a gunsmith.
How to install a scope rail on a receiver that wasn't made for one.
Step 1.
Take everything apart and look at it to make sure that there is enough room and clearances to do what you want to do.
In this case, I bought a cheap Mossberg shotgun rail from ebay for about $7 to use on this Charles Daly Turkish shotgun import.
This means with the way the barrel and receiver is made that 3 of the 4 bolts were too long and will need to be shortened on a grinder or go to the corner hardware store and buy shorter ones.
Since I don't want to go the store and the bolts already came with the rail, one of the best methods for marking metal to grind is using wite out. It's easy to see, dries fast, and doesn't just rub off like sharpie markers.
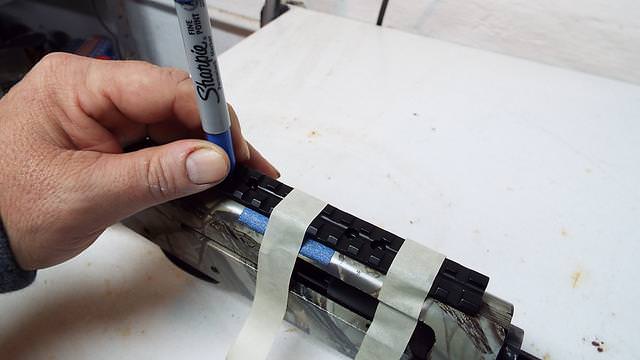
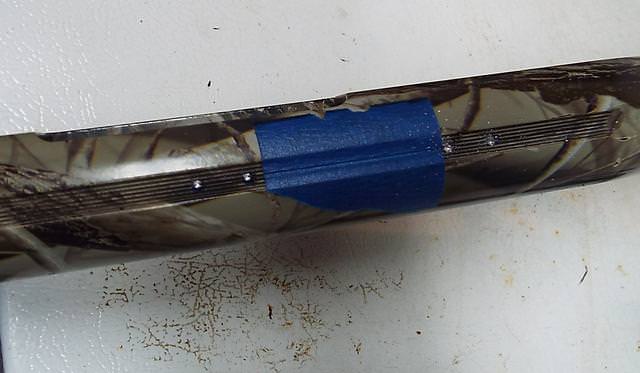
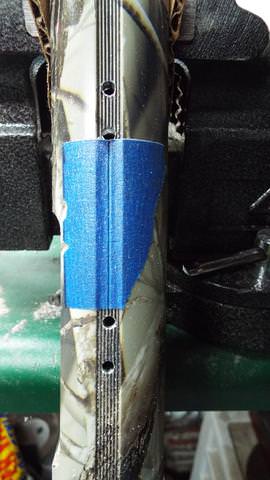
Now that's out of the way, you need to center the rail (using the little grooves that are made into the top of the receiver as a guide) and mark where the rail holes are going to go. Yes, I generally use a few pieces of tape to hold the rail in place while I make the marks so it doesn't move around as much. This is where a sharpie comes in handy. You just put the tip of the marker through each hole and now you have a general idea of where the holes are going to need to be drilled
Then you find the center of the marks and use a center punch and hammer to give your drill bit(S) that you're going to use in a minute a solid place to seat.
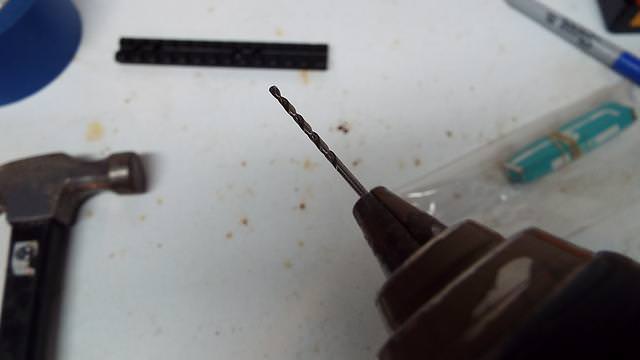
Alright, now that all the holes are marked where you need to drill them, don't go straight to the largest size drill bit that you're going to need for the tap. Start with a smaller drill bit and make a pilot hole all the way through the receiver for all four holes.
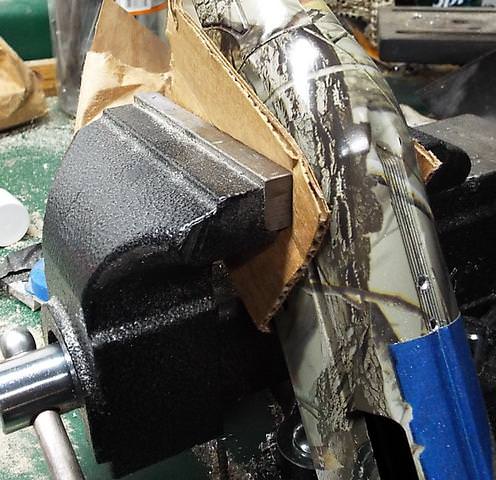
And to do that, I like to put the receiver in a vise to hold it still and I also normally use a scrap piece of cardboard to wrap the gun with so the vise doesn't scratch anything up in the process.
Alright, now that the holes are the proper placement and the pilot holes are drilled, you use the larger tap drill bit and easily open up the pilot holes to the proper diameter
Once they're drilled out, you simply use the tap and thread the holes by hand. And in some cases, you may not even need a thread tap.
* Sometimes you can use a sacrificial bolt to thread the hole as long as the metal you're threading is softer metal than the bolt is.
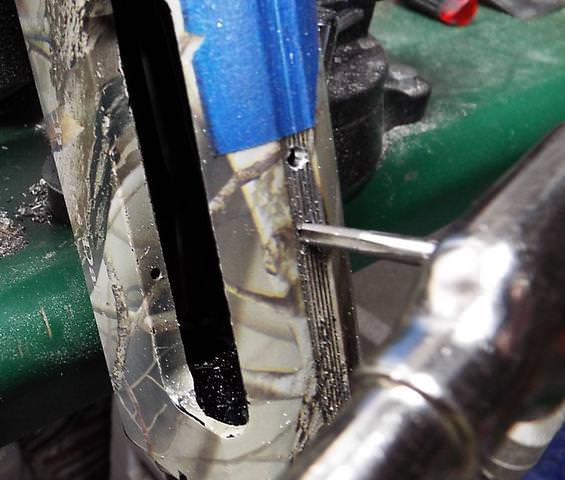
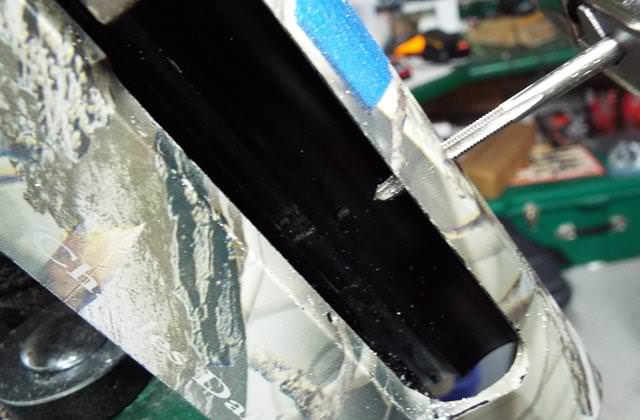
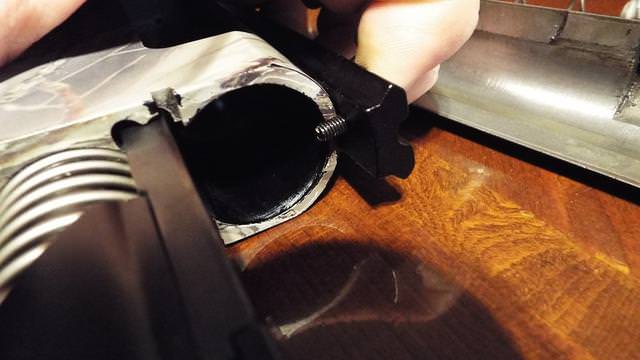
Once all the holes are done, I test fit the rail and all the bolts to make sure none of them need any further grinding so it doesn't interfere with installing and removing the barrel and to ensure that the rail is straight as possible.
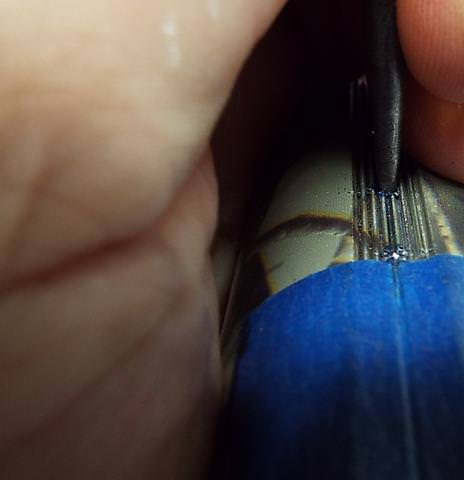
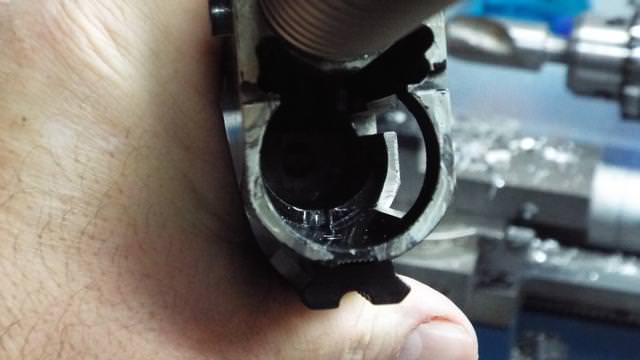
If you look closely, you can see that the front bolt is still a little long and protrudes a little too far into the channel cut for the barrel.
That is why I test fit everything before I Loctite the bolts.
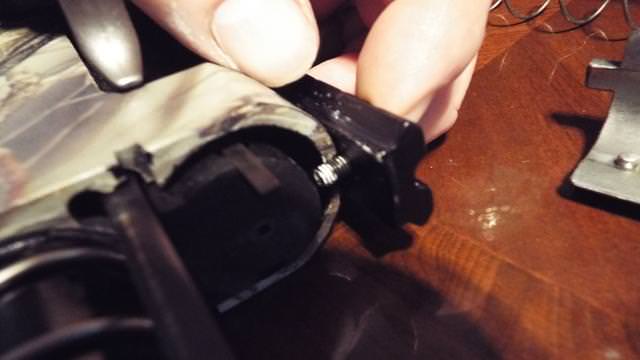
After a few more seconds grinding some length from that bolt, and getting everything fit the way you want it, remove one bolt at a time and put a drop of blue Loctite on the bolts to fasten everything down and that's about all there is to it.
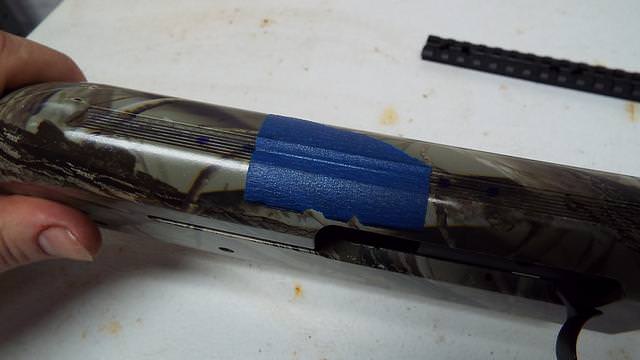
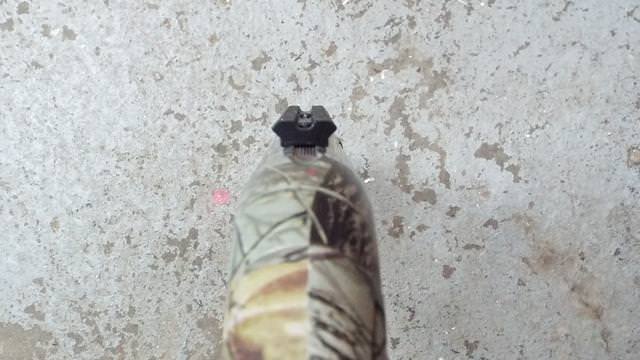
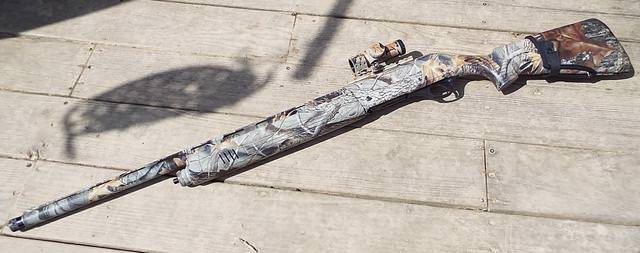
I did put a little spray paint on the rail and the red dot because it is one of my turkey guns to help it blend in a little better, but that's not always needed.
Now, go zero that bad boy and Happy hunting.
This short tutorial covers how to do one of the most simple, yet very often requested jobs for a gunsmith.
How to install a scope rail on a receiver that wasn't made for one.
Step 1.
Take everything apart and look at it to make sure that there is enough room and clearances to do what you want to do.
In this case, I bought a cheap Mossberg shotgun rail from ebay for about $7 to use on this Charles Daly Turkish shotgun import.
This means with the way the barrel and receiver is made that 3 of the 4 bolts were too long and will need to be shortened on a grinder or go to the corner hardware store and buy shorter ones.
Since I don't want to go the store and the bolts already came with the rail, one of the best methods for marking metal to grind is using wite out. It's easy to see, dries fast, and doesn't just rub off like sharpie markers.
Now that's out of the way, you need to center the rail (using the little grooves that are made into the top of the receiver as a guide) and mark where the rail holes are going to go. Yes, I generally use a few pieces of tape to hold the rail in place while I make the marks so it doesn't move around as much. This is where a sharpie comes in handy. You just put the tip of the marker through each hole and now you have a general idea of where the holes are going to need to be drilled
Then you find the center of the marks and use a center punch and hammer to give your drill bit(S) that you're going to use in a minute a solid place to seat.
Alright, now that all the holes are marked where you need to drill them, don't go straight to the largest size drill bit that you're going to need for the tap. Start with a smaller drill bit and make a pilot hole all the way through the receiver for all four holes.
And to do that, I like to put the receiver in a vise to hold it still and I also normally use a scrap piece of cardboard to wrap the gun with so the vise doesn't scratch anything up in the process.
Alright, now that the holes are the proper placement and the pilot holes are drilled, you use the larger tap drill bit and easily open up the pilot holes to the proper diameter
Once they're drilled out, you simply use the tap and thread the holes by hand. And in some cases, you may not even need a thread tap.
* Sometimes you can use a sacrificial bolt to thread the hole as long as the metal you're threading is softer metal than the bolt is.
Once all the holes are done, I test fit the rail and all the bolts to make sure none of them need any further grinding so it doesn't interfere with installing and removing the barrel and to ensure that the rail is straight as possible.
If you look closely, you can see that the front bolt is still a little long and protrudes a little too far into the channel cut for the barrel.
That is why I test fit everything before I Loctite the bolts.
After a few more seconds grinding some length from that bolt, and getting everything fit the way you want it, remove one bolt at a time and put a drop of blue Loctite on the bolts to fasten everything down and that's about all there is to it.
I did put a little spray paint on the rail and the red dot because it is one of my turkey guns to help it blend in a little better, but that's not always needed.
Now, go zero that bad boy and Happy hunting.
")