You are using an out of date browser. It may not display this or other websites correctly.
You should upgrade or use an alternative browser.
You should upgrade or use an alternative browser.
Mossberg 500 Pump Action Accessories...
- Thread starter DHonovich
- Start date
Litany Against Fear
.22LR
I thought the screwdriver might be too frail, but what else could be used on such tiny screws?
get some liquid wrench and use a q tip to apply it to the screw heads. then after about a minute, take a screwdriver and a small block of wood. insert the driver into the screw and tap the driver handle with the block lightly ( like you are knocking on a door ) and turn the screw driver lefty loosey.
just be careful not to strip the heads of the screw or give your hand a blood blister from the knocking...doh!
just be careful not to strip the heads of the screw or give your hand a blood blister from the knocking...doh!
ninjapilot
.22LR
Re: Newbie Question: How to determine if forearm is removabl
Thank you Kodiak! I will check to see if I have that!!!!
Thank you Kodiak! I will check to see if I have that!!!!
Kodiak said:If you see this, you have a pinned forend. Note, it can be replaced with a removable slide tube & bar assembly.
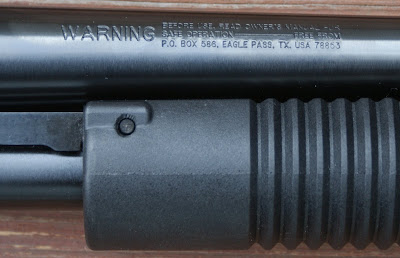
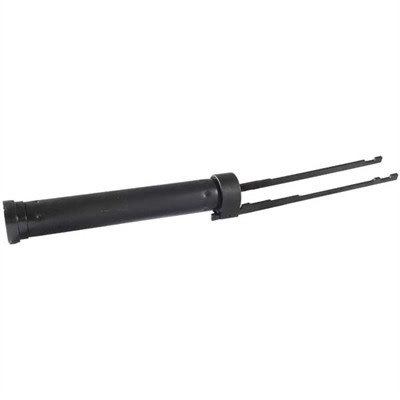
Removable slide tube & bar assembly
Litany Against Fear
.22LR
Thanks for the advice. I stopped trying when I lost the grip on one screw and could see that a stripping was imminent. Is it common for these screws to be attached super tight?
Does the block tapping seat the driver head deeper into the screw?
Does the block tapping seat the driver head deeper into the screw?
Tapping with the block acts like an impact driver. It turns and loosens at the same time. And vise versa.
It could be that they use a thread locker. Like lock tite. Thats why i also suggested using the liquid wrench as well. If you did strip it, and you have some tool knowlege you might be able to drill out the screw and re tap it.
It could be that they use a thread locker. Like lock tite. Thats why i also suggested using the liquid wrench as well. If you did strip it, and you have some tool knowlege you might be able to drill out the screw and re tap it.
Litany Against Fear
.22LR
I didn't strip the screw, but I see that you mean to tap the screwdriver while I unscrew it, right?
Horsepow3r
Copper BB
Re: Newbie Question: How to determine if forearm is removabl
Hi. I have an unpinned forearm on my 50588. Does that mean I can just slide off the forearm grip after unscrewing the nut and put a different forearm onto the tube without having to remove the slide tube action bars from the receiver?
Thanks!
Hi. I have an unpinned forearm on my 50588. Does that mean I can just slide off the forearm grip after unscrewing the nut and put a different forearm onto the tube without having to remove the slide tube action bars from the receiver?
Thanks!
Re: Newbie Question: How to determine if forearm is removabl
Not exactly sure what model the 50588 is but on any 500 the forend can be removed without removing the slide tube. The barrel does need to come off first though.
It can be a PIA doing it this way but it is very doable.
Considering that field stripping takes less than 2 minutes on a 500, I would recommend that you DO field strip it and you will find that turning the forearm nut will be much easier.
Horsepow3r said:Hi. I have an unpinned forearm on my 50588. Does that mean I can just slide off the forearm grip after unscrewing the nut and put a different forearm onto the tube without having to remove the slide tube action bars from the receiver?
Thanks!
Not exactly sure what model the 50588 is but on any 500 the forend can be removed without removing the slide tube. The barrel does need to come off first though.
It can be a PIA doing it this way but it is very doable.
Considering that field stripping takes less than 2 minutes on a 500, I would recommend that you DO field strip it and you will find that turning the forearm nut will be much easier.
Horsepow3r
Copper BB
Re: Newbie Question: How to determine if forearm is removabl
Hi, thanks for the reply. I am new to shotguns so field stripping the gun seems daunting to me right now. I found a forearm wrench that slides over the mag tube to get to the nut. Should be fairly easy I hope.
Thanks for the help!
Hi, thanks for the reply. I am new to shotguns so field stripping the gun seems daunting to me right now. I found a forearm wrench that slides over the mag tube to get to the nut. Should be fairly easy I hope.
Thanks for the help!
Re: Newbie Question: How to determine if forearm is removabl
For any new gun, a complete field strip and cleaning is NEEDED!
You should never fire a gun before doing this.
Anything that looks like grease in a new gun is actually a Cosmoline product.
Its a RUST PREVENTATIVE and should be removed and then the gun should be lubed with a good gun grease.
There are many videos on Youtube that show just how easy it is to field strip a 500.
This is a good one, but there are plenty more out there.
http://www.youtube.com/watch?v=TekCslIUWMQ
Follow my advice above, for ALL guns that you buy. Unfortunately MANY new gun owners are not taught this. It should be in EVERY gun manual.
I have said it before and I will say it again. Learn your gun from the inside out. Cleaning your gun should be part of regular maintenance. It will help you get MANY years of enjoyment from it.
MossLvR
.270 WIN
Re: Newbie Question: How to determine if forearm is removabl
EXACTLY!!! what he said, you need to know that the firearm will function as it is supposed to for your own safety and the safety of others......given that, the short answer to this question
Is yes once you remove the barrel....
LTB45 said:For any new gun, a complete field strip and cleaning is NEEDED!
You should never fire a gun before doing this.
Anything that looks like grease in a new gun is actually a Cosmoline product.
Its a RUST PREVENTATIVE and should be removed and then the gun should be lubed with a good gun grease.
There are many videos on Youtube that show just how easy it is to field strip a 500.
This is a good one, but there are plenty more out there.
http://www.youtube.com/watch?v=TekCslIUWMQ
Follow my advice above, for ALL guns that you buy. Unfortunately MANY new gun owners are not taught this. It should be in EVERY gun manual.
I have said it before and I will say it again. Learn your gun from the inside out. Cleaning your gun should be part of regular maintenance. It will help you get MANY years of enjoyment from it.
EXACTLY!!! what he said, you need to know that the firearm will function as it is supposed to for your own safety and the safety of others......given that, the short answer to this question
Horsepow3r said:Hi. I have an unpinned forearm on my 50588. Does that mean I can just slide off the forearm grip after unscrewing the nut and put a different forearm onto the tube without having to remove the slide tube action bars from the receiver?
Thanks!
Is yes once you remove the barrel....
Fronty Owner
.270 WIN
Re: Newbie Question: How to determine if forearm is removabl
any newly acquired firearm should be field stripped and cleaned as soon as you can after you get home. It gives you a chance to become familiar with the firearm, its operation, and and gives you an opportunity to check for wear and monitor wear as you clean and maintain the firearm over the years.Horsepow3r said:Hi, thanks for the reply. I am new to shotguns so field stripping the gun seems daunting to me right now. I found a forearm wrench that slides over the mag tube to get to the nut. Should be fairly easy I hope.
Thanks for the help!
ninjapilot
.22LR
Re: Newbie Question: How to determine if forearm is removabl
Ok so I checked and I do not have that pinned forearm. So that means is removable right? Im so nervous about doing the swap since I'm a newbie at this.
Ok so I checked and I do not have that pinned forearm. So that means is removable right? Im so nervous about doing the swap since I'm a newbie at this.
afterthisnap
Copper BB
Aimpro Tactical Ghost Ring Install w/Pics.
I just wanted to cover my installation of the Aimpro ghost ring sights.
I have a 20" 500A that came with a normal bead sight and I wanted something a little more precise for both slug shooting and the occasional 3gun competition. I planned to use the factory ghost ring setup but I was drawn to the fat red fiber bead of the Aimpro; it is the same basic sight picture I use on my Glock and AK competition guns.
I ordered the front sight blade and rail/ring online from Aimpro. I still needed the factory front sight base to replace the bead, so I had to call Aimpro and order that separately (The rail and blade came first within in a week, but it took a few Emails and half a dozen phone calls direct to Aimpro to get the factory front ramp order a week after that).
Before starting I made sure both the chamber and magazine were empty and that my workspace was free of ammunition.
( I ended up using the break room kitchen at work )
)
The rail bolts on by using three of the four factory threaded holes on top of the Mossberg receiver.The rearmost hole is under the ghost ring and requires disassembly of the spring loaded sight and windage mechanism. Movement of the aperture in both planes requires only a flathead screwdriver and there are positive detents from a spring loaded bearing pressing against the bottom of a knurled adjustment screw.
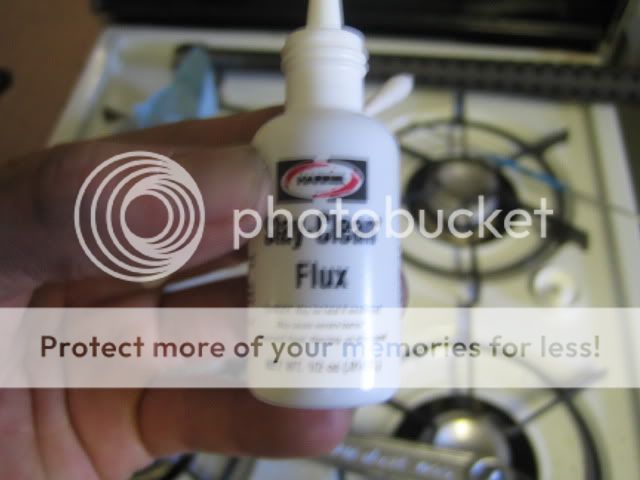
Since I didn't have a front base from the factory, I had to silver solder a new one on. I used Grobet/Harris Silver Solder which has a relatively low melting temperature but is significantly stronger than something like electrical solder or non-metal adhesive. http://www.grobetusa.com/soldering_tools/stay_brite_solder.html
The key to a good bond is to have the tightest possible fit between steel parts, and 90% of the install was spent prepping the parts.
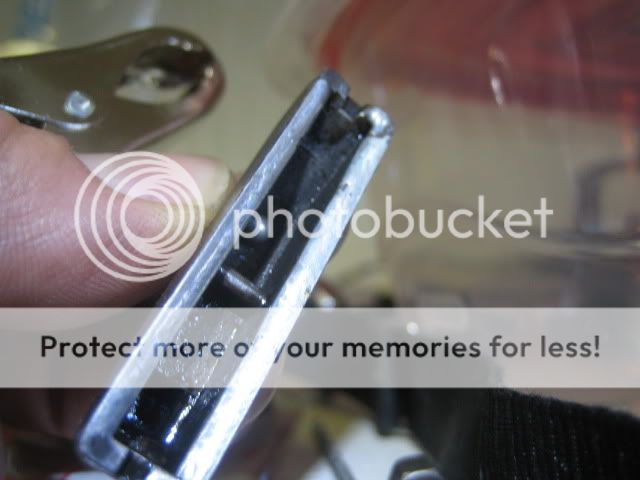
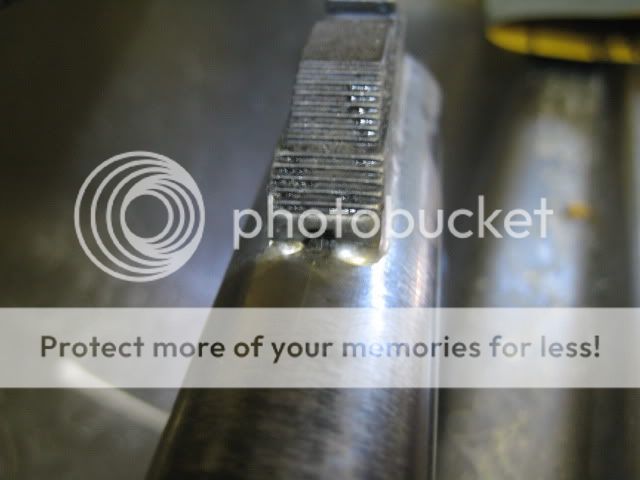
First I removed the barrel and sanded the sight base to the contour of the barrel with 800 grit:

then Sanded the barrel to the contour of the sight base with 800:
and then repeated with 1500 then 2000 grit to mate the surfaces and get a good shine:
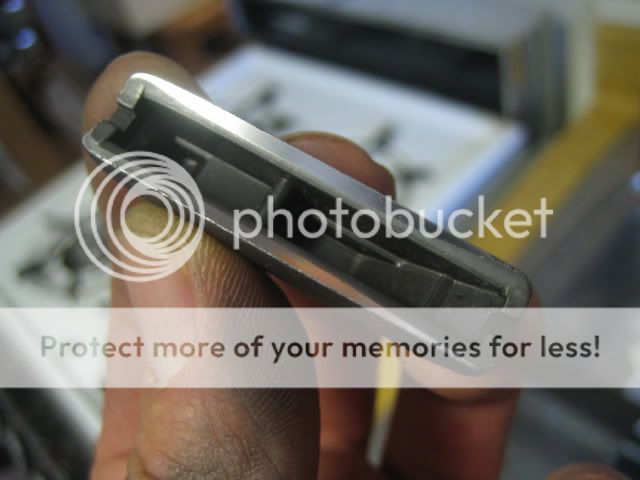
You can see where the high spots have been sanded down to fit the barrel contour.
Any oxidation/paint/parkerizing/or finish other than bare metal won't contribute to the bond, so I hit the rest of the sight base with some scotch-brite then cleaned all surfaces twice with some flux on clean qtips. The flux cleans off any residue and oxidation that forms after sanding and creates a temporary barrier from instantaneous oxidation.
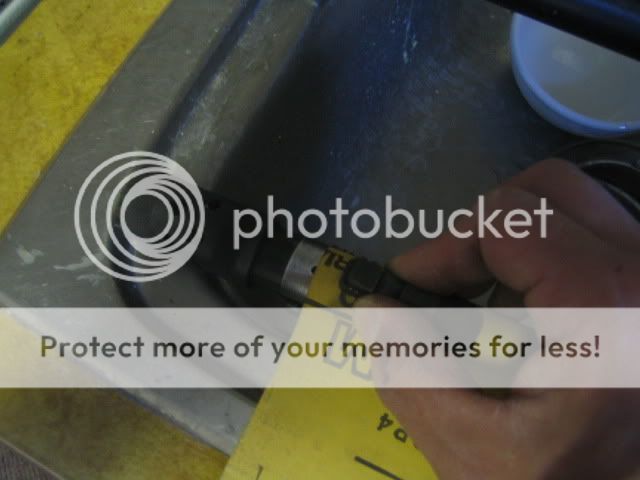
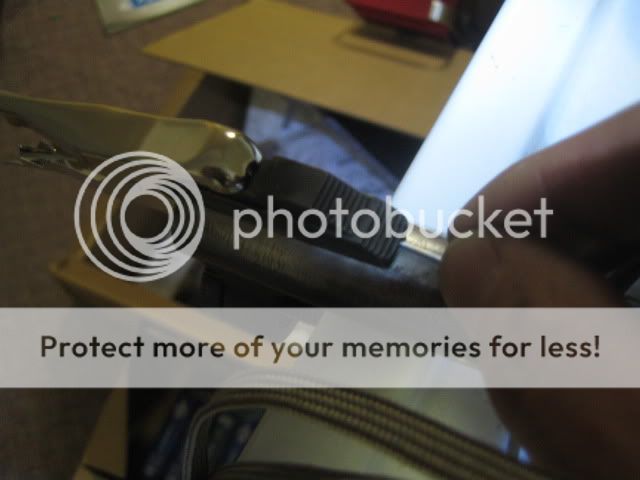
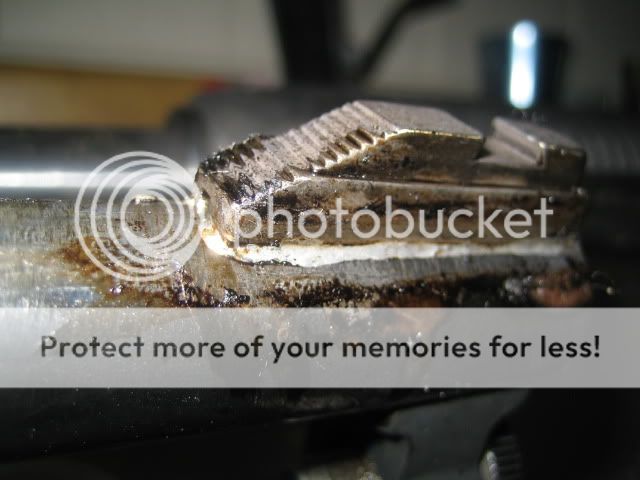
I then held sight base in the jaws of an adjustable wrench while I "tinned" it with a thin layer of solder (sorry, no video- my hands were full). The molten silver solder worked really predictably and flowed in a controlled fashion. As soon as the torch was off I swabbed the semi-molten solder with flux which burned off any impurities and protected the tinned surface.
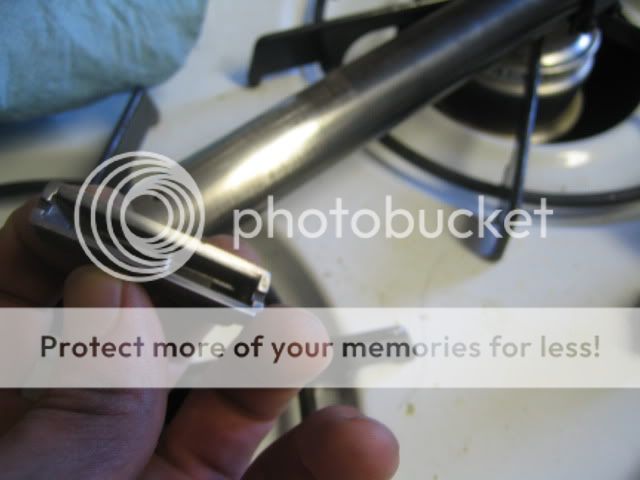
After that cooled I clamped the tinned base onto the barrel with a spring loaded clip. Having a spring loaded clip is important as the overall thickness of the clamped assembly will shrink once the solder flows, and without spring tension the base may slip out of alignment.
I scribed the barrel with a line through the middle of the bead hole, but ultimately I just eyballed it about 20 times:
I also outlined the outer edge of the solder area with a graphite pencil to prevent any solder from spilling over (the solder won't stick to the graphite). This proved to be unnecessary as the solder was really easy to control.
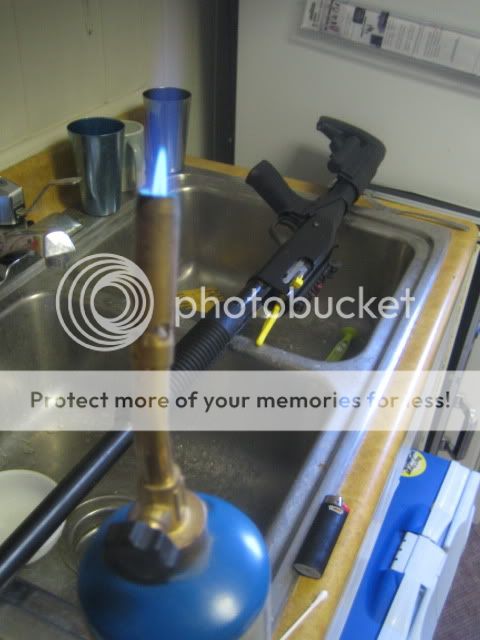
I cleaned everything one more time and soaked a few qtips with flux and fired up the torch again:
Then the magic happened. Unfortunately, I needed both hands to perform the soldering so I didn't snap any photos or video, but this is how I did it:
-gently warmed the barrel so it was too hot to touch with bare hands
-then heated the front sight base until the tinned metal melted and flowed into the barrel/base junction. At this point the joint was finished.
-Melted additional solder at the front of the base and flowed it rearwards into the larger junctions via capillary action. This was just to ensure I had an smooth, almost 360 degree, joint with no visible seams in which dirt and oil could to creep into.
-swabbed the hot solder with liquid flux
At no point did any metal heat to the point of glowing. This solder melts at 430 degrees F, so a propane torch was more than enough heat to get a controllable flow.
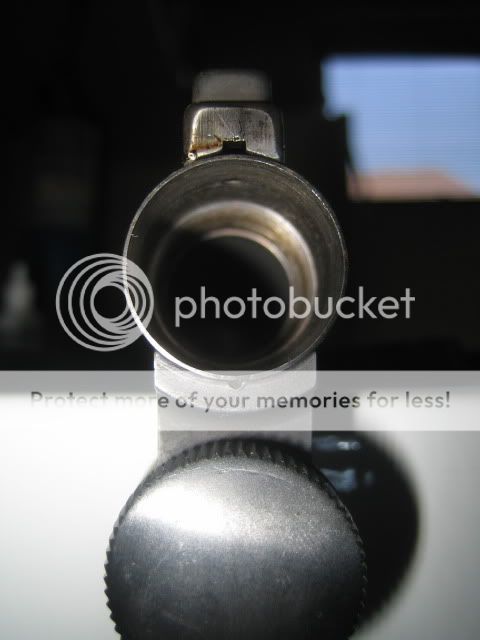
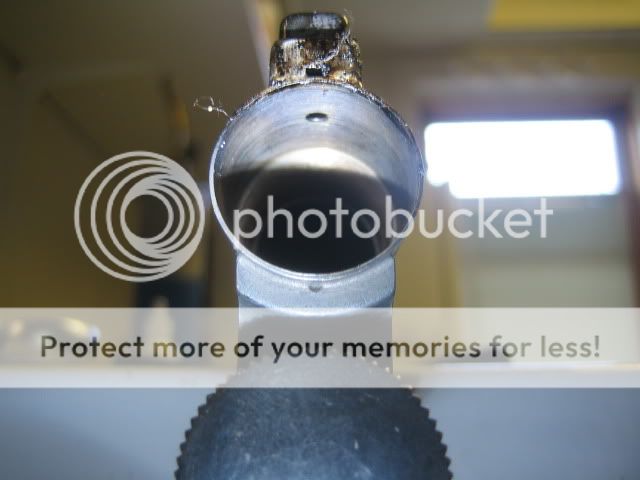
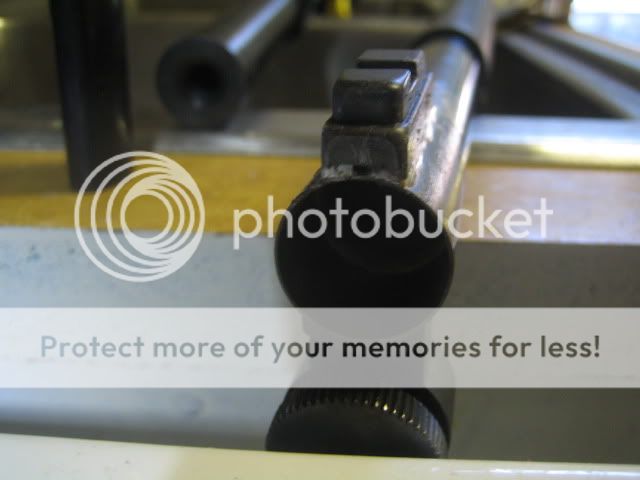
The immediate result was this:
(the sludge is the collected impurities that were carried off by the liquid/gasseous flux and a few burnt Qtip hairs)
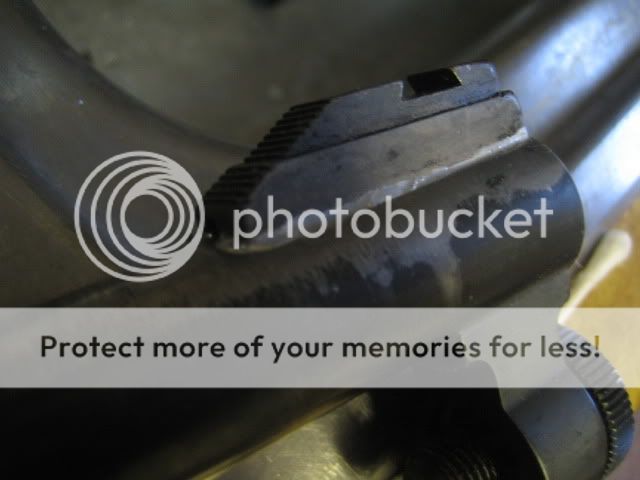
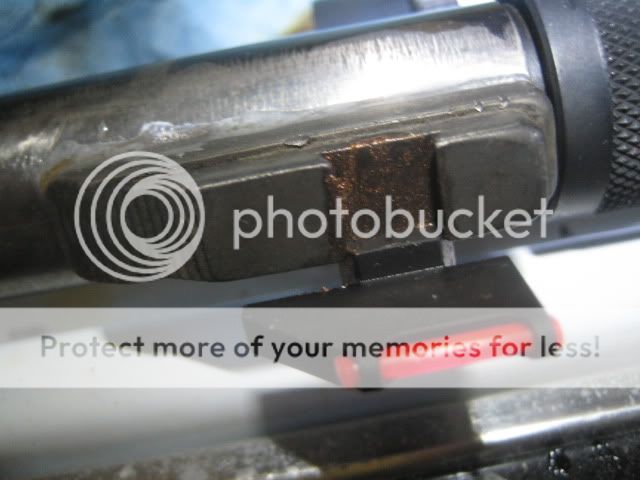
Checking for alignment:
(look, ma! No heat discoloration!)
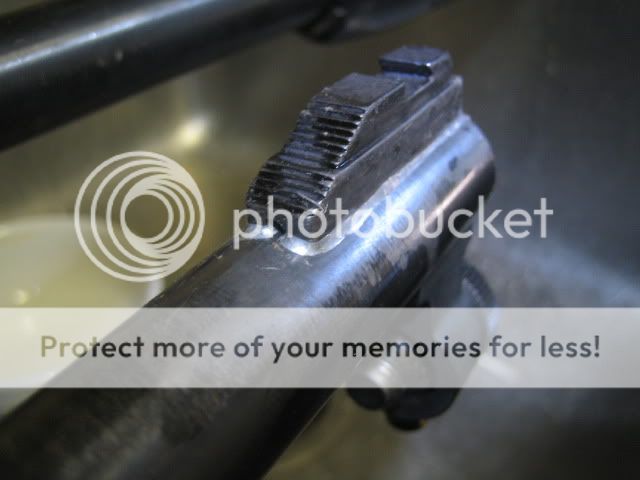
After a light wiping with water/acetone:
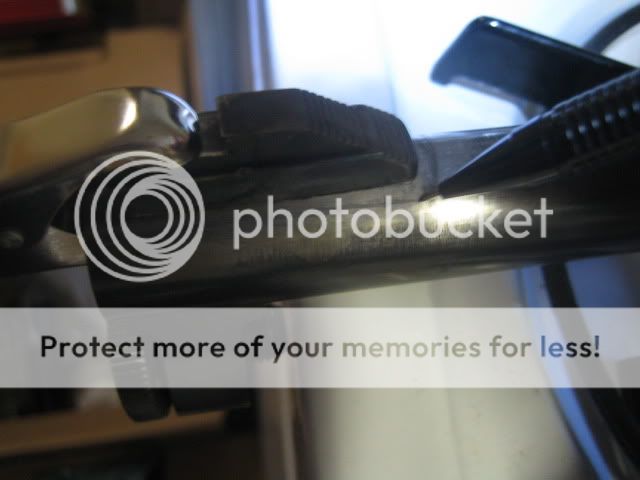
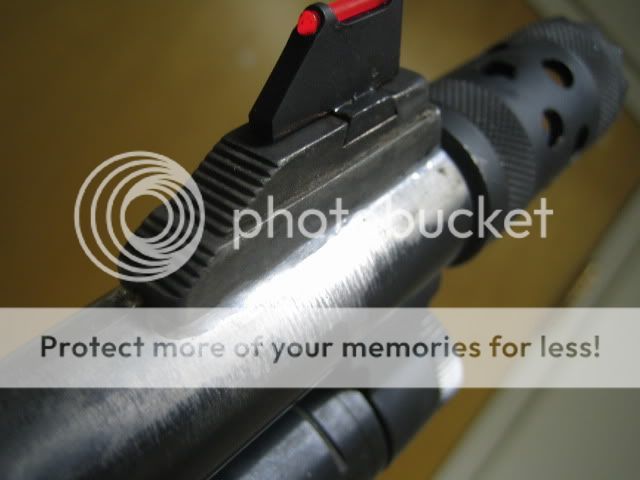
I put a thin layer of copper anti-sieze (Glock lube) on the base and Aimpro blade and used a channel lock to press them together. I could have used a hammer and punch.
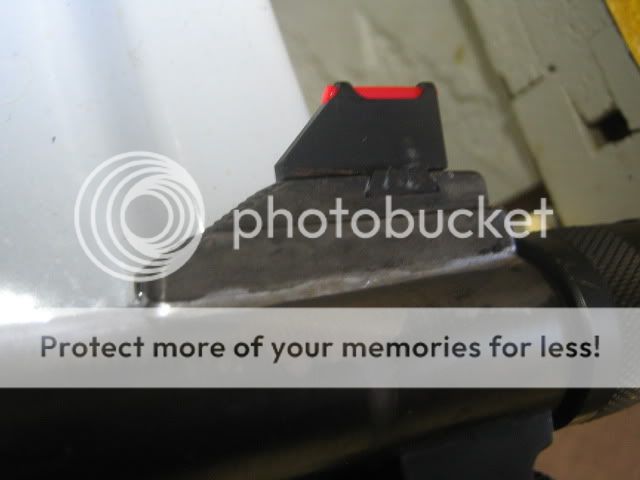
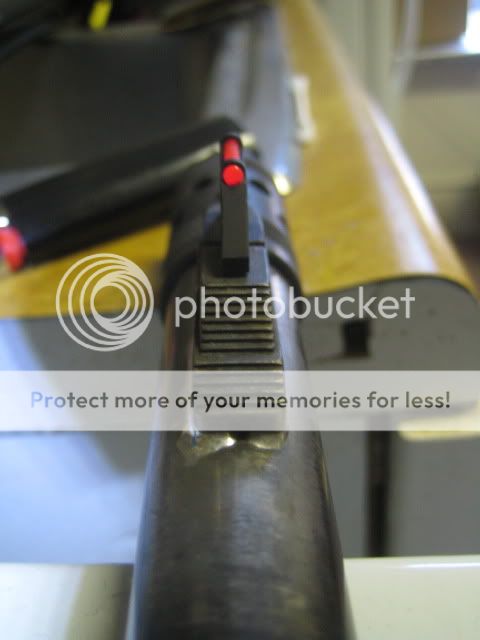
I couldn't get my camera to get a proper focus on the front bead, but with both eyes open it's pretty easy to get a proper sight picture. For me at least, the red dot is at least 2x as large as in the pictures, and in the sun it is extremely bright.

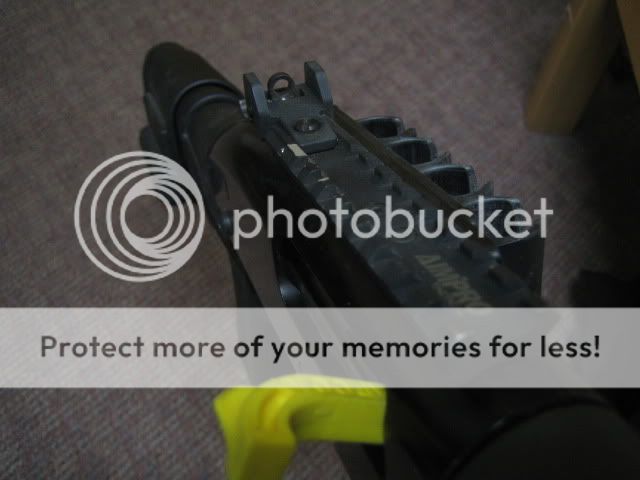
I took it out to get sighted in and it was shooting low and left at 30 yards. Raising the rear ghost ring up and moving it right took care of that, but I was worried that I only had a few adjustment screw threads engaged with the ring elevated so high (see first photo of rail above).
I sort of forgot about it until I had a comp this past weekend. I went through 5 boxes of ammo in a period of about four minutes and everything held tight. There was also a lot of moving/jostling/shoving and general banging around of guns throughout the course of the day.
Pros:
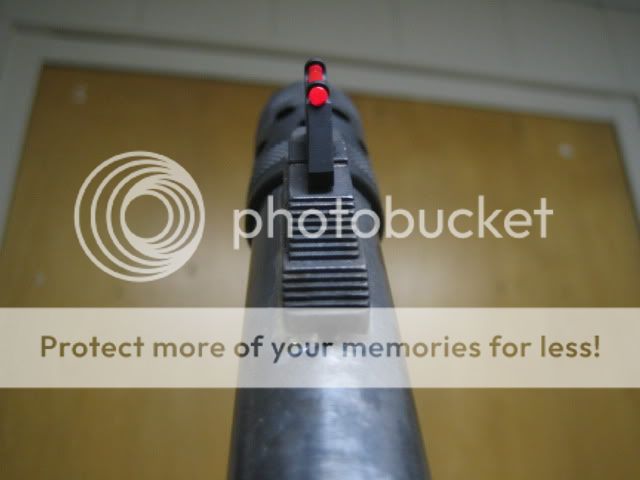
-Shooting with both eyes open was a breeze compared to traditional bead
-Compared to the Mossberg factory ghost rings there is a much more open sight picture with the dot instead of a huge orange stripe.
-Picatinny rail is just long enough for an optic without being obnoxious or heavy
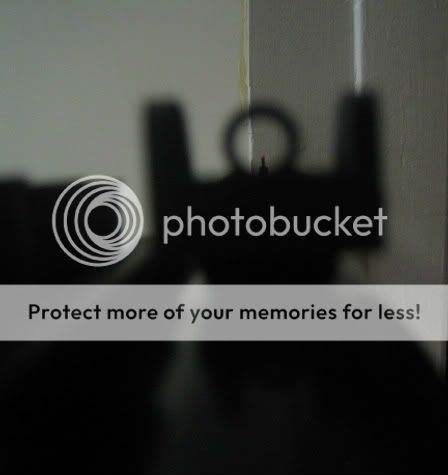
-Protected ghost ring is low profile and very sturdy.
-All three of my iron sighted guns now have the same basic front sight picture
 Cons:
Cons:
-It's gonna be easy to muss up a barrel if you're not aware of what you're doing (I believe Aimpro offers an install service)
-I would still like a slightly longer elevation screw included
-Unprotected front sight fiber is susceptible to dinging
-Rear ghost ring does not have alignment markings like the factory Mossberg sight- they really do help with fast alignment (I may paint or scribe some onto the Aimpro ring)
-The coating on the rail is already starting to flake. I'll be the first to admit that I don't mind an ugly gun (I haven't even painted my barrel yet!), but the Aimpro coating was coming off well before I started to abuse it.
-Aimpro seems like a small company with an awesome product, thus ordering "off menu" required a bit of persistence- but they were always friendly and the results were worth it.
Overall it was a fun little project and I highly recommend doing it if you have a decent grasp of brazing/soldering. I would NOT suggest going with JB weld or other adhesives as they are just not as strong and the risk of having a ruined day from dumping a front sight ramp isn't worth the cost/convenience.
Anyway, that's my first post.
Let me know if you have any questions.
I just wanted to cover my installation of the Aimpro ghost ring sights.
I have a 20" 500A that came with a normal bead sight and I wanted something a little more precise for both slug shooting and the occasional 3gun competition. I planned to use the factory ghost ring setup but I was drawn to the fat red fiber bead of the Aimpro; it is the same basic sight picture I use on my Glock and AK competition guns.
I ordered the front sight blade and rail/ring online from Aimpro. I still needed the factory front sight base to replace the bead, so I had to call Aimpro and order that separately (The rail and blade came first within in a week, but it took a few Emails and half a dozen phone calls direct to Aimpro to get the factory front ramp order a week after that).
Before starting I made sure both the chamber and magazine were empty and that my workspace was free of ammunition.
( I ended up using the break room kitchen at work
)The rail bolts on by using three of the four factory threaded holes on top of the Mossberg receiver.The rearmost hole is under the ghost ring and requires disassembly of the spring loaded sight and windage mechanism. Movement of the aperture in both planes requires only a flathead screwdriver and there are positive detents from a spring loaded bearing pressing against the bottom of a knurled adjustment screw.
Since I didn't have a front base from the factory, I had to silver solder a new one on. I used Grobet/Harris Silver Solder which has a relatively low melting temperature but is significantly stronger than something like electrical solder or non-metal adhesive. http://www.grobetusa.com/soldering_tools/stay_brite_solder.html
The key to a good bond is to have the tightest possible fit between steel parts, and 90% of the install was spent prepping the parts.
First I removed the barrel and sanded the sight base to the contour of the barrel with 800 grit:
then Sanded the barrel to the contour of the sight base with 800:
and then repeated with 1500 then 2000 grit to mate the surfaces and get a good shine:
You can see where the high spots have been sanded down to fit the barrel contour.
Any oxidation/paint/parkerizing/or finish other than bare metal won't contribute to the bond, so I hit the rest of the sight base with some scotch-brite then cleaned all surfaces twice with some flux on clean qtips. The flux cleans off any residue and oxidation that forms after sanding and creates a temporary barrier from instantaneous oxidation.
I then held sight base in the jaws of an adjustable wrench while I "tinned" it with a thin layer of solder (sorry, no video- my hands were full). The molten silver solder worked really predictably and flowed in a controlled fashion. As soon as the torch was off I swabbed the semi-molten solder with flux which burned off any impurities and protected the tinned surface.
After that cooled I clamped the tinned base onto the barrel with a spring loaded clip. Having a spring loaded clip is important as the overall thickness of the clamped assembly will shrink once the solder flows, and without spring tension the base may slip out of alignment.
I scribed the barrel with a line through the middle of the bead hole, but ultimately I just eyballed it about 20 times:
I also outlined the outer edge of the solder area with a graphite pencil to prevent any solder from spilling over (the solder won't stick to the graphite). This proved to be unnecessary as the solder was really easy to control.
I cleaned everything one more time and soaked a few qtips with flux and fired up the torch again:
Then the magic happened. Unfortunately, I needed both hands to perform the soldering so I didn't snap any photos or video, but this is how I did it:
-gently warmed the barrel so it was too hot to touch with bare hands
-then heated the front sight base until the tinned metal melted and flowed into the barrel/base junction. At this point the joint was finished.
-Melted additional solder at the front of the base and flowed it rearwards into the larger junctions via capillary action. This was just to ensure I had an smooth, almost 360 degree, joint with no visible seams in which dirt and oil could to creep into.
-swabbed the hot solder with liquid flux
At no point did any metal heat to the point of glowing. This solder melts at 430 degrees F, so a propane torch was more than enough heat to get a controllable flow.
The immediate result was this:
(the sludge is the collected impurities that were carried off by the liquid/gasseous flux and a few burnt Qtip hairs)
Checking for alignment:
(look, ma! No heat discoloration!)
After a light wiping with water/acetone:
I put a thin layer of copper anti-sieze (Glock lube) on the base and Aimpro blade and used a channel lock to press them together. I could have used a hammer and punch.
I couldn't get my camera to get a proper focus on the front bead, but with both eyes open it's pretty easy to get a proper sight picture. For me at least, the red dot is at least 2x as large as in the pictures, and in the sun it is extremely bright.
I took it out to get sighted in and it was shooting low and left at 30 yards. Raising the rear ghost ring up and moving it right took care of that, but I was worried that I only had a few adjustment screw threads engaged with the ring elevated so high (see first photo of rail above).
I sort of forgot about it until I had a comp this past weekend. I went through 5 boxes of ammo in a period of about four minutes and everything held tight. There was also a lot of moving/jostling/shoving and general banging around of guns throughout the course of the day.
Pros:
-Shooting with both eyes open was a breeze compared to traditional bead
-Compared to the Mossberg factory ghost rings there is a much more open sight picture with the dot instead of a huge orange stripe.
-Picatinny rail is just long enough for an optic without being obnoxious or heavy
-Protected ghost ring is low profile and very sturdy.
-All three of my iron sighted guns now have the same basic front sight picture
-It's gonna be easy to muss up a barrel if you're not aware of what you're doing (I believe Aimpro offers an install service)
-I would still like a slightly longer elevation screw included
-Unprotected front sight fiber is susceptible to dinging
-Rear ghost ring does not have alignment markings like the factory Mossberg sight- they really do help with fast alignment (I may paint or scribe some onto the Aimpro ring)
-The coating on the rail is already starting to flake. I'll be the first to admit that I don't mind an ugly gun (I haven't even painted my barrel yet!), but the Aimpro coating was coming off well before I started to abuse it.
-Aimpro seems like a small company with an awesome product, thus ordering "off menu" required a bit of persistence- but they were always friendly and the results were worth it.
Overall it was a fun little project and I highly recommend doing it if you have a decent grasp of brazing/soldering. I would NOT suggest going with JB weld or other adhesives as they are just not as strong and the risk of having a ruined day from dumping a front sight ramp isn't worth the cost/convenience.
Anyway, that's my first post.
Let me know if you have any questions.