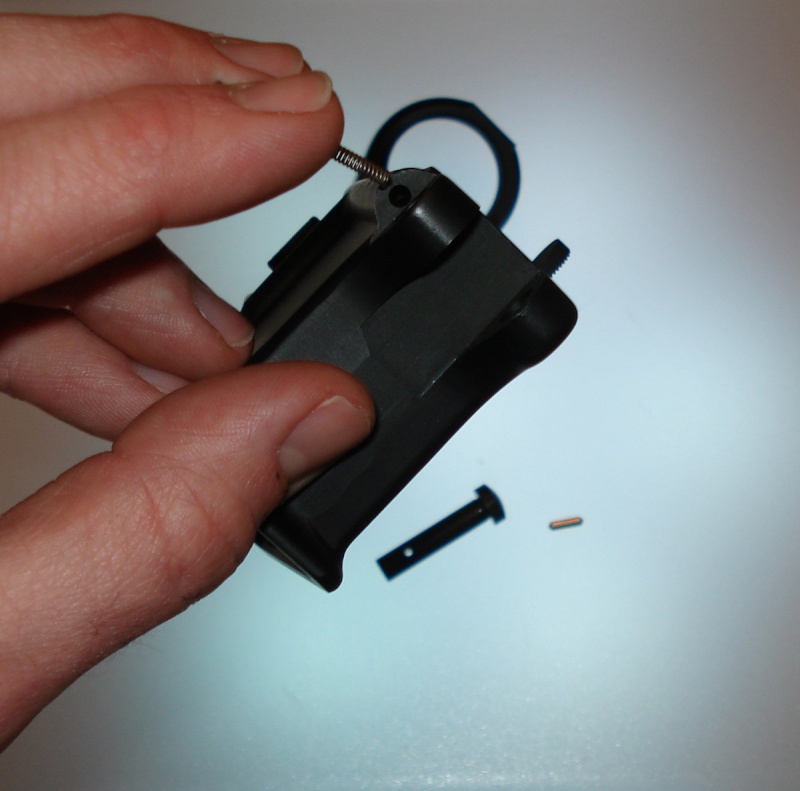
• Mossberg Owners is in the process of upgrading the software. Please bear with us while we transition to the new look and new upgraded software.

New AR Project...

LAZY EYED SNIPER

Overwatch
Global Moderator
Supporter
"Philanthropist"


- Machined from a 7075 T6 Mil-Spec Forging.

- Mil-Spec Type III Hardcoat Anodized finish.

- Low Shelf for use with RDIAS

- Bullet Pictogram markings in the Safe/Semi/Auto positions (auto position is NOT functional)


I'm starting a new build off with this multi-cal stripped lower from Spikes Tactical. Lower parts kit and buffer tube assembly are on the way. Looking at uppers, but still haven't made up my mind which direction I'm going.

I'll be posting updates to this thread as I go, so anyone that's ever been interested in building an AR stay tuned...
 
Re: My New AR...

Yeah I can se the AR in there! I will be paying attaion, I have considered building one!
 
Re: My New AR...

I look forward to seeing the progress on this build.
 
Re: My New AR...

While I'm waitn on my lower parts to arrive, I took the opportunity to color treat the ST logo and bullet pictograms...


Re: My New AR...

How do you do the color? I'm wanting to do something similar to my 590A1.
 
Re: My New AR...

I have done similar modifications to my pistols with crayons. Not sure if that's what he did though.
 
Re: My New AR...

Yessir,

You can use China Markers (wax pencils) or good old fashioned crayons. I used the latter.

The trick is to heat up the receiver or whatever part of the gun to which you're applying color to the point where the wax melts on contact with the metal. I use a small butane lighter for the best results. The wax will easily melt into the recess. Let it cool completely and carefully scrape off the excess with a plastic credit card, rewards card, etc. Any residue can be cleaned off with gunblast or any non-abrasive gun cleaner.

I treated my Bushmaster receiver and the slide on my XD40sc the same way. It holds nicely and haven't had any issues with melting during my range trips.

The whole process takes only a few minutes.
 
Re: My New AR...

Crayons you say... I wonder if my kids have any tan crayons to match the skull.

Thanks!
 
Re: My New AR...

Haha, I'll bet they do.

If not, let me know. I've got a few extra... :D


My lower parts kit should arrive tomorrow, so I hope to have some progress updates on the build over the weekend...
 
Re: My New AR...

I'm intrigued with this process. I'm gonna have to try it now sooner rather than later! Thanks for the tips!

I'll be watchin for the LPK to be installed!
 
Re: My New AR...

Another tip for color treating,

If you apply too much wax in a thick layer over the treated area and allow it to cool and harden it can pull the wax out of the desired areas when you scrape it off. Less is more! I find it advatageous to wipe the excess wax off with my thumb before it solidifies. Timing is crucial, as doing this too soon can leave you with one helluva burn. The wax does cool down and harden surprisingly fast though.
 
Re: My New AR...

Thank you Sir, and you're welcome.


The nice thing about using wax vs. paint is that if you change your mind on the color, you can melt it out and re-treat with a new one in a matter of minutes.
 
Re: My New AR...

LPK showed up today and is now installed. I took step-by-step photos as I went along which I'll post up. Please note that I am not a gunsmith by any means and I'm mearly posting up MY process.


Instructions in following posts will be borrowed from the Lower Assembly Guide from AR-15.com, http://www.ar15.com/content/guides/assembly/lower/.


Spikes Tactical Enhanced LPK includes:

-Spike's Billet Trigger guard w/Set screw

-KNS Gen II Mod II Anti-Rotation pins

-Spider Logo'd Ergo grip (Choose from Black, FDE, or OD Green)

-ST Battle trigger with Nickel Boron Coated Mil-Spec Single Stage Trigger, Disconnect, and Rounded hammer

-Ambi Safety Selector

-Mil-Spec bolt catch, mag catch, and mag catch button

-Mil-Spec detents, plungers, pins, and springs

-Quality Spiral roll pins for trigger guard and bolt catch

-1/4 Allen screw with washer for grip
 
Re: My New AR...

MAGAZINE CATCH ASSEMBLY

PARTS: magazine catch, magazine catch spring, magazine button
TOOLS: 5/32" roll pin punch

•Install magazine catch into recess on left of receiver.

•Install spring onto threaded portion of magazine catch from the right side of receiver.

•Screw button onto threaded portion of magazine catch 3 or 4 turns.

•Use a punch (larger than hole in magazine button) or wooden dowel to push in the magazine button so you can turn the magazine catch clockwise until the end of the catch is flush with the magazine button head. You can hold the receiver and press the punch against the table to do this, but put something between the punch and the magazine catch button to prevent marking it. Do this step first, as it will prevent the bolt catch from getting in the way as you turn the magazine catch into place.

CAUTION: IT IS POSSIBLE TO SCRATCH THE RECEIVER ON THIS STEP!

Take special care when turning the magazine catch to avoid rubbing against the hump around the bolt catch.

FUNCTION CHECK

•Check that depressing the magazine release button will push the magazine catch out of the magazine well in the lower receiver.

•Spring will return magazine catch to engage in magazine well.


Re: My New AR...

TRIGGER GUARD ASSEMBLY


PARTS: trigger guard assembly, roll pin
TOOLS: 1/8" roll pin punch, hammer


•Attach front of trigger guard assembly to the receiver using the detent.

•Lay receiver on a block of wood, and drive roll pin into receiver and rear of trigger guard using drive pin punch.

•Make sure that the small block of wood is supporting the bottom flange and that the trigger guard is in position supporting the top flange otherwise you risk bending or breaking off one of the flanges.

•Also watch as you put in the roll pin that it is going through the hole in the trigger guard correctly.


FUNCTION CHECK

•Check that by depressing the detent on trigger guard you are able to pivot the trigger guard open.


Re: My New AR...

BOLT CATCH ASSEMBLY


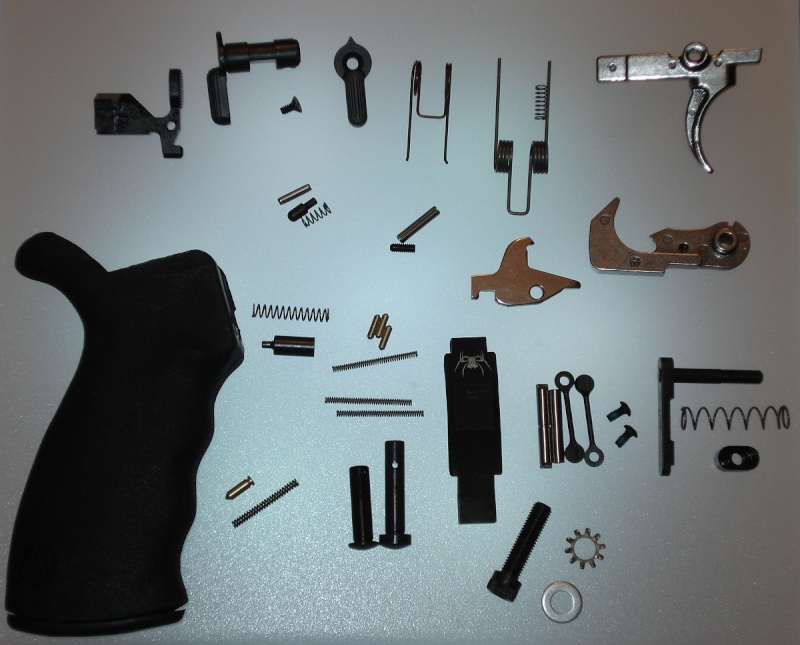
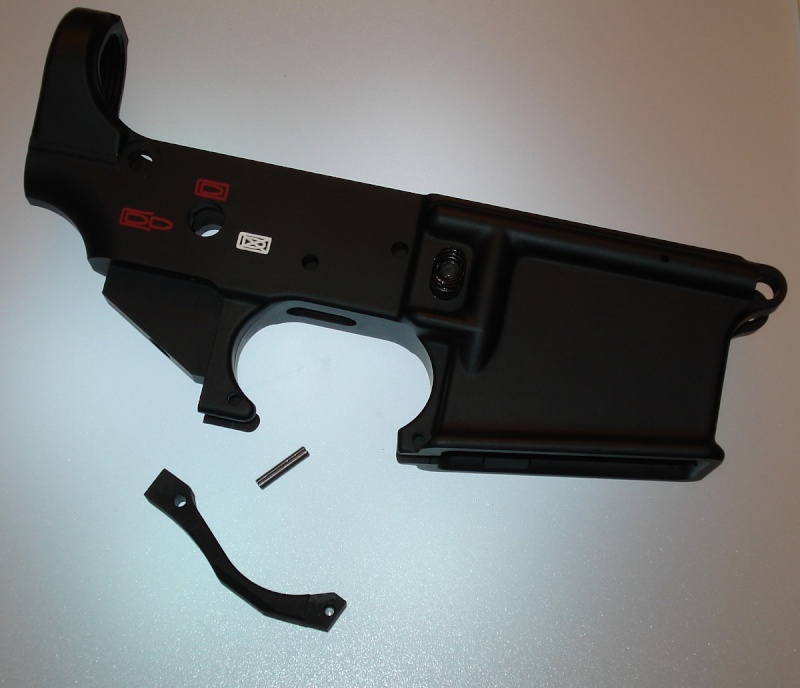
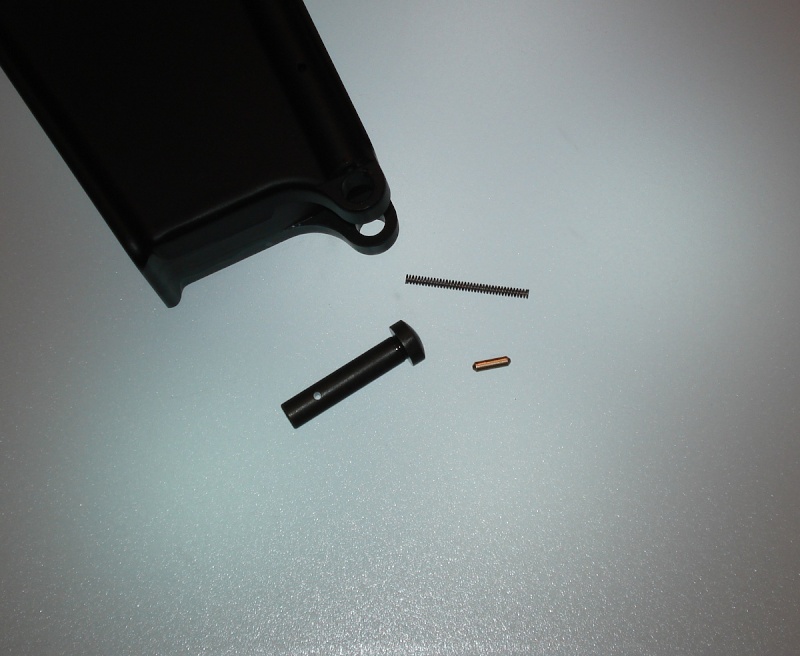
PARTS: bolt catch, bolt catch buffer, bolt catch spring, roll pin
TOOLS: 3/32" roll pin punch, 5/32" (or larger) punch

CAUTION: IT IS VERY EASY TO SCRATCH THE RECEIVER ON THIS STEP!

Take special care to make sure pin in in place before driving it, and ensure that it is held securely in place when striking the punch. Fiberglass packing tape - 2 layers thick - taped over the receiver just between the receiver and the punch can help avoid scratching.


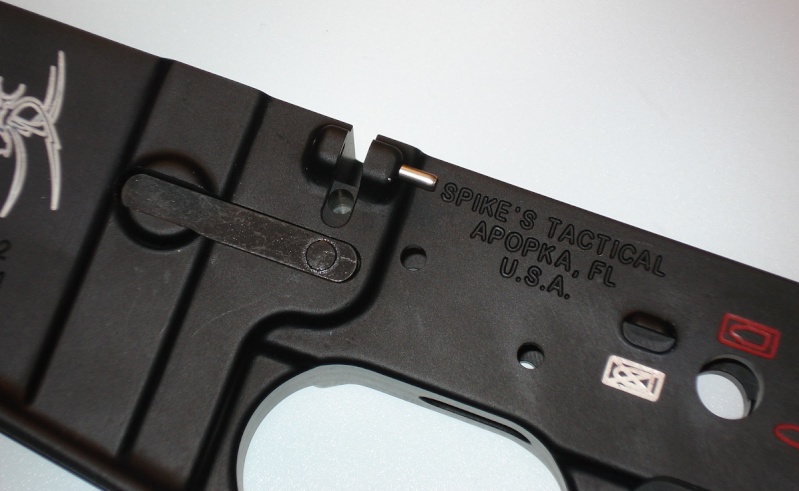
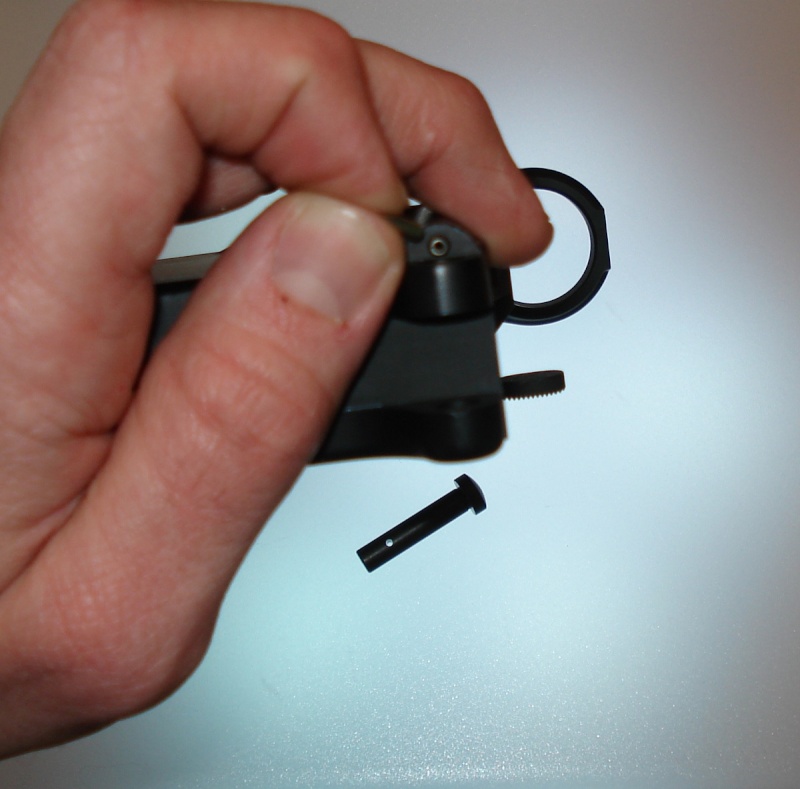
•When installing the bolt catch, first drive the roll pin about halfway into the rear hump from the rear of the receiver using roll pin holder. It can be very difficult to get this pin started; you might want to try squeezing the roll pin on one end with pliers or the vise before starting. If you don't have a roll pin holder, then try holding it in place with a pair of needle nose pliers while you drive using a 5/32" punch.

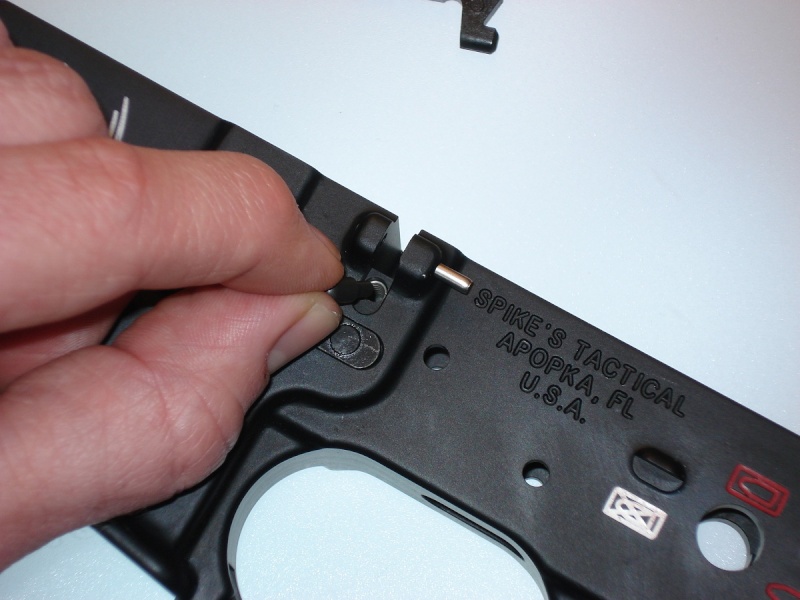
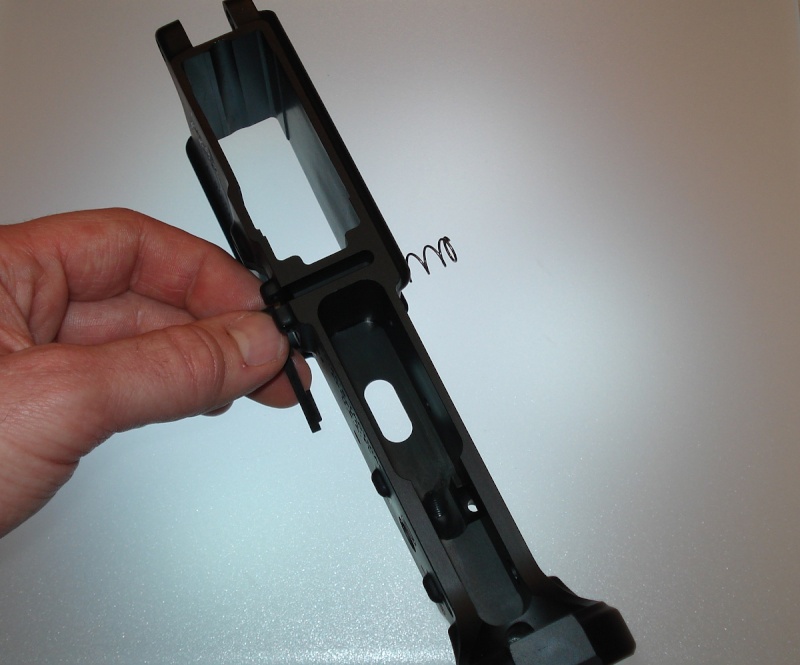
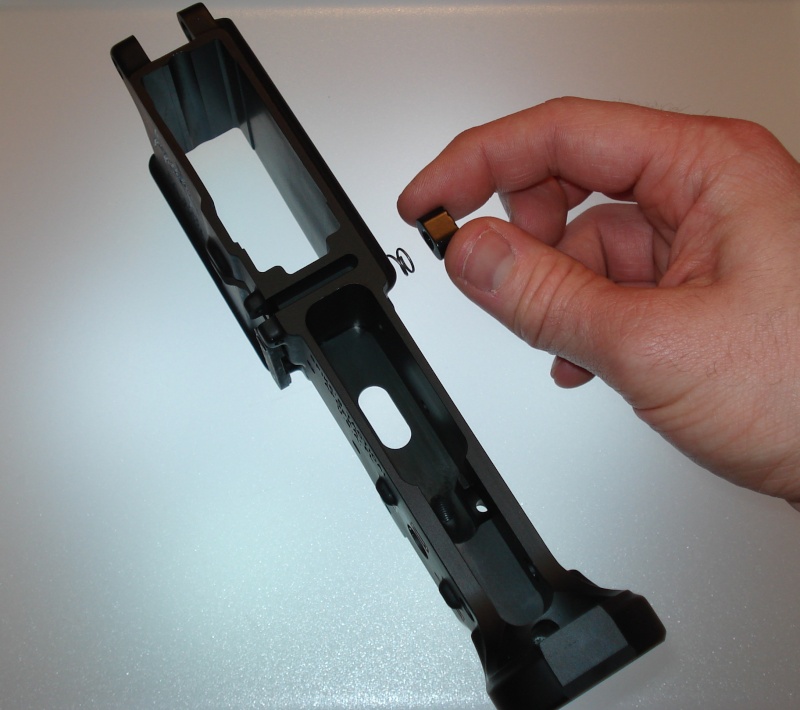
•Install spring in hole on left side of receiver.

•Install bolt catch plunger on top of spring with round portion on top and small end into receiver. Make sure it moves freely in its hole.

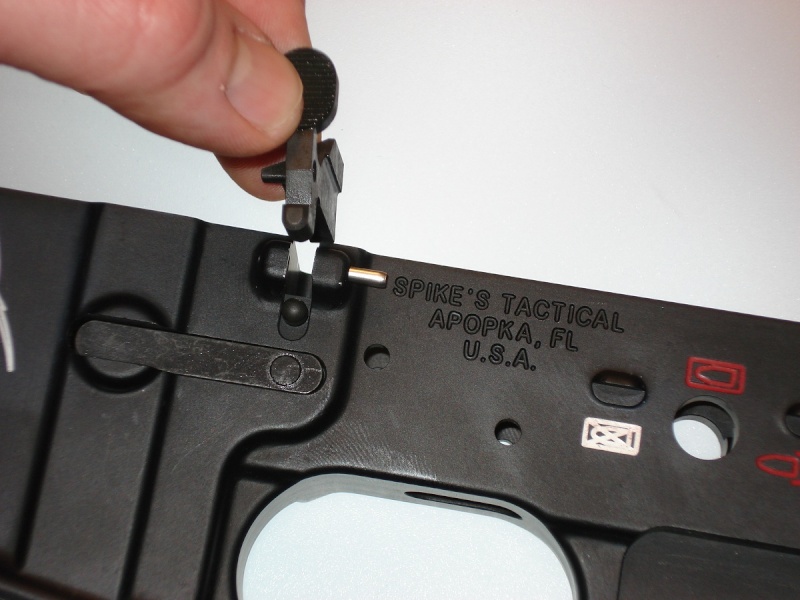
•Install bolt catch in receiver; it only fits on one way.

•Use a 3/32" punch to hold the assembly by placing it through the front hump.

•The pin can be driven the rest of the way from the rear as the punch will be pushed out and while holding the bolt catch in correct alignment. (function check as you do it to make sure it's going in correctly)

•Avoid marring/scratching lower by covering receiver with tape, cloth, or other material while you do this.
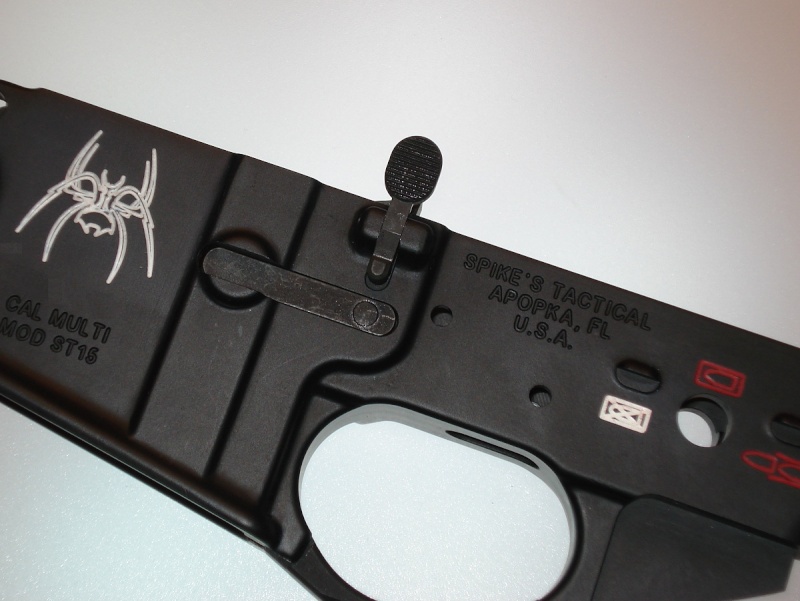

FUNCTION CHECK

•Verify that the bolt catch functions smoothly and is under tension from the spring.


Re: My New AR...

PIVOT PIN ASSEMBLY

PARTS: pivot pin, pivot pin detent, pivot pin detent spring
TOOLS: pivot pin installation tool, 3/32" drive pin punch

•This is perhaps the hardest part of the lower assembly, so if available, install the installation tool.

•Insert spring and detent into receiver.

•Compress detent in recess using 3/32" punch and rotate tool.

•Push out tool with pivot pin and rotate until detent is in groove of pivot pin.


FUNCTION CHECK

•Verify that the pivot pin detent prevents the pivot pin from coming off the receiver.

Note: If you do not have an installation tool, it can be difficult to get the pivot pin inserted without losing the detent and/or detent spring; if these parts do fly out, they can be very hard to find. The idea is to insert the spring and detent, and then compress them as you insert the pivot pin. A pair of needle-nose pliers can be helpful. It is difficult to remove the pivot pin once installed, so make sure you do it right the first time and make sure you've cleaned out the detent/spring hole with a drill bit before inserting the spring.


By the way, I launched the spring and detent across the room twice during this step. Fortunately I was able to find them...
 
Back
Top