You are using an out of date browser. It may not display this or other websites correctly.
You should upgrade or use an alternative browser.
You should upgrade or use an alternative browser.
Good morning
- Thread starter meanstreak
- Start date
Bobster
.30-06
It is Biketoberfest here in the Daytona area...I will take my last motorcycle ride for the season this weekend.
It looks like it’s getting windy here and I need to go do some shopping. I don’t think I’ll be welding outdoors unless it calms down.
I saw this on the local news and made me think for a minute.
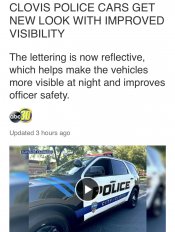
These police cars are purposely painted like this to make them less obvious in traffic. They don’t want to be seen unless the lights are going.
If they were interested in visibility they would be painted neon yellow. It appears they’re more interested in being cagy.
The only thing this has to do with officer safety is the new paint job will be less obvious from a distance than the old one.
Only when parked sideways across the road would this be extremely visible in traffic without the lights on.
I saw this on the local news and made me think for a minute.

These police cars are purposely painted like this to make them less obvious in traffic. They don’t want to be seen unless the lights are going.
If they were interested in visibility they would be painted neon yellow. It appears they’re more interested in being cagy.
The only thing this has to do with officer safety is the new paint job will be less obvious from a distance than the old one.
Only when parked sideways across the road would this be extremely visible in traffic without the lights on.
Bobster
.30-06
A local PD has a black Dodge Charger unmarked with that type of writing on it. The writing is very faint gold during the day and reflects at night.Only when parked sideways across the road would this be extremely visible in traffic without the lights on.
@Bobster, Biketoberfest would be a fun time for sure, if I were a bit younger, lol.
Good morning to all of yous. Cloudy and 68 this morning. The next few days will be relatively warm then we are in for a chilly spell. To start next week it looks like lows in the mid to upper 20s and highs in the upper 40s to low 50s. For this area that is chilly this time of year.
I hope you all are enjoying fall. Have a great day and stay safe.
Good morning Mossberg Owners. The weather has cooled off a little bit and I have put all the insulation back on the outdoor aquariums.
I have been doing lots of water changes on the aquariums & plenty of irrigation as a result.
I tried to upgrade my version of Ubuntu and immediately had big problems. I discovered it has a bug.
Anyhow, this morning I scrubbed off my OS & reinstalled it from scratch. Took over four hours to get everything running again, but it seems OK.
Good morning Mossberg Owners.
The weather is still cool and breezy, and I am hoping that it calms down today so I can paint my bumper brackets.
I cleaned all the paint from them with three applications of spray on oven cleaner and a good hot water scrub with scotchbrite. It’s definitely not as fast as zip strip professional paint stripper, but it does the job given time.
I could’ve made it go faster by heating up the parts with the torch, but I just got them as hot as I could in the sink with hot water and that made a big difference in the chemical action.
It’s still dark here, but I will go out in a little while and see if they rusted during the night. I expect a little bit of flash rust because it’s humid outdoors. Not like the middle of August lol.
You folks enjoy the cool weather and have a nice day.
Good evening all. It's dark here too, lol. Our temperature at 9:30 am was 72. By 11;00 am it had dropped to 59. I think now it has dropped to about 50. Fall has arrived, lol.
Y'all have a great weekend.
Y'all have a great weekend.
Cloudy and rainy day two. 39 this morning and drizzle. Funny thing, the dog does not care at all.
This week we are leaving this weather for about 2 weeks. We are going to colder weather and probably snow. 10-12 days in the Cedar Rapids Iowa area.
You all have a great day.
This week we are leaving this weather for about 2 weeks. We are going to colder weather and probably snow. 10-12 days in the Cedar Rapids Iowa area.
You all have a great day.
Happy Sunday you guys.
I’ve been spending a lot of time messing around with the tropical fish and irrigating my trees, and getting all my bumper brackets stripped and painted.
Yesterday we went to the American Legion Hall for the annual spaghetti dinner fundraiser. My sister cooks there every year and she was the post commander for a couple years.
I was gonna get back to my welding today but I needed a day off. Mostly I’ve just been lounging.
I did these yesterday afternoon.

I bought the candy, and Judy has been decorating, and we are essentially 100% ready for Halloween.
I’ve been spending a lot of time messing around with the tropical fish and irrigating my trees, and getting all my bumper brackets stripped and painted.
Yesterday we went to the American Legion Hall for the annual spaghetti dinner fundraiser. My sister cooks there every year and she was the post commander for a couple years.
I was gonna get back to my welding today but I needed a day off. Mostly I’ve just been lounging.
I did these yesterday afternoon.

I bought the candy, and Judy has been decorating, and we are essentially 100% ready for Halloween.
Back on the job. I went over all the welds on that patch from the outside, and now I’ve got to go inside the tunnel to finish it up.
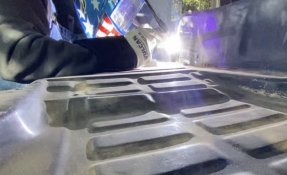
This looks a bit sloppy because it is. I ground out all the old porous MIG welds and blended it all back in with some new metal. I didn’t try to square up the sloppy shape.
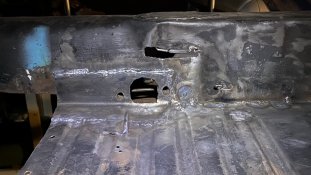
Patching holes in the floor pan.
Big 3/4” holes and slots in 0.030” steel.…
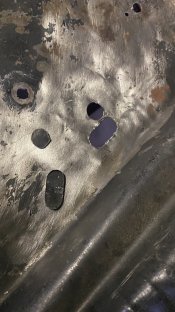
Patches fitted…
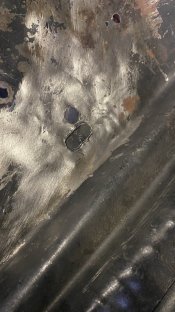
This first one was tough, but it got easier with practice.
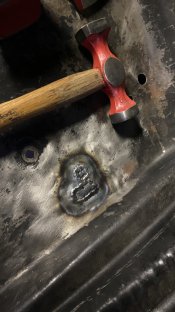
I will go back over these with the acetylene torch and flatten them out with a hammer.
I have welded up about 50 holes so far on the driver side, and I have just barely started on the passenger side.

This looks a bit sloppy because it is. I ground out all the old porous MIG welds and blended it all back in with some new metal. I didn’t try to square up the sloppy shape.

Patching holes in the floor pan.
Big 3/4” holes and slots in 0.030” steel.…

Patches fitted…

This first one was tough, but it got easier with practice.

I will go back over these with the acetylene torch and flatten them out with a hammer.
I have welded up about 50 holes so far on the driver side, and I have just barely started on the passenger side.
Didja ever start on a small project because it was too cold outside and it just snowballs into a life of its own…lol I was just gonna paint the old closet area in the laundry room. Simple. Remove some shelves and the coat hanger stuff. Decide to pop out the old chunk of plywood covering the tub access opening because I haven’t been in there in a decade or so. Hmmm wet and rotten 2x4 at bottom of the wall…rip and tear out some Sheetrock, and some more, and some more.. 54 year old shower valve is weeping..oh well, hasn’t been putting out steady hot water for a shower in 20 years, so, do some online shopping, watch some plumbing videos for sweating copper, switching to Pex or anything else that’s new..went with a new/Pex combo with Sharkbite fittings and Pex pipe. New shower only valve, threaded to Sharkbite 90s and couplings, deep breath…cut, cut, stab,stab, done in less than an hour. No muss, no fuss, no leaks. Was able to fix the hot water to the proper side ( left side ) which wasn’t a problem with the old, unmarked, pull for water flow, valve. Pex made that a simple fix that copper wouldn’t have.. Patched the two jaggedy holes in the fiberglass where the old control knob and tub spout were ( a new backer board and some JB water weld putty to fill the fiberglass shower wall, since I moved the new control handle up to about hotel height, lol ) and got back to the original project..whew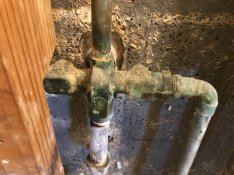
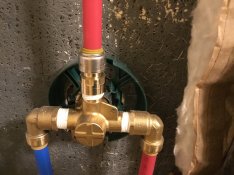
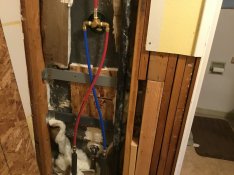


Those things work great, as long as you remember not to drill any holes where you put the plastic. 
Good morning Mossberg Owners.
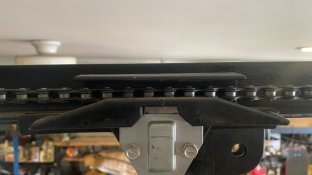
I got up this morning and watered the trees, watered the fish, did laundry, spread 10 bags of topsoil, Went to the Welding Shop for a tank of argon, Got my welder set up, and then the garage door opener broke!
I’ll have to climb up on a ladder and fix it. So that’s gonna put a crimp in my welding schedule. This is my welding schedule:
7 AM….. Look outside and see if the weather is good enough to weld.
8 AM ….. Decide if I feel like welding.
9 AM…… I have breakfast while I decide what I’m going to weld first.
10 AM….. Go do all the chores that I should do before I start welding.
11 AM… Plug in the welder, if I still feel like welding.
12 AM…..Lunch
1PM….. Decide if I want to nap after lunch.
2 PM……Well I think you get the idea
Lol no worries. Have a full wall inspection cover now, instead of the little peeky port..Those things work great, as long as you remember not to drill any holes where you put the plastic.
Good morning Mossberg Owners.
I got up this morning and watered the trees, watered the fish, did laundry, spread 10 bags of topsoil, Went to the Welding Shop for a tank of argon, Got my welder set up, and then the garage door opener broke!
I’ll have to climb up on a ladder and fix it. So that’s gonna put a crimp in my welding schedule. This is my welding schedule:
7 AM….. Look outside and see if the weather is good enough to weld.
8 AM ….. Decide if I feel like welding.
9 AM…… I have breakfast while I decide what I’m going to weld first.
10 AM….. Go do all the chores that I should do before I start welding.
11 AM… Plug in the welder, if I still feel like welding.
12 AM…..Lunch
1PM….. Decide if I want to nap after lunch.
2 PM……Well I think you get the idea
Good morning Mossberg Owners. The weather here continues to be completely lovely, with sunny skies, and mild temperatures, and the lightest of breezes.
All of the floor pan welding is finished on the top but I have to touch it up on the bottom. I only rolled it over halfway because I’m going to work inside the tunnel first.
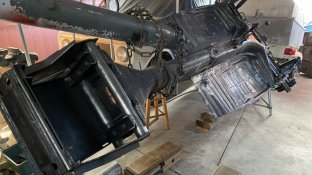
I have to admit that I find this pivot a little scary, hanging all the weight off of one bolt, with plenty of prying action. It’s not that it is that much weight. I can actually lift the whole back of this chassis myself (even with the stand bolted on it.) But that prying action is a killer!
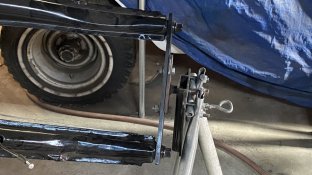
I was careful not to make things so rigid, so that it would want to snap, but this pivot does not constitute a safe work platform. I put some more legs and blocks under it, added a temporary post, and strung it up from the overhead
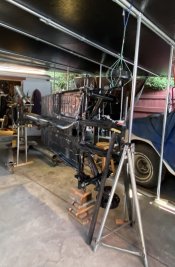
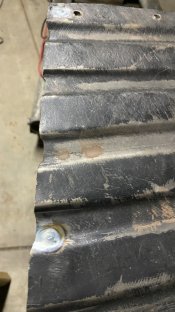
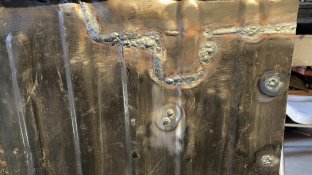
This is my first good look at the bottom of my welding. Yuck. Most of it looks worse & is going to get some touch up.
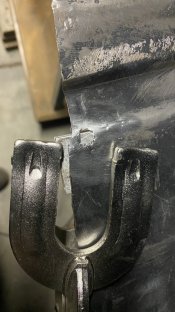
Now I have to get up inside the tunnel a bit, and address this rusty mess.
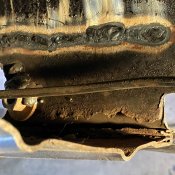
I have to cut back all that rusty metal and put a real patch in there. It should be interesting. I will have to use a stubby torch setup, But I do not have the stubby ceramic nozzles. I will call the welding store but if they don’t have what I want I will probably take a grinding wheel and modify a ceramic cup.
Even with that I may not have enough visibility. I may order out the clear stubby pyrex glass cup and gas lens kit. The thing is that I’ve never used one and I don’t know if it’s just a gimmick or if you can really see through that.
All of the floor pan welding is finished on the top but I have to touch it up on the bottom. I only rolled it over halfway because I’m going to work inside the tunnel first.

I have to admit that I find this pivot a little scary, hanging all the weight off of one bolt, with plenty of prying action. It’s not that it is that much weight. I can actually lift the whole back of this chassis myself (even with the stand bolted on it.) But that prying action is a killer!

I was careful not to make things so rigid, so that it would want to snap, but this pivot does not constitute a safe work platform. I put some more legs and blocks under it, added a temporary post, and strung it up from the overhead

This is my first good look at the bottom of my welding. Yuck. Most of it looks worse & is going to get some touch up.

Now I have to get up inside the tunnel a bit, and address this rusty mess.

I have to cut back all that rusty metal and put a real patch in there. It should be interesting. I will have to use a stubby torch setup, But I do not have the stubby ceramic nozzles. I will call the welding store but if they don’t have what I want I will probably take a grinding wheel and modify a ceramic cup.
Even with that I may not have enough visibility. I may order out the clear stubby pyrex glass cup and gas lens kit. The thing is that I’ve never used one and I don’t know if it’s just a gimmick or if you can really see through that.
Bobster
.30-06
Now I have to get up inside the tunnel a bit, and address this rusty mess.
I have to cut back all that rusty metal and put a real patch in there. It should be interesting. I will have to use a stubby torch setup, But I do not have the stubby ceramic nozzles. I will call the welding store but if they don’t have what I want I will probably take a grinding wheel and modify a ceramic cup.
Even with that I may not have enough visibility. I may order out the clear stubby pyrex glass cup and gas lens kit. The thing is that I’ve never used one and I don’t know if it’s just a gimmick or if you can really see through that.
I avoid TIG-ing in tight dirty areas like this.
I did a search for "#17 torch gas lens" on debay for you HERE. I think I saw a glass lens in a couple places. Be mindful of electrode (tungsten) size of collets of the kits offered. You probably want to use 1/16" on 70-90A. I have a #9 torch (125A) with stubby gas lens I would use for this. But the consumables, cups etc. are in a different torch "family" than 17, 26 and 18WC. So you would need a new torch.
Have you considered stick welding some stitch welds? I'm not sure what area of the tunnel that is or how critical the welds must be. I would probably break out the MIG for that job since I have one but a stick might be able to do the same, no larger than 3/32" rod. Maybe drill a hole from outside, take some "pincer" vise-grips and clamp the pieces together and weld up the hole and other piece together from the outside.


